The simplest way to hide any File or Folder on a Windows computer is by designating that particular File/Folder as being “Hidden” on File Properties screen.
This built-in method of hiding Files and Folders is easy to use and good enough to prevent access to important files and folders on a Windows computer and prevent them from being accidentally deleted.
Another method of hiding Files and Folders on a Windows computer is by making Windows to treat them as being system files, which it automatically hides.
The second method requires the use of Command Prompt to hide/unhide files, which makes it difficult for anyone with average computer skills to snoop on your files.
Hide Files and Folders in Windows 10/11
You can find below the steps to hide Files and Folders on a Windows computer by using File Properties, File Explorer and also by using Command Prompt.
1. Hide File/Folder on Windows computer
As mentioned above, the easiest way to hide any file or folder on a Windows computer is by going to File Properties screen.
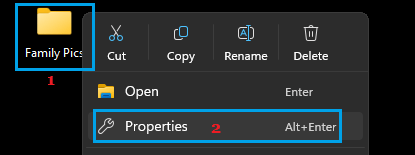
1. Right-click on the File/Folder that you want to hide and click on Properties.
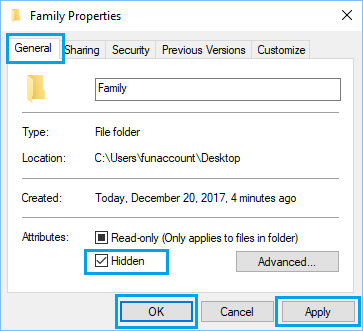
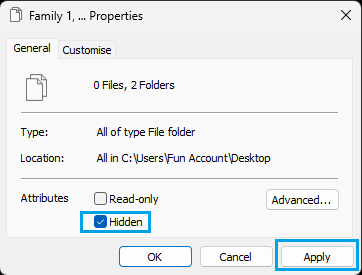
2. On File Properties screen, scroll down to “Attributes” section and select the Hidden box and click on Apply.
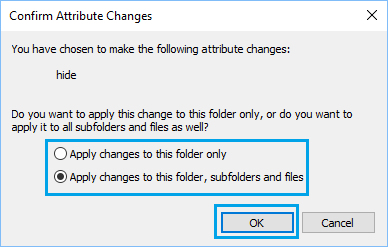
3. On the pop-up, select whether you want to hide the selected Folder only or Apply the changes to Folder, Subfolders and Files.
4. Click on OK to save this change on your computer.
Depending on the selection, the selected Folder or Folder along with all its Subfolders and Files will become hidden.
2. Hide Multiple Files/Folders Using File Explorer
You can hide multiple files and folders on your computer by using File Explorer.
1. Open the File Explorer on your computer.
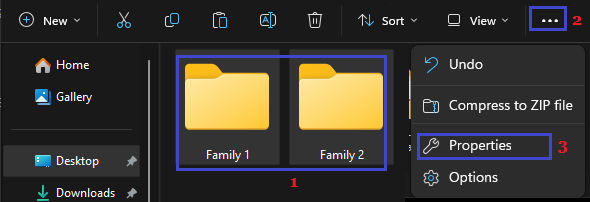
2. On the File Explorer screen, select the Files/Folders that you want to hide, click on 3-dots icon and select Properties in the drop-down menu.
3. On File Properties screen, select the Hidden option and click on Apply.
3. On Confirm Attribute Changes pop-up, you can select the option to Hide selected Folder or Hide selected Folder along with all its Subfolders and files.
4. Click on OK to Save the changes.
3. Hide Files/Folders Using Command Prompt
As mentioned above, you can also hide files and folders on a Windows computer by using Command Prompt.
1. Type CMD in the search box > right-click on Command Prompt in the search results and select Run as administrator option.

2. On the Command Prompt screen, type attrib +h +s followed by The File Path and press the Enter key.
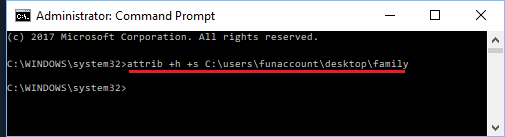
In above case, a particular File named as “Family” is located on the desktop and its File Path can be written as C:\users\funaccount\desktop\family.
The letters “h” and “s” in the attribute command instruct the computer to treat the selected File/Folder as Hidden and as a System File.
3. Once the command is executed, the File/Folder named in the “Attrib” Command will be treated as a System File by the computer and it will become hidden.
At any time, you can Unhide the Hidden File/Folder by typing attrib -s -h C:\Users\funaccount\Desktop\Family and pressing the Enter Key on the keyboard of your computer.
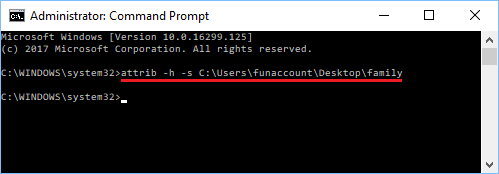
Once the command is executed, you will see the hidden Files/Folders appearing back on your computer.
Important: Make sure that you note down the file path for the hidden files, you will need this to unhide the file.
4. View Hidden Files/Folders in Windows 11/10
When Files and Folders are hidden on a Windows computer, they no longer appear in File Explorer and on the location from which they were originally hidden.
However, Windows also provides the option Show Hidden Files, which can be used to view hidden Files and Folders on your computer.
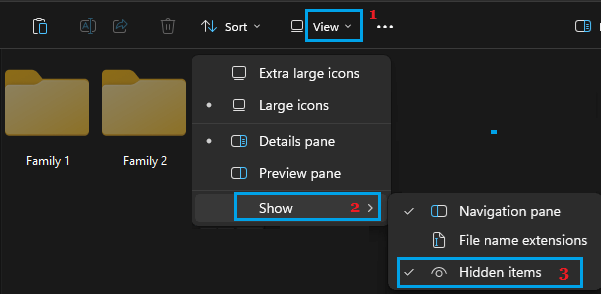
1. Open the File Explorer on your computer.
2. On the File Explorer screen, click on View tab > Show and select Hidden items option.
Windows 10: Click on the View Tab and select Hidden Items box in “Show/Hide” items section.
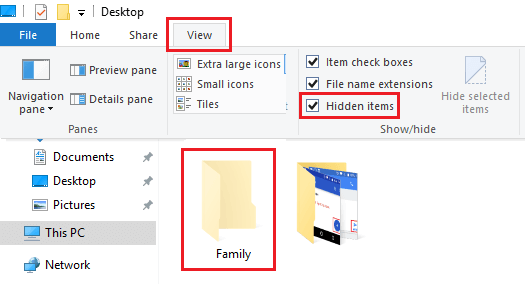
Once you select the Hidden Items option, you will be able to see hidden Files/Folders on the File Explorer screen with partially transparent icons, which allows you to distinguish Hidden Files from regular ones.