Sometimes the Mail Recipient option in Send To menu goes missing or does not work as intended. You will find below some of the ways to fix the problem of Mail Recipient Missing from Send to menu in Windows 10.
Mail Recipient Missing From Send to Menu in Windows 10
The Mail Recipient option in Send to Menu allows you to attach files to Emails by right-clicking on the File and choosing Mail Recipient option in Send to Menu.
The problem of Mail Recipient Missing from Send to Menu in Windows 10 or not working can be fixed using any of the following methods.
- Delete Bluetooth Folder in SendTo Folder
- Copy Mail Recipient Shortcut From Default User Profile.
- Replace Msmapi32.dll file
- Select Default Email Client
1. Delete Bluetooth Folder in SendTo Folder
1. Open the File Explorer on your computer.
2. In the File Explorer screen, click on View and check the option for Hidden Items.

3. Next, navigate to C:\Users\Username\AppData\Roaming\Microsoft\Windows\SendTo Folder and delete Bluetooth Device File.
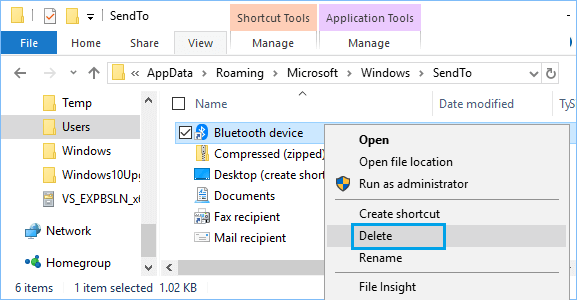
4. Restart your computer and see if Mail Recipient option is now available in Send to Menu.
This method will not work if the Mail Recipient shortcut is missing in your User profile or it has become corrupted. In such a case, you will have to use other methods as provided below.
2. Copy Mail Recipient Shortcut From Default User Profile
In case the Mail Recipient Shortcut is Missing or appears to be corrupted, you can copy Mail Recipient Shortcut from Windows Default User profile and Paste it into your User Profile.
1. Open the File Explorer on your computer.
2. In the File Explorer screen, click on View and check the option for “Hidden Items”.

3. Navigate to C:\Users\Default\AppData\Roaming\Microsoft\Windows\SendTo and copy Mail Recipient file.
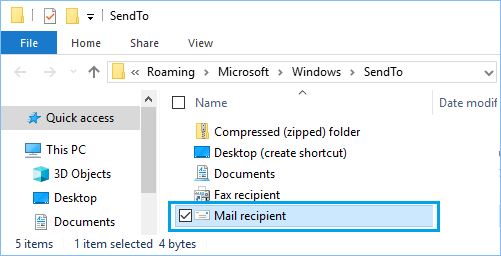
4. Now, navigate to C:\Users\Username\AppData\Roaming\Microsoft\Windows\SendTo and Paste the Mail Recipient shortcut into the SendTo Folder.
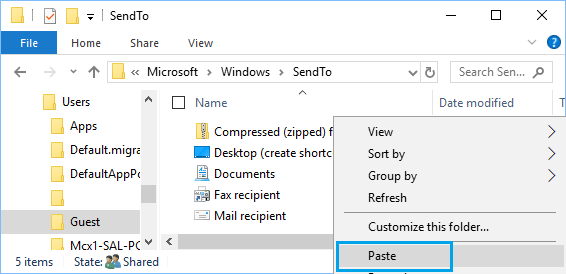
This fix should work immediately, you should be able to right-click on any File and you will find the Compressed ZIP Folder option.
3. Replace Msmapi32.dll File
In case the above fix did not work, it is likely that Msmapi32.dll file is corrupted. Hence, follow the steps below to delete the corrupted file from your User Profile and replace it with a copy from Default User profile.
1. Close Microsoft Outlook program (in case it is open)
2. Open File Explorer on your computer
3. Navigate to C:\Program Files (x86)\Common Files\system\MSMAPI\1033\ and delete Msmapi32.dll file.
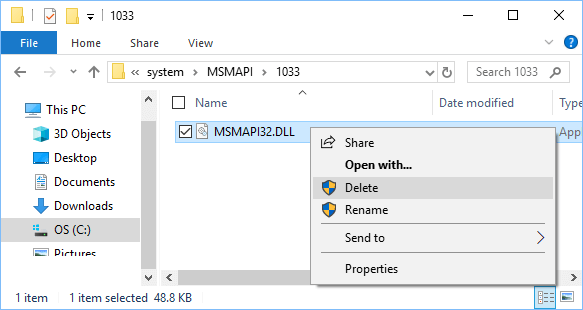
Note: In 64-bit version of Outlook the file should be located at C:\Program Files\Common Files\system\MSMAPI\1033\
4. Now, open Microsoft Outlook program on your computer and it should automatically create a new Msmapi32.dll file.
Now, try the Send To Menu and you should find the Mail Recipient option back in the Send to Menu.
4. Choose App For Email
If the above methods did not help, it is likely that Microsoft Outlook is not set as the default App for Email on your computer.
1. Click on the Start button and then click on Settings icon.
![]()
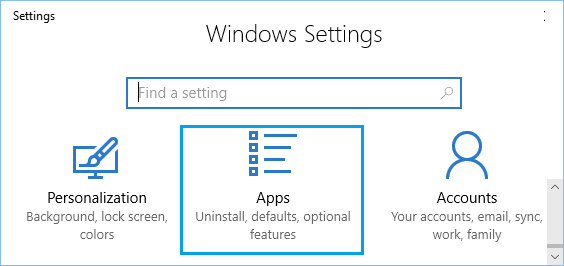
2. In the Settings screen, click on Apps.
3. On the next screen, click on Default Apps in the left pane and set Microsoft Outlook as the default email client in the right pane.
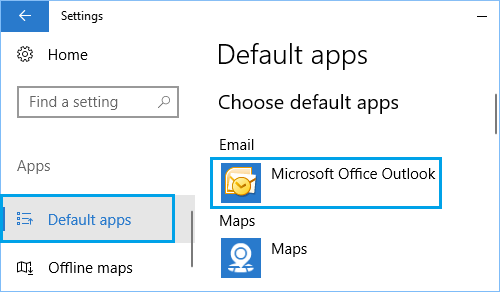
Note: In case you are not using Microsoft Outlook, choose the Email App that you are using.