When you Map Network Drive on a Windows computer, you are basically creating a shortcut pointing to another Drive or Shared Folder located on your network.
The mapped Drive or Folder will appear under This PC in File Explorer, allowing you to quickly access the Shared Folder, just like you would access any other Folder on your Local hard disk.
So let us go ahead and take a look at the steps to quickly map a network drive (shared folder) in Windows 10, and how to disconnect, using the options available in File Explorer.
Map Network Drive in Windows 10
Here is how you can quickly Map Network Drive on a Windows computer and create shortcut to a Shared Folder located on another computer or drive on your network.
1. Map Network Drive in Windows 10
Follow the steps below to map network drive in Windows 10 and create a shortcut to a Shared Folder located on your network.
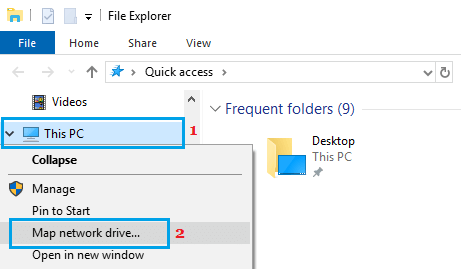
1. Open the File Explorer on your computer.
2. On the File Explorer screen, right-click on This PC and click on Map network drive… option.
3. On the next screen, you can use the default Drive Letter or choose an available letter from the Drive list.
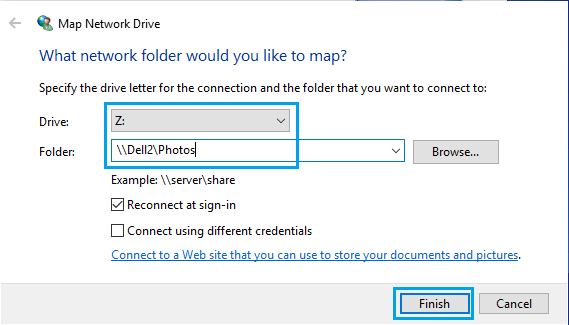
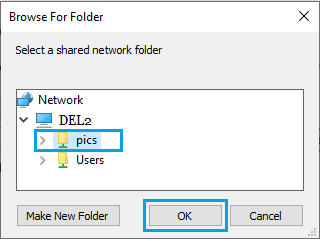
4. In the Folder box, type the Path to the Shared Folder (\\hostname\sharename) or click on the Browse button and navigate to the Folder that you want to map as a network drive and click OK.
Note: The Format for Shared Folder path is \\hostname\sharename, where “hostname” is the Name or IP Address of the Network and “sharename” is the name of the Shared Folder.
You can check Reconnect at sign-in option if you want to be always connected to the Shared Folder.
5. After making required selections, click on the Finish button.
During above steps, you may be prompted to enter Network Credentials. In work related situation, User Name and Password to access the Shared Folder will be provided by your Network Admin.
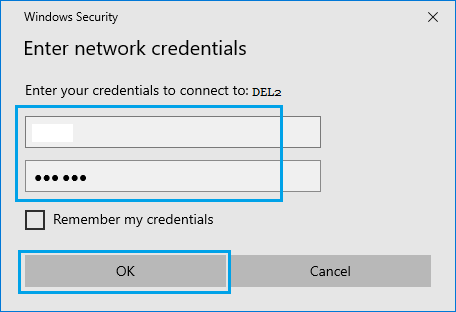
If you are connecting to a Shared Folder located at another computer on your home WiFi Network, enter User Name and Password for the User Account on which the Shared Folder is located.
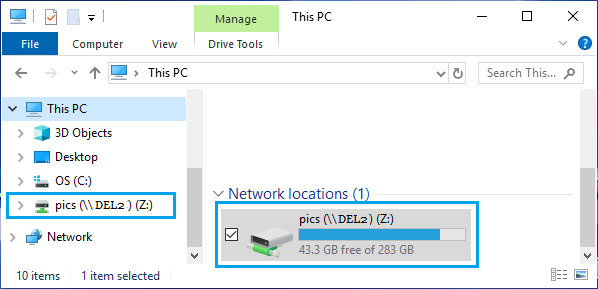
Once the Network Drive is mapped, you will be able to access the Shared Folder at any time from your computer by going to File Explorer > This PC > Shared Folder
2. Disconnect Network Drive
If you no longer need access to the Mapped Network Drive, you can easily disconnect the Network drive.
1. Open the File Explorer on your computer.
2. Click on This PC (left-pane) > right-click on the Shared Folder in the right-pane and click on Disconnect.
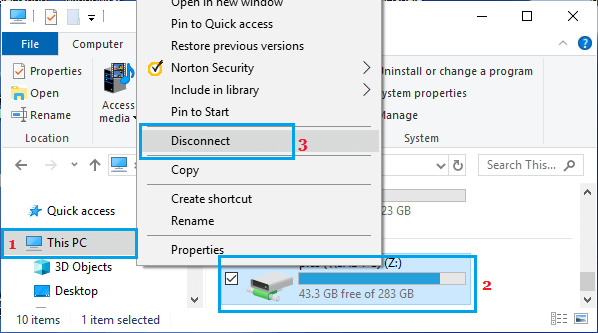
Once you click on Disconnect, the Shared Folder will simply disappear from your computer.