If Microsoft Teams is using a high amount of Memory (RAM) and CPU on your computer, it is just displaying its default tendency to make use of all the available resources on your computer.
The main intention or reason behind default settings in Microsoft Teams is to provide Users with the best possible video experience during Teams calls and meetings.
However, this default behavior can lead to High Memory and CPU usage by Microsoft Teams on budget computers, which are usually equipped with low RAM and CPU capacity.
High Memory and CPU Usage by Microsoft Teams
In general, the most common reason for High RAM & CPU usage in Microsoft Teams is due to Hardware (GPU) acceleration being enabled by default and Teams add-in for Outlook being used on the computer.
While Hardware acceleration can be useful on computer with high RAM and CPU capacity, it can end up causing high resource usage problem on Low End and Budget computers.
With this understanding, let us go ahead and take a look at the steps to reduce RAM & CPU usage by Microsoft Teams on a Windows 11/10 computer.
1. Sign Out from Microsoft Teams
If you are currently not using Microsoft Teams, you can simply Sign Out of the app and it will stop using resources on your computer.
1. Open Microsoft Teams (If you are signed-in, but not using it).
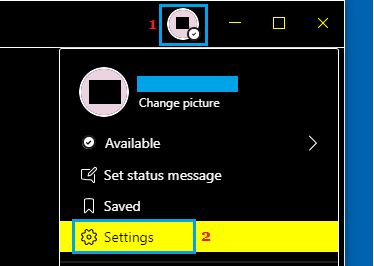
2. Click on your Profile Icon and select the Sign Out option in drop-down menu.

Note: You can also exit Teams by right-clicking on the Teams Icon in Taskbar and clicking on the Sign-out option.
2. Disable GPU Hardware Acceleration
As mentioned above, GPU Hardware acceleration is enabled by default in Microsoft Teams and this can cause high resource usage problem on budget computers.
1. Open Microsoft Teams > click on your Profile Icon and select Settings in the Drop-down menu.
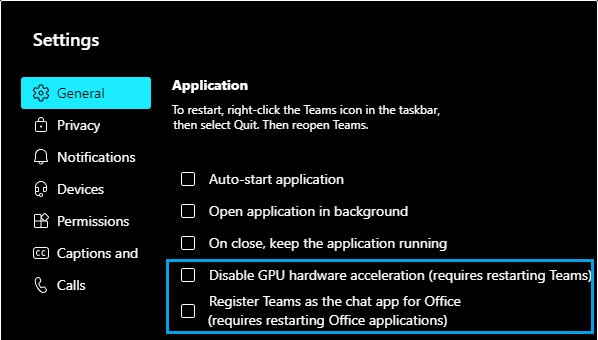
2. On the Settings screen, select the General Tab and uncheck Disable GPU Hardware Acceleration and Register Teams as the Chat App for Office options.
3. Exit Microsoft Teams and relaunch it back on your computer.
3. Turn OFF Read Receipts
Switching OFF Read Receipts can help in reducing the resource usage on your computer.
1. Open Microsoft Teams > click on Profile Icon and select Settings in the drop-down menu.
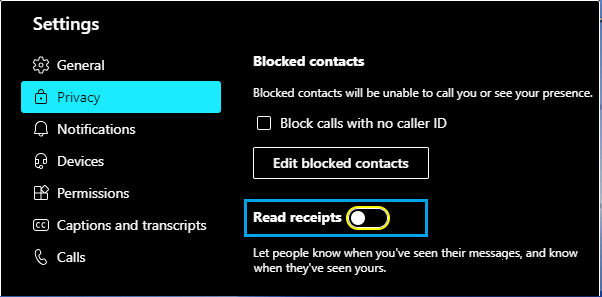
2. On the Settings screen, go to Privacy tab and disable Read Receipts by moving the toggle to OFF position.
3. Exit Teams and relaunch it back on your computer.
4. Disable Microsoft Outlook Add-in
While the Teams Add-in for Outlook can help in scheduling Teams meetings directly from the Outlook App, it is known to cause problems, with both Outlook and the Teams App.
1. Open Microsoft Outlook on your computer.
2. Click on the Gear Icon and select Options in the drop-down menu.
![]()
3. On the Options screen, select the Add-ins tab (left-pane) > uncheck Microsoft Teams Meeting Add-in for Microsoft Office and TeamViewer Meeting Add-in in the right pane.
5. Clear Teams Cache
Over a period of time, the Teams Cache can gets filled up, causing increased memory usage and other problems with the Teams App.
1. Quit Microsoft Teams on your computer.
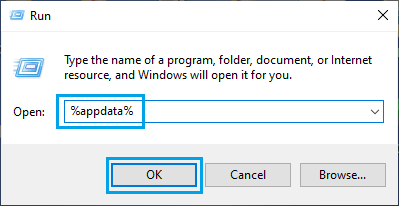
2. Open Run Command (Windows + R key) > type %appdata% and click on OK.
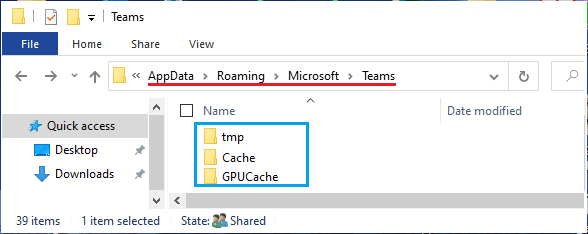
3. From the next screen, navigate to AppData\Roaming\Microsoft\Teams and delete all files in TMP, GPUCache and Cache Folders.
4. Make sure that you Restart the computer to apply this change.