If your Windows computer is running slow, getting stuck or becoming noisy, the problem might be due to High CPU Usage by MsMpEng.exe.
In case you are concerned, MsMPEng is not a virus or malware program, it is a vital part of Microsoft’s built-in security software known as Windows Security or Windows Defender.
The main task of MsMpEng.exe is to Scan Files for Malware, as they are being downloaded to the computer and it also runs regular scans to detect harmful software, spyware, viruses and other types of harmful programs.
High CPU Usage By MsMpEng.exe in Windows 10/11
In general, High CPU Usage by MsMpEng.exe should automatically come down, as soon as Windows Security has finished its scanning activity.
If this is not happening and MsMpEng.exe is frequently consuming high resources on your computer, you should be able to fix the problem using the following steps.
1. Disable Automatic Sample Submission
Disabling “Automatic Sample Submission” in Windows Security should help in reducing CPU Usage by MsMpEng.exe on your computer.
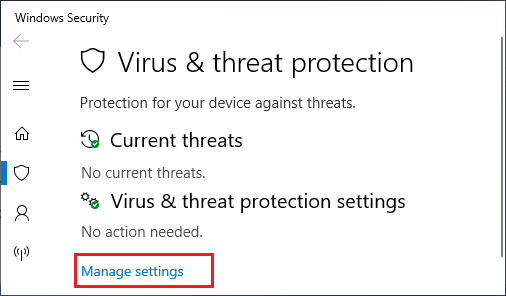
1. Go to Settings > Privacy & security (or Update & Security) > Windows Security > Virus & Threat Protection.

2. On the next screen, scroll down and click on Manage Settings Link located under “Virus & threat protection settings”.
3. On the next screen, scroll down and disable Automatic sample submission.
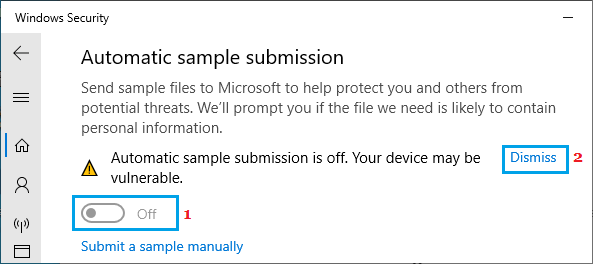
If required, you can always submit files manually to Microsoft by clicking on Submit a sample manually link.
2. Disable Real Time Protection
You should see an immediate improvement in the functioning of your computer after disabling “Real Time Protection” feature in Windows Security.
1. Go to Settings > Privacy & security (or Update & Security) > Windows Security > Virus & Threat Protection.
2. On the next screen, scroll down and click on Manage Settings Link located under “Virus & threat protection settings”.
3. On the next screen, turn OFF Real-Time Protection.
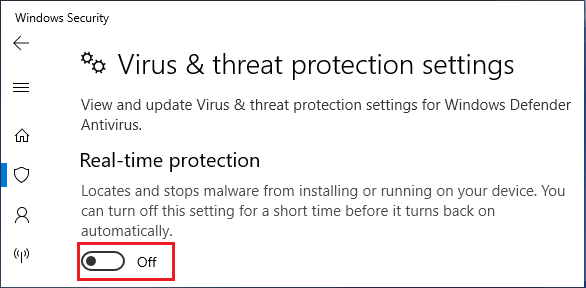
4. Restart your computer and you should now find it running better than before.
3. Prevent Windows Defender from Scanning its Own Directory
Another way to reduce High CPU Usage by MsMpEng.exe is to prevent the program from scanning its own directory.
1. Go to Settings > Privacy & security (or Update & Security) > Windows Security > Virus & Threat Protection.
2. On the next screen, scroll down and click on Manage Settings Link located under “Virus & threat protection settings”.
3. On the next screen, scroll down to “Exclusions” section > click on Add or remove exclusions link.
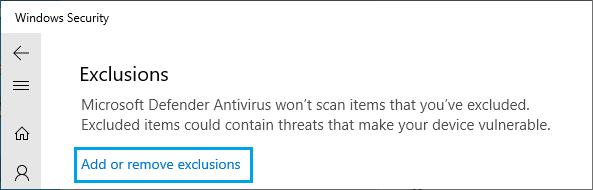
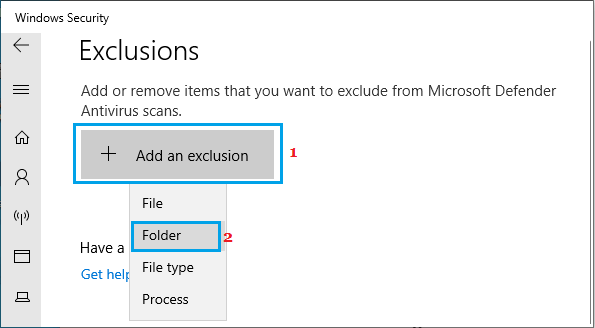
4. On the next screen, click on Add an Exclusion and select the Folder option.
5. On next screen, navigate to C: Program Files > Windows Defender and click on Select Folder button.
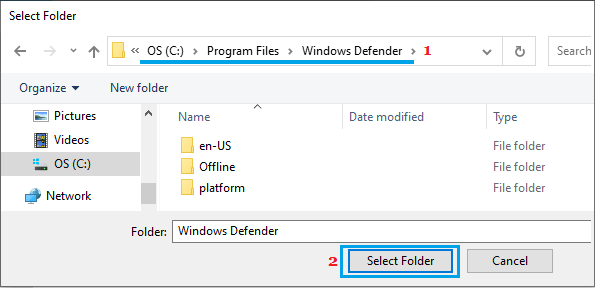
6. Restart your computer and you should be able to see an improvement in its overall functioning.
4. Disable AntiSpyware Function in Windows Defender
If your computer is still suffering from High CPU Usage, you need to think in terms of disabling the AntiSpyware feature in Windows Security.
1. Right-click on the Start button and click on Run.
2. In the Run Command window, type Regedit and click on OK to open Registry Editor.

3. On the Registry Editor screen, navigate to HKEY_LOCAL_MACHINE\SOFTWARE\Policies\Microsoft\Windows Defender and Double-click on DisableAntiSpyware entry in the right-pane.
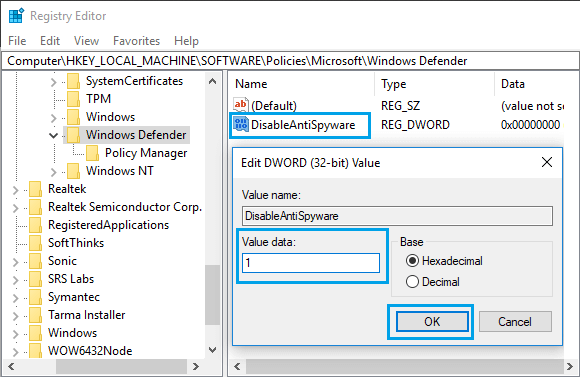
4. On the Edit DWORD pop-up, change Value Data from 0 to 1.
This will disable the AntiSpyware feature in Windows Defender, which prevents it from constantly being active and using up resources on your computer.
Note: If you cannot find DWORD named “DisableAntiSpyware”, you will have to create a New DWORD and name the DWORD as “DisableAntiSpyware” and set its Value Data to 1.