The purpose of pagefile.sys file on a Windows computer is to store data offloaded by RAM and make this data available for use, whenever required by the computer.
Hence, pagefile.sys is also known as swap file and it can end up occupying a large amount of storage space on the computer, depending on the way it is being used.
Is it Safe to Disable & Delete Pagefile.sys?
In theory, deleting pagefile.sys on a computer with sufficient RAM capacity (12 to 16 GB) should not lead to performance issues, as it can be expected to handle most tasks, without the need to store anything in its virtual memory (pagefile.sys).
However, deleting pagefile.sys on a computer with low RAM capacity can lead to the possibility of your device being unable to complete certain tasks and coming up with “Out of Memory” or “Not Enough Memory” error messages.
1. Location of Pagefile.sys in Windows
Unless modified by the user, the default location of pagefile.sys on a Windows computer is at root folder of the Local drive (This PC > (C:)) of the computer.
Being a system file, Windows operating system keeps pagefile.sys hidden, in order to prevent the possibility of this file being accidentally deleted by the users.
You won’t be able to view pagefile.sys and other system files, without enabling the option to “Show Hidden System Files” on your computer.
2. Check Size of Pagefile.sys File
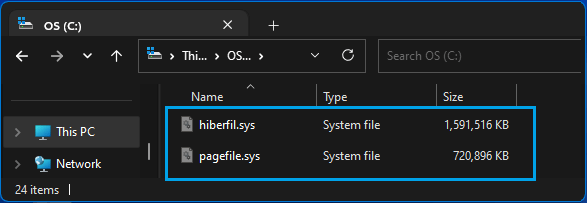
If the option to Show Hidden System Files is enabled on your device, you can check the amount of storage space occupied by pagefile.sys on your computer by using File Explorer.
1. Open the File Explorer on your computer.
2. On the File Explorer screen, click on This PC in the left-pane and double-click on your Local Drive (C:) in the right pane.
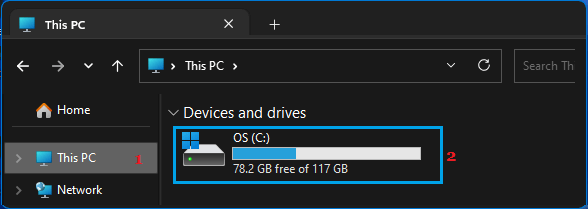
3. After this, scroll down in the right-pane and you will be able to see the amount of storage space occupied by pagefile.sys file on your computer.

3. Steps to Disable & Delete Pagefile.sys
While it is easy to access pagfile.sys on Windows computer, deleting pagefile.sys is not easy as this file is constantly being used by the operating system.
When you try to delete pagefile.sys, you will run into “The action can’t be completed because the file is open in another program” error message, which makes it impossible to delete this file.
Hence, the first step is to disable pagefile.sys, which prevents the computer from using the file, which in-turn makes pagefile.sys available for deletion.
Hence, the first step is to disable pagefile.sys, which prevents the computer from using the file, which in-turn makes pagefile.sys available for deletion.
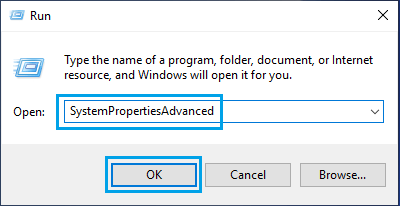
1. Right-click on Start button and click on Run.
2. In the Run Command window, type SystemPropertiesAdvanced and click on OK.
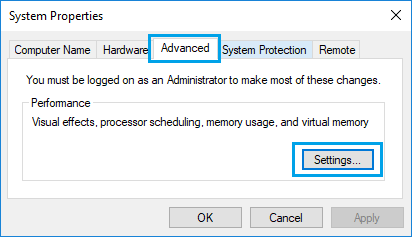
3. On System Properties screen, switch to Advanced tab and click on Settings button, located under “Performance” section.
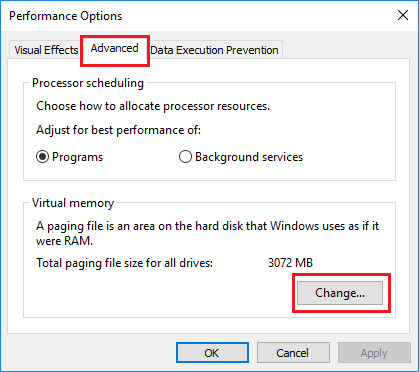
4. On Performance Options screen, switch to Advanced tab and click on the Change button, located under Virtual Memory section.
5. On Virtual Memory screen, uncheck Automatically manage option, select your Hard Drive, select No Paging File option and click on the Set button.
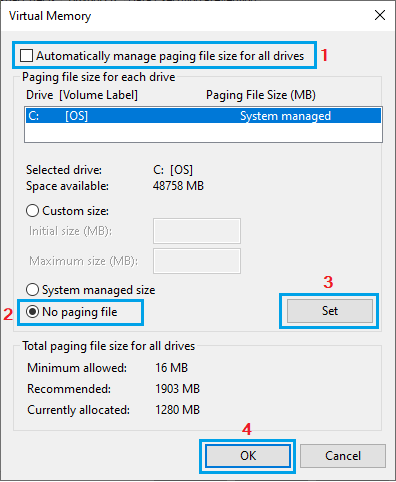
6. On the pop-up, click on OK to restart the computer.
After the computer restarts, you should be able to delete pagefile.sys file by going to its default location on a Windows computer – This PC > Local Drive (C:).
Note: You won’t be able to see pagefile.sys, if the the option to “View Hidden System Files” is not enabled on your computer.
4. How to Resize Pagefile.sys
If your computer has low RAM capacity, you can allocate additional virtual memory by increasing the size of pagefile.sys file.
1. Open Run Command (press Windows + R keys).
2. Type SystemPropertiesAdvanced and click on OK.
3. On System Properties screen, make sure you are on Advanced tab and click on the Settings button, located under “Performance” section.
4. On the next screen, go to Advanced tab and click on the Change button, located under “Virtual memory” section.
5. On “Virtual Memory” screen, de-select Automatically manage paging file size option, select your Hard Drive, select Custom size option, type Initial Size and Maximum Size values and click on the Set button.
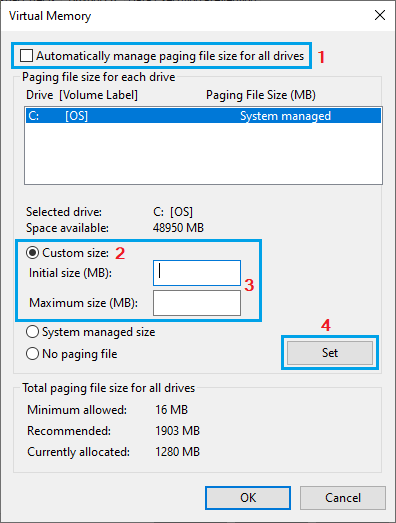
Note: Set Initial Size to 1.5 times RAM and Maximum Size to 3 times the available RAM on your computer.
6. Make sure you click on OK and Restart the computer to apply this change.
This provides Windows with additional space on the Hard Disk (virtual RAM), to store data required for proper functioning of apps and programs running on the computer.
5. How to Restore Pagefile.sys?
If you are experiencing problems after deleting pagefile.sys, you can restore pagefile.sys on your computer by using the following steps.
1. Open Run Command > type SystemPropertiesAdvanced and click on OK.
2. On System Properties screen, go to Advanced tab and click on Settings button, located under “Performance” section.
3. On Virtual Memory screen, make sure Automatically manage paging file size for all drives checkbox is selected.
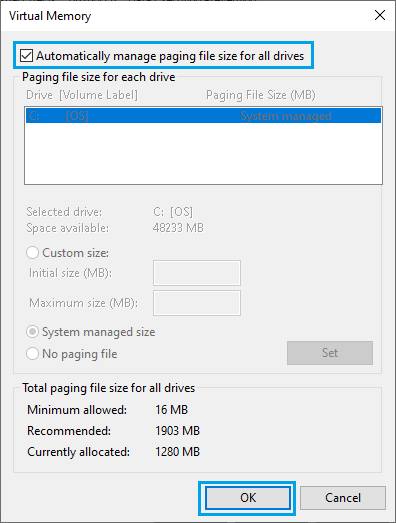
4. Click on OK to close Virtual Memory screen and Restart the computer.
Once the computer restarts, you will see pagefile.sys file along with swapfile.sys file back on your computer.