Facebook has this annoying habit of reactivating accounts even after they are deleted. You will find below the steps to Prevent your Facebook Account from being reactivated.

Prevent Your Facebook Account From Being Reactivated
Even after you go ahead and Permanently delete your Facebook Account, it takes a long time for Facebook to permanently delete your data from its servers.
During this period, your Facebook account can get accidentally reactivated in case your Facebook account is linked to other social media accounts and you login to these accounts.
Hence, you need to take the following steps to prevent your Facebook Account from being reactivated.
- Logout of Facebook on All Devices
- Unlink Social Media Accounts and Apps
1. Logout of Facebook on all Devices
Before going ahead with the steps to Permanently Delete Your Facebook account, you need to make sure that you are logged out of Facebook on all your devices (Laptop, Desktop, Tablet and Phone).
There are good chances of your Facebook account being reactivated, in case you are not logged out of Facebook on any of your devices and happen to accidentally open Facebook on any of these devices.
2. Unlink Other Social Network Accounts & Apps From Facebook
In case you have linked your Facebook account to other social media networks like Twitter, Tumblr, Instagram and others, make sure that you unlink your Facebook account from all your other Social Media Accounts and Apps.
You need to do this because Facebook will automatically reactivate your account, in case you happen to sign-in to any of your other Social Media Accounts that are linked to Facebook within 14 days of deleting your Facebook Account.
Follow the steps below to unlink Facebook from your other Social media Accounts.
1. Using PC or Mac, Login to your Facebook Account.
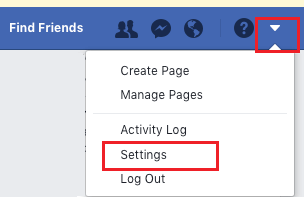
2. Click on the down-arrow menu icon located at the top-right of your screen and then click on Settings.

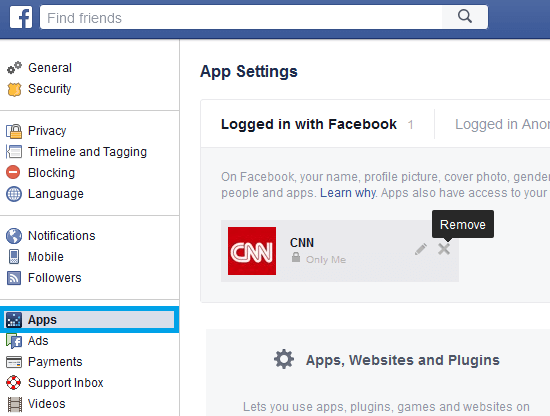
3. On the Settings screen, click on Apps in the side-menu and then click on the x button next to the Apps that you want to unlink.

In the above image you can see CNN App being unlinked from our Facebook account.
Make sure that all Apps linked to your Facebook Account are removed, in order to completely prevent the possibility of your Facebook account being accidentally reactivated.