You may find the need to Factory Reset your Windows computer, if you are selling it, giving it away or if the computer is bothering you with hard to fix problems.
Hence, Windows operating system comes with the built-in “Reset this PC” option, which can be used to restore the computer to its original Factory Default condition.
Factory Reset Windows 11/10 Computer
When you Factory Reset Windows computer, the hard disk of the computer will be totally erased and the latest version of Windows operating system will be installed on the computer.
However, before proceeding with the Factory Reset Process, Windows provides the option to “Keep your Files” and also the option to “Remove Everything” from the computer.
If you select “Remove Everything”, practically everything on the computer will be totally erased. If you select “Keep My Files”, all your personal files will be left-intact, while all the apps, programs and Settings will be removed from the computer.
For example, all your Microsoft Excel Files and Word Documents will be saved on the computer, while Microsoft Office Program will be deleted.
Steps to Factory Reset Windows 11/10 Computer
You can follow the steps below to Factory Reset your Windows 11/10 computer.
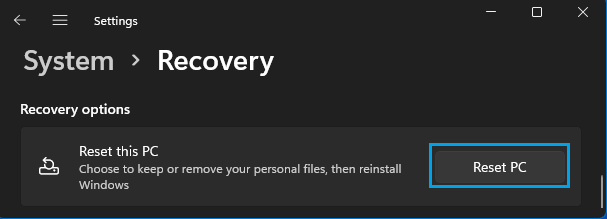
1. Go to Settings > System (left-pane). In the right-pane, scroll down and click on the Recovery tab.

2. Next, scroll down in the right-pane to “Recovery Options” and click on Reset PC button.
Windows 10: Go to Settings > Update & security > Recovery (left-pane) > Get Started button.
3. On the next screen, select Keep My files option, if you want to save your personal files. If not, click on “Remove Everything” option.

If you select Keep My Files, Windows will save all your personal files before starting the process of erasing and formatting the hard Disk.
Once the process is complete, Windows will show you a list of Applications that are going to be removed from the computer and it will also save the List of Removed Applications on the desktop.
If you select Remove Everything, Windows provides the options to “Just Remove My Files” or “Remove Files and Clean the Drive”.
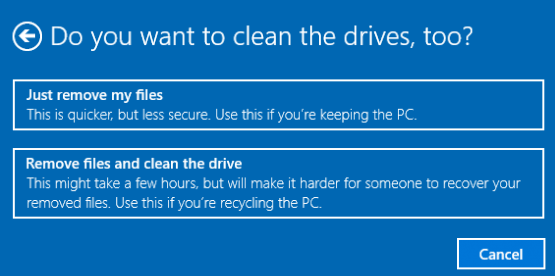
Select Just Remove My Files, if you are going to keep the computer with you. Select Remove Files and Clean the Drive option, if you are planning to sell the computer or give it away.
In both cases, be prepared to see your computer restarting multiple times as Windows goes through the process of Resetting your PC.
4. When the process is completed, you will see the computer starting with Windows setup screen, prompting you to enter your Language, Time, Keyboard Layout.
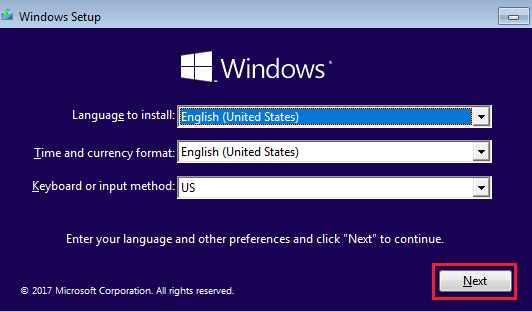
5. Follow the on-screen instructions to complete the setup process.
After completing above steps, your computer should be free of all glitches and problems that you were experiencing.