Apart from taking photos, the camera on your Android Phone can be used to Scan documents in PDF Format. This can be quite handy in situations where you do not have access to a document scanner or you simply do not want to use a scanner, since your Android Phone can also scan documents.
Scan Documents With Android Phone
Used in conjunction with the Google Drive App, your Android Phone is quite capable of doubling up as an impressive document scanner.
Scanning a document with an Android Phone is as simple as taking a snap with the back camera of your phone. Once the document has been scanned, you can crop, rotate, edit and enhance the document, before saving it to Google Drive.
The scanned document will be saved as a PDF file on Google Drive, from where you can Print, Share or Send the Scan to anyone using Gmail, WhatsApp, Skype and other sharing apps as available on your phone.
Steps to Scan Documents With Android Phone
As mentioned above, you will need the Google Drive App in order to turn your Android Phone into a Document Scanner. You should already have this app on your Android Phone, if not make sure that you download and install the Google Drive app from this link.
1. Open the Google Drive App on your Android Phone.
2. Next, tap on the large Plus button located at the bottom right corner of your screen (See image below).
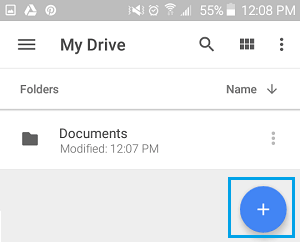
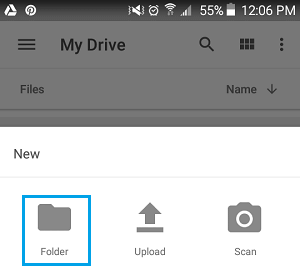
3. On the next screen, tap on the Folder option to create a new folder on Google Drive for storing your scanned Documents.
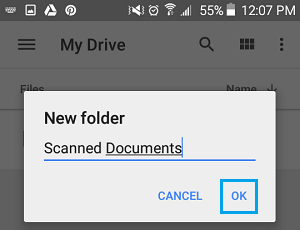
4. Next, you will see a popup asking you to provide a Name for the folder, name the folder as “Scanned Documents” or any other name that best suits your purpose.
5. Next, tap on the Scanned Documents folder that you had just created.
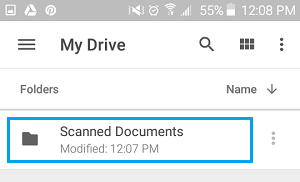
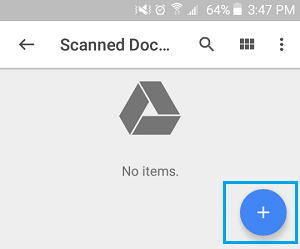
6. Once you are in the Scanned Documents Folder, tap on the large blue Plus button (See image below).
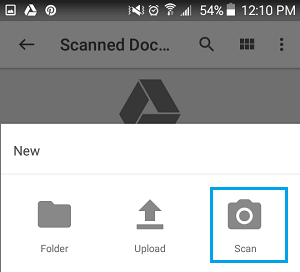
7. On the next screen, tap on the Scan option (this will activate or open the camera of your Android Phone).
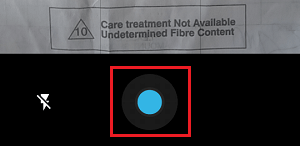
8. Place the document to be scanned on a flat surface (table) and simply take a picture of the document by tapping on the large blue circle located at the bottom of your screen (See image below).
9. Once you take a picture of the document, you will get to see a preview. In case the preview looks OK, you can save the scan as a PDF document by tapping on the Check mark icon (See image below)
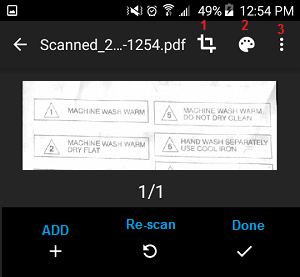
Tapping on the Plus button, located in the bottom menu allows you to scan the next page of the document (See image above).
If you are not satisfied with the scan, you can re-scan the document by tapping on the Redo icon in the bottom menu or you can make use of the Editing and Document Enhancing options from the top menu, as explained below.
1. Crop: Tapping on the crop option (#1 in image above) allows you to crop the picture that you just shot with your camera.
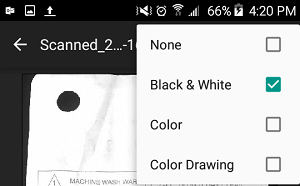
2. Color Palate: Tapping on the Color Palate icon (#2 in image above) allows you to change the default “Black and White” scan to Color. (See image below).
3. 3-dot Menu icon: Tapping on the 3-dots menu icon (#3) allows you to Delete, Rename, Rotate the scanned document and also provides access to other Settings. (See image below)
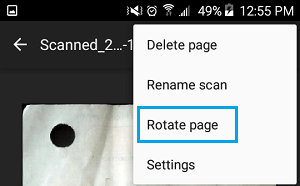
The Settings menu allows you to choose the Paper Size, Image Quality, Orientation of the document and Automatic image enhancement.
Print, Share or Send Scanned Documents
Once you scan the document, it will be stored on Google Drive in Scanned Documents Folder or any other folder that you made the scan to.
The best part of storing Scanned documents on Google Drive is that you will be able to search the document by its name, Print, Share or Send the document to any one at any time.
1. Simply open the Google Drive App on your Android Phone.
2. Once you are in Google Drive, Open the scanned document that you want to print or send to someone.
3. Once the document is open, tap on the 3-dot menu icon, located at the top right corner of your screen.
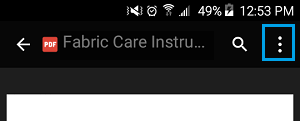
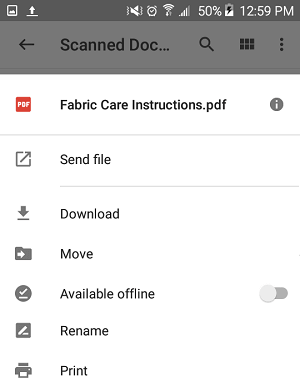
4. On the menu that appears, tap on Print in case you want to print the PDF file or tap on Send File, in case you want to send the scan to anyone. (See image below)
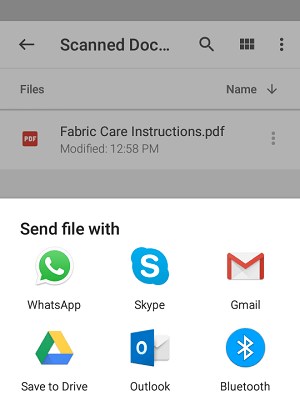
5. Once you tap on send, you will see a slide-up menu, providing you with Gmail, WhatsApp, Outlook and various other options to send the file (See image below).
Tip: Instead of taking pictures of Receipts, Flyers, Notes and others, you can save a ton of Storage space on your Android device by scanning such items and saving them as PDF files on Google Drive.