It is most likely that your computer has personal photos, sensitive and confidential information stored on it. Hence, consider setting up Apple’s ‘Find My’ Service on Mac to help track your device, in case it gets lost, misplaced or stolen.

Set up ‘Find My’ On Mac
Apple’s ‘Find My iPhone’ service is currently known as ‘Find My’ and it can be used to track the location of any Apple Device, including your MacBook.
In addition to pin-pointing the exact location of your lost, misplaced or stolen MacBook, Apple’s ‘Find My’ service can also be used to Lock your MacBook or completely erase of wipe its data from a remote location.
This way you can prevent the possibility of your confidential or personal data from being misused by anyone.
With this understanding, let us go ahead and take a look at the steps to Set up ‘Find My’ service on Mac and use ‘Find My’ to track the location of your lost or stolen MacBook.
Steps to Set Up ‘Find My’ Service on Mac
Follow the steps below to set up ‘Find My’ Service on your MacBook, Mac Mini or iMac.
Click on the Apple Logo in top menu-bar and select System Preferences option in the drop-down menu.
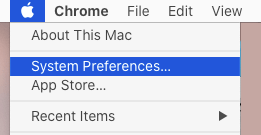
On System Preferences screen, click on iCloud.

If prompted, enter your Apple ID and Password to login to iCloud.
On the next screen, you will be prompted to Set up two-factor authentication. In this case let us click on Not Now and move to the next screen.
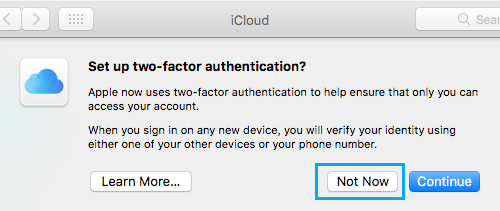
On the next screen, select Do Not Upgrade option, as we are not setting up two-factor authentication at this point.
Once you are in your iCloud Account, select Use Find My Mac option and click on the Next button.
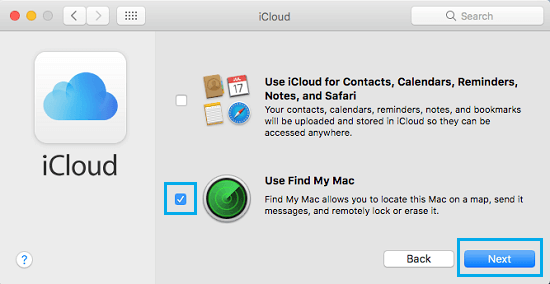
Note: At this point, do not select or check Use iCloud for Contacts, Calendars, Reminder, Notes and Safari, unless you want to.
You will see a pop-up, asking you to “Allow Find My” service to use the Location of this Mac. Click on the Allow button.
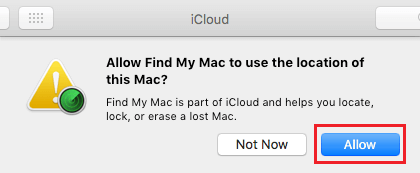
You may see a pop-up, prompting you to enter your Admin User Name and Password (this happens when you are not signed in with your Admin Account).
Next, scroll down to the bottom of the screen and make sure that the option for Find My Mac is enabled.
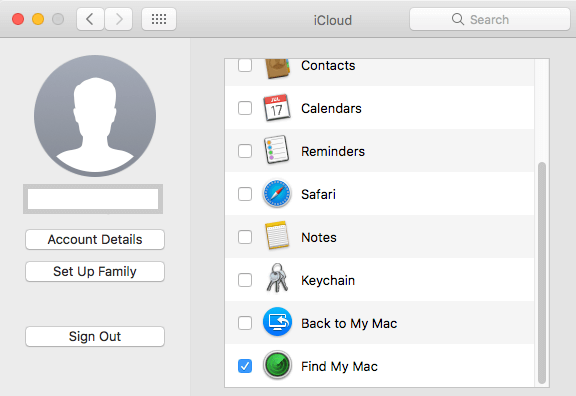
You can now close the iCloud window. However, make sure that you do not click on the Sign out button, as signing out of iCloud Drive will disable Find My Mac service.
How to Track Lost or Stolen MacBook Using ‘Find My Mac’ Service
If you end up losing or misplacing your MacBook, you can login to your iCloud Account using your iPhone, Windows computer or another Mac and track the location of your missing Mac using ‘Find My’ Service.
1. On your iPhone, Android Phone, PC or another Mac visit icloud.com
2. Sign-in to iCloud using your Apple ID and Password associated with the Lost, Misplaced or Stolen Mac.
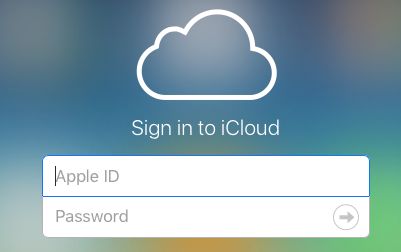
3. Once you are in your iCloud Account, click on Find iPhone option (See image below).
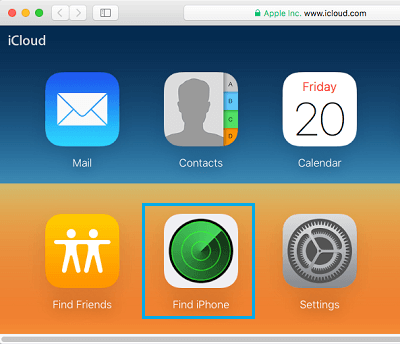
4. If prompted, enter your Apple ID Password, to sign-in to Find iPhone Service.
5. On the next screen, click on All Devices option and select your Device Name.
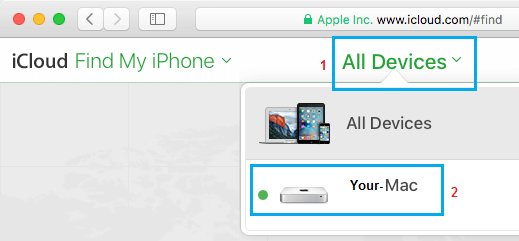
6. On the next screen, you can select Notify me when found option, if Find My Mac service says that it cannot locate your Mac. This can happen if your MacBook is out of range or has been switched OFF (See image below).
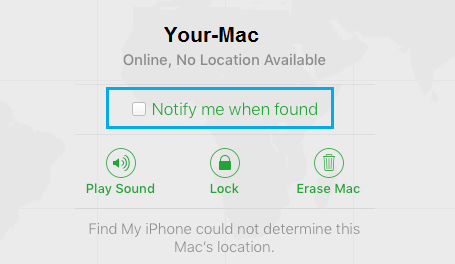
As soon as anyone turns on your MacBook, you will receive a notification on your email address associated with your Apple ID.
7. If your MacBook happens to be online, Apple’s ‘Find My’ service will indicate the Location of your MacBook on a Map and it will also provide you with the following options.
- Play Sound
- Lock
- Erase Mac
Here is an explanation of what each option does:
Play Sound: This option plays an audible tone on your Mac. This option can be used when you are quite sure that you have misplaced your Mac, either within your house or at a friend’s place.
Lock: This option can be used to completely lock your Mac with a passcode. You can also display a custom message on the Lock Screen of your Mac for the finder of your Mac (Your Phone number to get in touch with you).
Erase: Using this mode you can delete all your personal information from your Mac, in order to protect your privacy.