If required, you can Setup Network Priority on your Mac to make sure that it is always connecting to your preferred network type (Wi-Fi or Ethernet) or connecting to your preferred Wi-Fi Network (Home or Office).
Another reason for setting up Network Priority on Mac is to fix Network connectivity issues, which can be caused due to Mac connecting to a Network that is no longer valid or active.
Change or Setup Network Priority on Mac
It is quite normal for users to access the internet on Mac using Wi-Fi Network at Home, while using wired network (Ethernet) at office due to work related guidelines or requirements.
In such cases, it is better to setup Network Priority on your MacBook to make sure that it is always connecting to your preferred Network type first (Wi-Fi or Ethernet).
1. Change Network Priority on Mac to Wi-Fi or Ethernet
Depending on your preference, you can make either Wi-Fi or Ethernet as the preferred network type on your Mac.
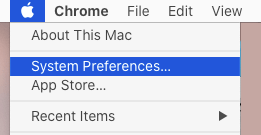
1. Click on Apple Logo in top-menu bar and select System Preferences in the drop-down menu.
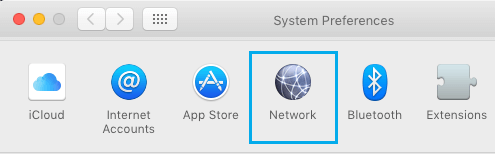
2. On System Preferences screen, click on the Network icon.
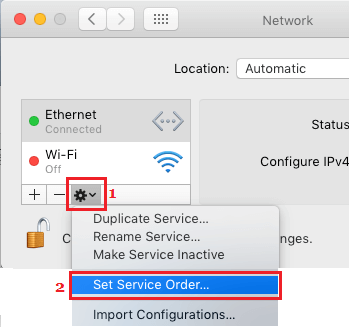
3. On Network Settings screen, click on Gear icon located at bottom of Network services column and select Set Service Order option in the drop-down menu.
4. On Service Order window, drag your preferred Network type (Wi-Fi or Ethernet) to top, followed by your second option.
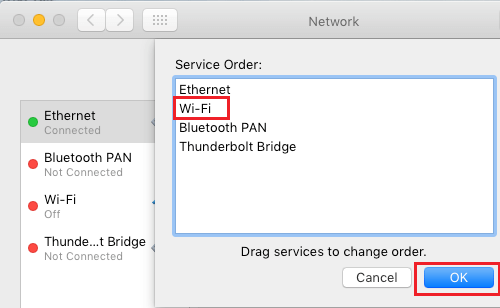
For example, drag Ethernet to top and move Wi-Fi below, if you want your Mac to always connect to Ethernet or Wired Connection.
5. Once you are done reordering Networks, click on OK to save your changes.
After this, you will find your Mac always connecting to your preferred Network type, whenever it wakes up or gets re-started.
2. Setup your Preferred Wi-Fi Network on Mac
If your Mac has access to multiple Wi-Fi Networks, you can reorder the Wi-Fi Networks on your Mac to make sure that it is always connecting to your preferred Wi-Fi Network.
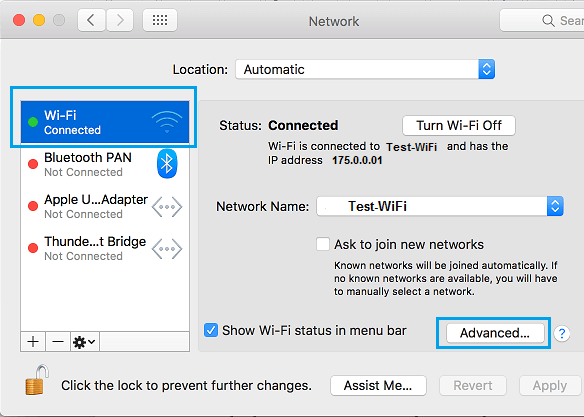
1. Click on Apple Logo > System Preferences > Network.
2. On the Network screen, select WiFi in the left-pane. In the right-pane, scroll down a bit and click on the Advanced button.
3. On the next screen, drag your Preferred WiFi Network to the top in Preferred Networks window.
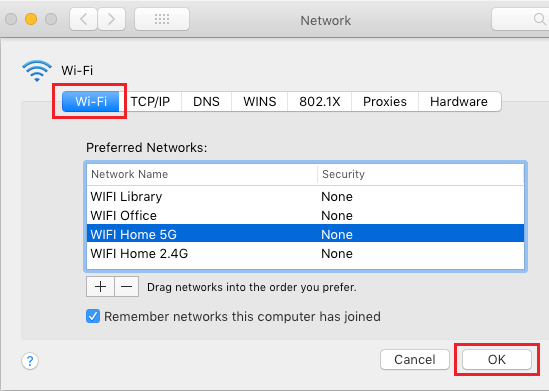
4. Click on OK to save your Preferred Wi-Fi Network Settings.