If your computer is coming up with Status Access Violation error, you can find below the steps to fix Status Access Violation Error in Google Chrome browser.
Status_Access_Violation Chrome
In general, Status_Access_Violation error occurs due to an unspecified program or process trying to access the memory on computer without proper authority.
This can happen due to a glitch or bug in the web browser, incompatible browser extensions or plugins, browser settings getting corrupted and other reasons.
In many cases, restarting the browser should help in fixing the problem. If the computer still comes up with Status Access Violation error, you should be able to fix the problem using other methods as provided below.
1. Clear Browser Cache & Cookies
Start by clearing the Browser Cache and Cookies to rule out the possibility of the problem being caused by a cached error page.
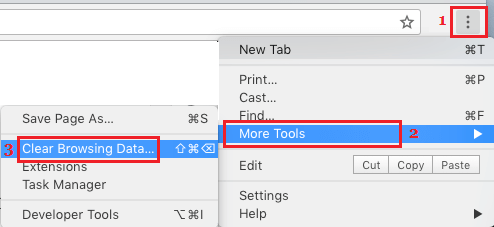
1. Open Chrome Browser > click on 3-dots Menu icon > More Tools > Clear Browsing Data.
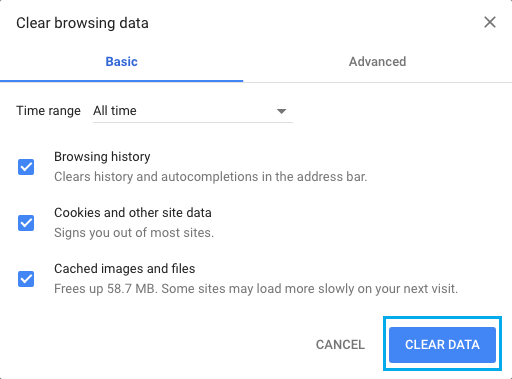
2. On the next screen, select All Time as the “Time Range”, check Browsing History, Cookies, Cached Images and click on Clear Data button.
3. After clearing browsing cache, see if the same problem appears.
2. Update Chrome Browser
The next step would be to make sure that you are using the latest version of Google Chrome on your computer.
1. Open Chrome Browser > click on 3-dots menu icon > hoover mouse on Help and click on About Google Chrome.
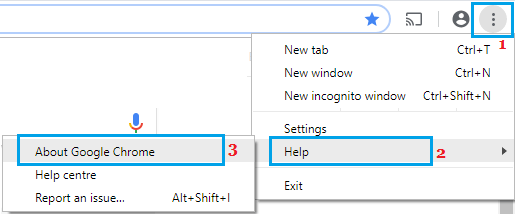
2. On the next screen, allow Google Chrome to check and apply the Updates (if available).
3. Disable/Remove Browser Extensions
As mentioned above, it is not uncommon for browser extensions to become incompatibe and cause problems
1. Open Chrome in Incognito mode > click on 3-dots icon > Hoover mouse over More tools and click on Extensions.
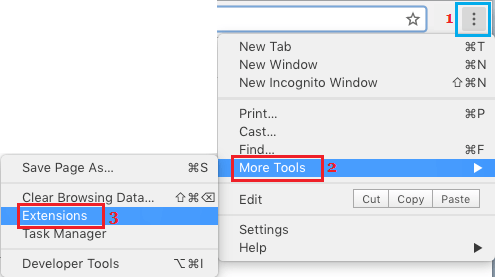
2. On the next screen, you can disable extensions by moving the toggle to OFF position and delete extensions by clicking on the Remove option.
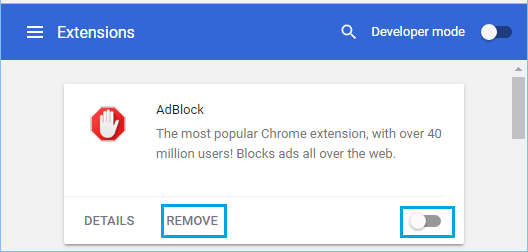
After disabling/removing the extensions, you should find Chrome browser starting without any problem on your computer.
4. Reset Chrome Browser
The Reset option in Google Chrome disables resets the browser to its original default settings.
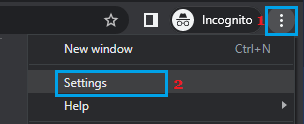
1. Open Chrome in Incognito Mode > click on 3-dots Menu icon and select Settings in the drop-down menu.
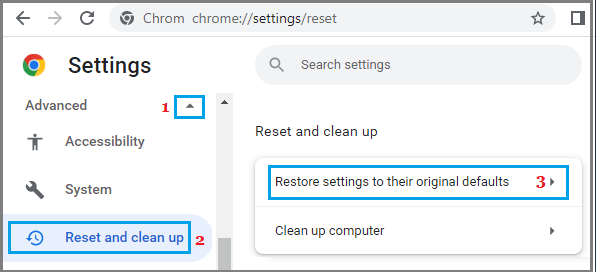
2. On the Settings screen, select Reset Settings tab in the left-pane and click on Restore Settings to their original defaults option in the right-pane.
3. On the pop-up, click on the Reset Settings button to confirm.
After the reset process is completed, open Google Chrome and see if it is now working properly on your computer.
5. Reinstall Google Chrome
Make sure that all Browser tabs are closed and follow the steps below to Reinstall Google Chrome browser on your computer.
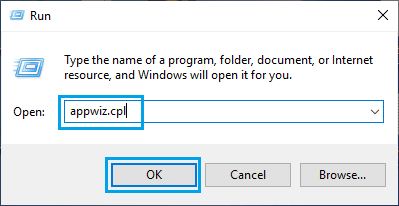
1. Right-click on the Start button and click on Run > In the Run Command window, type appwiz.cpl and click on OK.
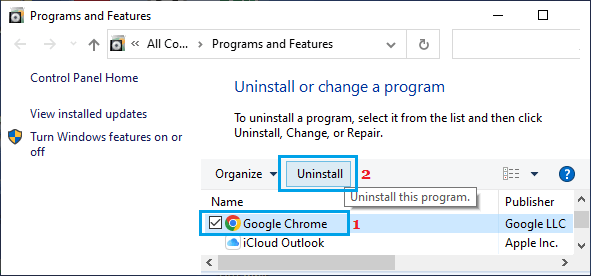
2. On Program and Features screen, select Google Chrome and select the Uninstall option.
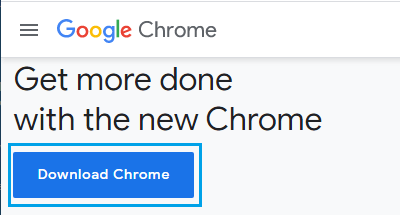
3. After Uninstalling Chrome, go to Google Chrome’s website and download the latest version of Google Chrome browser on your computer.
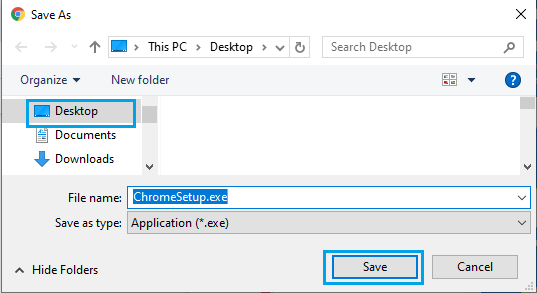
4. Select the location for ChromeSetup.exe file on your computer and click on Save.
5. Double-click on the downloaded ChromeSetup.exe file.

6. Wait for Google Chrome browser to be installed on your Windows Computer.
After Chrome browser is installed, you should find it working properly on your computer.