You may find the need to System Restore Windows computer in Safe Mode, if it has become unstable after installation of an update, app, desktop program or other reasons.
Before going ahead with the steps to perform System Restore in Safe Mode, make sure that a valid “System Restore Point” that was made prior to start of the problem is available on your computer.
This is possible, if the “System Protection” feature was enabled on your computer and a System Restore Point was automatically created by the system and also if you had manually created a System Restore point on your computer.
Note: If you are unable to login to the computer, you can enter Safe Mode using a bootable USB Drive.
System Restore Windows Computer in Safe Mode
If a suitable System Restore Point is available on your computer, you can follow the steps below to perform a System Restore in Safe Mode.
1. Press Win + R keys > Type msconfig in the Run Command window and click on OK.

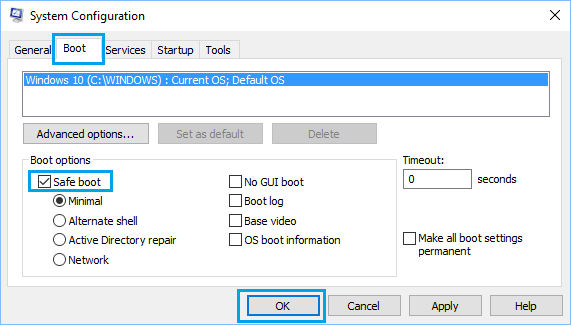
2. On the System Configuration screen, switch to Boot tab, select Safe Boot with Minimal option and click on OK.

3. On the pop-up, click on Restart to start the process of starting your computer in Safe Mode.
4. After the computer starts in Safe Mode, go to Settings > System > About (right-pane) and click on System Protection link, located in “Related Links” section.

Windows 10: Go to Settings > System > About (left-pane) > click on System Protection link in the right-pane.
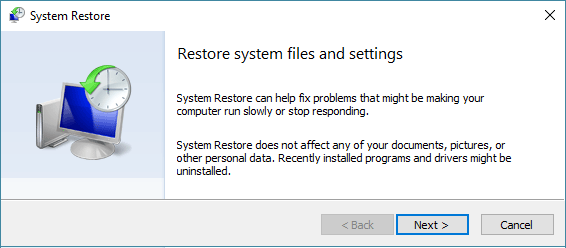
5. On the System Restore screen, click on the Next button.

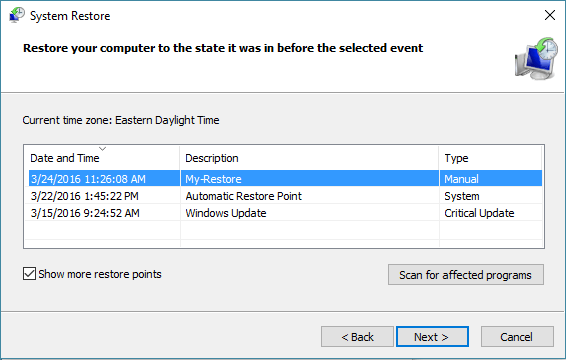
6. On the System Restore screen, select the Restore Point that you want to use and click on the Next button.

7. Wait for the Restore Process to be completed and make sure you do not close the computer or interrupt the restore process in any way.
Once the Restore Process is completed, your should find your computer being rolled back to its previous working status (when the Restore Point was created), undoing all the recent changes that must have caused the problem on your computer.