If Google Chrome Browser is unable to load a particular website, it is usually known to to come up with “This site can’t be reached” error message.
In most cases, the reason for Chrome being unable to reach or open requested websites is due to DNS Lookup failure. This usually happens, if the DNS Server of your Internet Service Provider (ISP) is busy, congested or going through problems.
This Site Can’t Be Reached Error in Google Chrome
If the reason for the problem is due to the DNS servers of your Service Provider being busy, you should be able to fix the problem by switching the DNS servers on your computer to Google or OpenDNS (Last method as provided below).
However, the reason for Google Chrome being unable to access the requested websites on your computer could also be due to network related issues, incompatible browser extensions and other reasons.
1. Clear Browser Cache
The problem could be due to a cached error page or corrupted files in the browser cache on your computer. This issue can be easily fixed by clearing the Chrome browser cache on your computer.
If you are not used to clearing the browser cache, you can refer to this guide: How to Clear Cache in Google Chrome.
After clearing browser cache, try to access the same webpage again and see if you are still getting “This Site Can’t Be Reached” Error.
2. Flush DNS & Reset Network Adapter
Flushing the DNS Cache and Resetting Network Adapter can help in fixing various network connectivity issues on a Windows computer.
1. Type CMD in the Search bar > right-click on Command Prompt in the search results and select Run as Administrator option.

2. On the Command Prompt screen, type ipconfig /flushdns and press the Enter key.
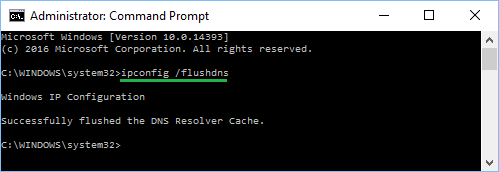
Next, type the following Commands and press the Enter key after each of these Commands.
- ipconfig /renew
- ipconfig /registerdns
- netsh winsock reset
3. Close Command Prompt window and Restart your computer.
Now, try to load the webpage that you were trying to access and see if you are still getting “This site can’t be reached” Error in Chrome browser.
3. Restart DNS Client
Restarting the DNS Client Service can help in fixing network connectivity issues.
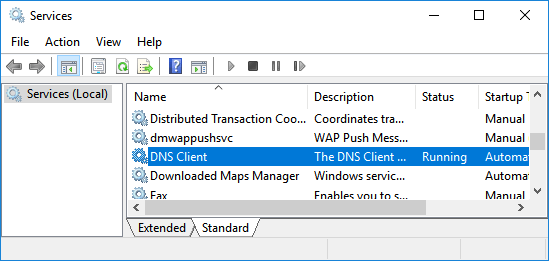
1. Open Run Command (Press Windows + R keys)
2. Type services.msc and click on OK.

3. On the Services screen, scroll down till you reach DNS Client. Right-click on DNS Client and click on Restart.
After Restarting DNS Client, try to access the same webpage and see if the Google Chrome is coming up with any error message.
4. Reset Chrome Browser
You can undo changes (if any) to the Chrome browser settings on your computer by Resetting Google Chrome to its original default settings. You can find the steps to Reset Google Chome on your computer.
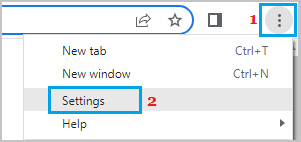
1. Open Google Chrome > click on 3-dots icon and select Settings in the drop-down menu.
2. On the Settings screen, select Reset Settings in the left-pane. In the right-pane, click on Restore Settings to their original defaults option.
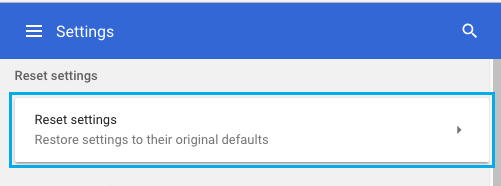
3. On the confirmation pop-up, click on Reset Settings button to confirm.
After Resetting Google Chrome, try to access the webpage and see if you are still getting “This Site Can’t Be reached” error message.
5. Remove and Reinstall Chrome
If above solutions did not help, you can remove and reinstall the Google Chrome browser on your computer to rule out the possibility of Chrome browser being damaged or corrupted.
You can find the steps to Remove & Reinstall the Google Chrome browser on your computer in this guide: How to Reset Google Chrome to Default Settings.
6. Switch DNS Servers
Switching the DNS Servers on your computer to Google or OpenDNS can help, if the problem is due to the DNS servers of your service provider being constantly busy or going through problems.
For more information, you can refer to this guide: How to Change DNS Server in Windows 11.