If you have a Shoebox and a Magnifying glass, you can hope to spend some quality time with your children by joining them as a guide on a weekend or holiday project that requires them to turn a smartphone into projector.
The best part about this project is that it practically costs nothing to build this DIY Projector and you can look forward to watching videos and pictures with your family and friends, once this low cost projector is built.
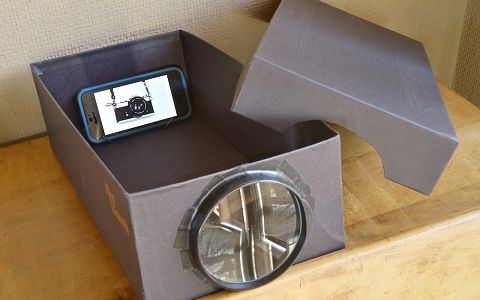
Source: Photojojo
What is Required to Turn Phone Into Projector
In order to turn an iPhone or Android phone into projector, the first step is to make sure that you have the following items and tools at your disposal. This will ensure that you are not running around for things while you are in the middle of building your first DIY projector.
- Shoebox
- Craft Knife
- Duct tape
- Magnifying Glass ($1-2)
- Sharpie or Pen
- LEGO Blocks
Important: Do not allow children to use a regular knife or cutter. If you find the need to use a knife or cutter, make sure Step#2 (below) is being performed by an adult; familiar with safety precautions.
Steps to Turn Phone into Projector
Once you are ready with the required items and tools, you can follow the steps below to turn an iPhone or an Android phone into a Projector.
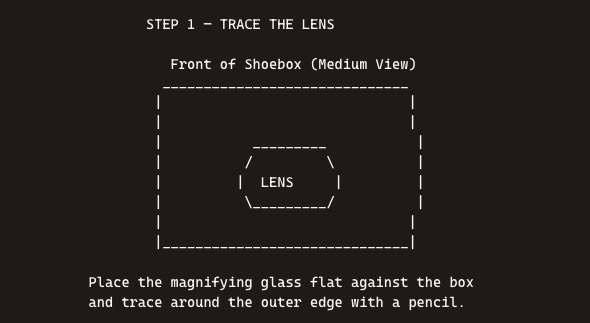
1. Trace Circular Opening: Trace the outer edge of the magnifying glass (lens) on the short side of the shoebox using a pen or a pencil.
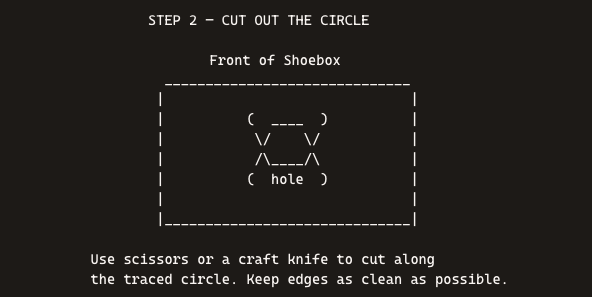
2. Cut out the Opening: Once the outline of the circular opening is marked on the box, the next step is to cut out the opening using a knife or a box cutter.
Optional: At back of the box, you can cut out another small opening for the power cord. So that you can charge the phone without taking it out of the box while you are using the projector.
3. Attach Magnifying Glass: Attach the Magnifying glass to the opening, either to outside or inside of the shoebox. Tape the magnifying glass and make sure that it is held securely and there are no gaps from which the light can escape.

4. Place Phone inside Shoebox: Place the phone inside the box (inline with the Lens). You can use LEGO bricks to elevate the phone to the required height.
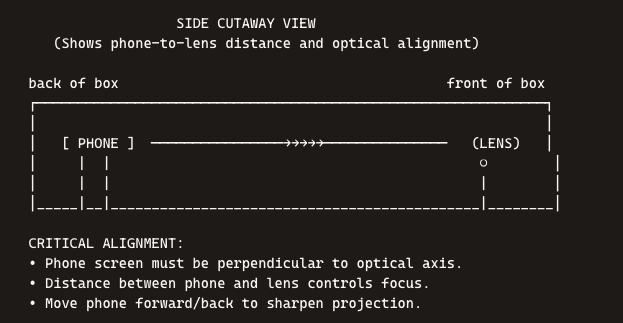
5. Adjust the Phone Position: Adjust the height as required and move the phone forward or backwards, until you get the sharpest possible projection.
6. Fix Upside Down Image: The light gets flipped when it is made to pass through a lens, which results in the images being projected upside down. The solution to this issue is to just flip your phone and it will project it right side up.
Improve Picture Quality
If you want to improve the picture quality follow these tips.
- Turn off all the lights.
- Turn up the brightness to maximum on your phone.
- Tape inside of the shoebox with a black duct tape.
We hope you enjoyed this article and are looking forward to lots of fun building your first phone projector.