If you are running the 32-bit version Windows on your computer, you might be eligible for upgrade to 64-bit version of Windows for free by using your existing Windows License.
The advantage of 64-bit version of Windows is that it can handle up to 2TB of RAM, which allows it to run several apps at the same time.
In comparison, a computer running on 32-bit version of Windows can only handle up to 3.75 GB RAM, which makes it incapable of running 64-bit apps.
Upgrade from 32-bit to 64-bit Windows 11/10
If Windows 11 is already installed on the computer, there is no need to upgrade as Windows 11 is 64-bit only and it does not have a 32-bit version.
If the computer is currently running on 32-bit version of Windows, it can be upgraded to 64-bit; if it meets the following minimum hardware requirements that are required to run Windows 11.
- Processor: 64-bit processor with 2 or more cores and minimum speed of 1 GHZ or more.
- Memory & Storage: Minimum of 4 GB RAM and 64 GB storage (more is better).
- Graphics Card: Needs to be compatible with DirectX12 or later.
The System Firmware needs to be UEFI (secure Boot capable) and the computer needs to be equipped with TPM (Trusted Platform Module).
With this understanding, let us go ahead and take a look at the steps to check the hardware specs of a Windows computer.
1. Check Processor Type
You can follow the steps below to check and make sure that the processor installed on the computer is capable of running 64-bit programs.
Go to Settings > System > About > scroll down to “Device Specifications” section in the right pane and take a look at the entry next to System Type.
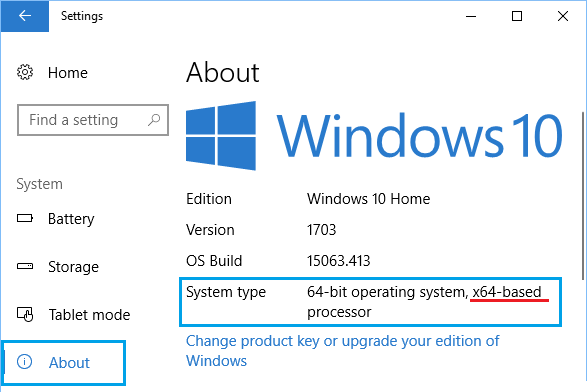
If the entry next to “System Type” reads X64-based processor, the computer is capable of being upgraded to 64-bit version of Windows.
If the entry next to “System Type reads x86-based processor, the computer is not suitable for upgrading to 64-bit version of Windows.
2. Check RAM Capacity
Go to Settings > System > About > In the right-pane, you can find the amount of RAM installed on the computer.
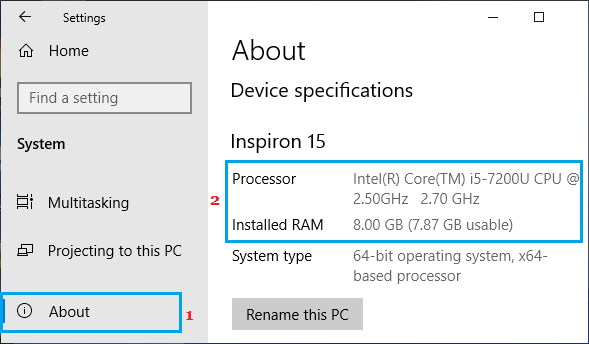
As you can see in above image, the computer has 8 GB, which is more than the minimum (4 GB) required amount of RAM for running Windows 11.
3. Check Graphics Card Driver
If your computer is only a few years old, it should already be equipped with a Graphics Card Driver which is compatible with DirectX12 or later.
If you are not sure, you can take a look at the type of Graphics Card installed on your computer and visit manufacturers website to download a 64-bit version of the driver.
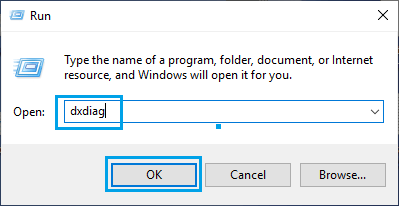
1. Open Run Command > Type dxdiag and press the enter key.
2. On DirectX Diagnostic Tool window, switch to Display Tab and take a look at DirectX Features section and Feature Levels entry, located in Drivers section.
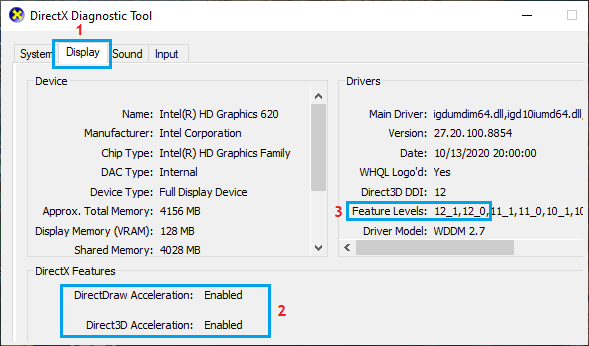
If the listed Feature Level is 12.0 or higher, the Graphics card installed on your computer supports DirectX 12 and DirectX 12 Drivers is available on the computer.
Upgrade Computer from 32-bit to 64-bit Windows
Since, there is no direct upgrade path from 32-bit to 64-bit Windows, the only way to upgrade a computer from 32 to 64-bit version of Windows is by performing a clean Installation of Windows 11 on the computer.
This means, you need to reformat the Hard Disk, install the 64-bit version of Windows and reinstall back all the programs and files that you had on the computer.
Hence, the process to upgrade from 32-bit to 64-bit Windows can be divided into the following 4 steps.
- Make a Backup of Files on your computer
- Create Bootable Windows 11 Installation Drive
- Install 64-bit Windows 11 on the computer
- Download & Install Updates on the computer
1. Backup Files
The clean installation of 64-bit Windows is going to wipe out all the files and programs located on the hard disk of your computer.
Hence, it is important that you make a backup of the files on your computer to an external drive using steps as provided in this guide – How to Backup Windows Computer
2. Create Bootable Windows Installation Drive
Make sure that you have an empty USB Drive of at-least 8 GB capacity and follow the steps as provided in this guide to create Bootable Windows 11 USB Drive: How to Create Bootable USB Drive (Windows 11/10).
If you are upgrading from 32-bit Windows 10 to 64-bit Windows 10, you need to create a Bootable USB Drive for Windows 10 using steps provided in the same guide.
3. Install 64-bit Version of Windows on the Computer
The final step is to install the 64-bit version of Windows on the computer by using Windows USB Installation Drive that we just created.
First make sure that your computer is not connected to any external drives and follow the steps below to Install 64-bit version Windows on your computer.
1. Insert the Windows USB Installation Drive into USB port of the computer and Restart the computer.
2. You should now find the Computer starting with Windows Logo.

Note: In case your Computer does not start with Windows Logo, you will have to change the boot sequence on your computer, in order to make it boot from USB Drive.
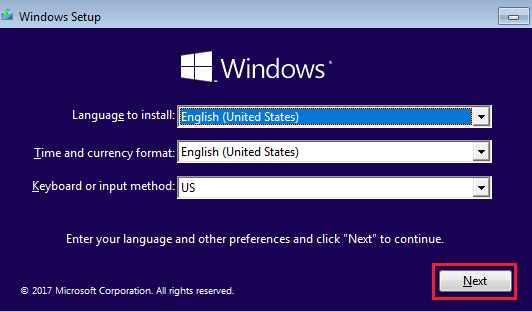
3. On the Windows Setup screen, select Language, Time & CurrencyFormat, Keyboard Layout and click on Next.
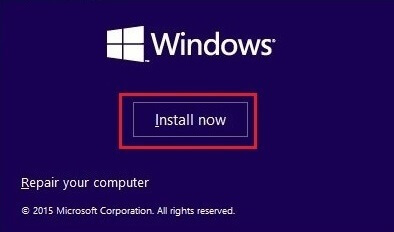
4. On the next screen, Click on Install now option.
5. Skip the option, in case you are prompted to enter your Windows Product Key > Accept Licensing Agreement and click on Next.
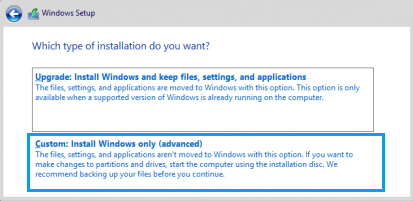
6. On Windows Setup screen, click on Custom: Install Windows only (advanced) option.
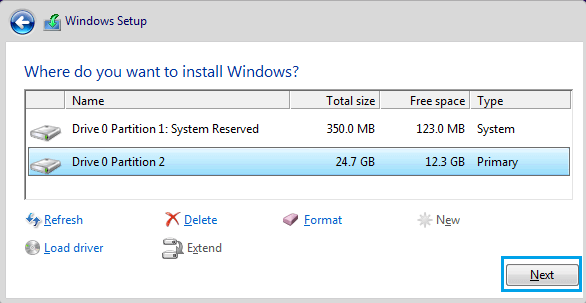
7. On the next screen, select the Drive where you want to install 64-bit version Windows and click on Next.
9. Follow the next set of on-screen directions to complete the installation of 64-bit Windows on your computer.
4. Install Updates on the computer
After the installation of Windows 11 is completed, make sure that you manually download the available updates.
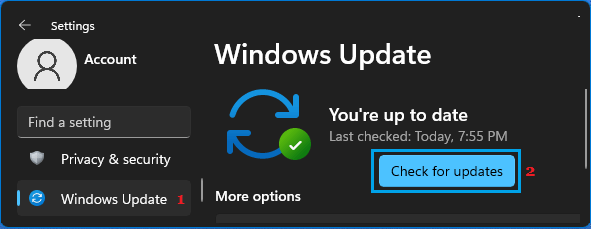
Windows 11: Go to Start button > Settings Icon > Windows Update > click on Check for Updates button in the right-pane.
Windows 10: Go to Settings > Update & Security > Windows Update > click on Check for Updates button in the right-pane.
Wait for Windows to check for available updates and install them on your computer.