While “Video Driver Crashed and was Reset” error is commonly noticed on gaming computers, it can also occur on regular computers while playing online video games and watching videos on the internet.
There could be various reasons for this error, ranging from overloading of the GPU to outdated or corrupted drivers of the Graphics Card installed on your computer.
Video Driver Crashed and was Reset Error
If you are dealing with “Video Driver Crashed and was Reset” error message on your gaming or regular Windows computer, you should might be able to fix the problem using the following methods.
1. Close Active Programs and Processes
Keeping multiple browser tabs and programs open at the same time can cause the problem by placing excessive demands on the GPU.
Close all the open programs and browser tabs on your computer and this should reduce significantly reduce resource usage on your computer.
2. Run Video Playback Troubleshooter
If the problem is occurring while playing videos, the built-in Video Playback Troubleshooter as available on your computer might help in fixing the problem.
1. Go to Settings > System > Troubleshoot (right-pane) > click on Other troubleshooters.
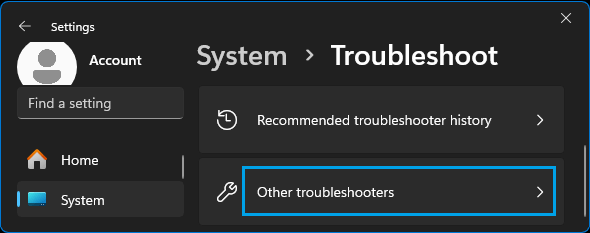
2. On the next screen, select Video Playback and click on Run the Troubleshooter.
3. Follow the onscreen instructions to allow the troubleshooter to find and fix problems on your computer.
Windows 10: Go to Settings > Updates & Security > Troubleshoot > Video Playback and click on Run the Troubleshooter.
3. Update Graphics Card Drivers
Follow the steps below to manually update the driver for the Graphics Card installed on your computer.
1. Right-click on the Start button and click on Device Manager.
2. On Device Manager screen, expand Display Adapters entry > right-click on the Graphics Driver and click on Update driver.
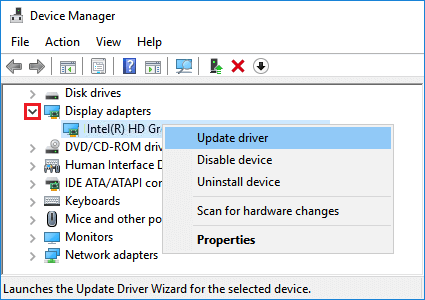
3. On the next screen, select Search automatically for updated driver software option and follow the onscreen instructions to Update Driver.
4. Repeat the above steps to for other Graphics Cards installed on your computer.
After updating Graphics Driver, restart your computer and see if the problem is now fixed.
4. Download Updated Driver from Manufacturers Website
If Windows is unable to find the required driver, visit the Manufacturers website and see if an updated driver is available.
If a driver is available, download the driver software and follow the instructions to install the Drivers on your computer.
5. Adjust Visual Effects for Best Performance
Setting the Visual Effects on your computer for best performance, instead of best appearance can help in fixing the problem by reducing the load on GPU.
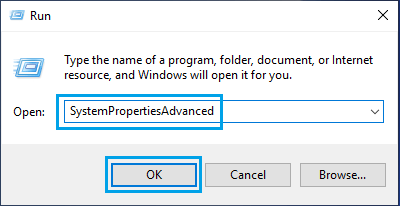
1. Right-click on Start and click on Run.
2. Type SystemPropertiesAdvanced and click on OK.
3. On System Properties screen, go to Advanced tab and click on Settings button, located under “Performance” section.
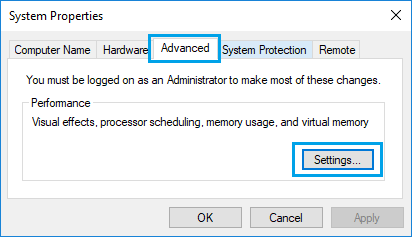
4. On the next screen, make sure you are on Visual Effects tab and select Adjust for best performance option.
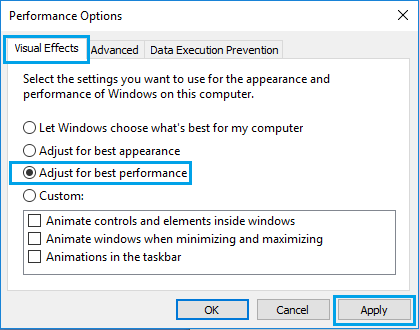
5. Click on Apply > OK to save these settings on your computer.
5. Increase GPU Processing Time Using Registry Editor
Note: This method is meant for advanced users, proceed carefully and do not make any mistakes while you are in the registry.
1. Right-click on Start button and click on Run.
2. Type regedit in the Run Command window and click on OK.

3. On the Registry Editor screen, navigate to HKEY_LOCAL_MACHINE\SYSTEM\CurrentControlSet\Control\GraphicsDrivers.

4. Click on GraphicsDrivers folder in the left pane. In the right-pane, create a new DWORD by right-click in any Blank space > New > DWORD (32-bit) Value.
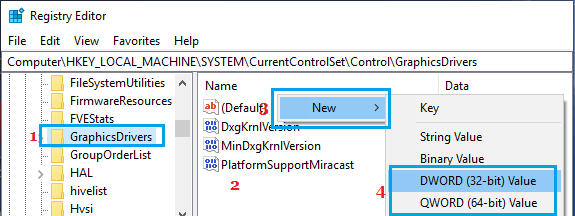
Note: You can choose DWORD(64-bit) if the OS on your computer is 64-bit.
5. Name the newly created DWORD as TdrDelay.
6. Double-click on TdrDelay and type 8 as the “Value Data” in Edit DWORD pop-up.

6. Click on OK to save this change to the Registry.
Close Registry Editor and restart your computer for the changes to Apply.