The default setting in Windows is to show only the documents or files that are currently waiting in line to be printed in the Print Queue on your computer. As each file is printed, it gets removed from the list, resulting in a blank print queue; which does not provide the history of previously printed documents on the computer.
However, this can be easily fixed by enabling “Keep Printed Documents” option for Printers that are linked to your computer and this will allow you to view the Print History.
View Print History in Windows 11
As mentioned above, the first step is to enable “keep printed documents” option for the Printer or Printers that are linked to the computer.
After “Keep Printed Documents” option is enabled, the printed documents or files will remain listed on the Print Queue, even after they have been printed.
Step 1. Enable “Keep Printed Documents” Option
The first step is to enable the option to “Keep Printed Documents” for the Printer attached to your computer.
1. Open the Settings App on your computer.
2. From the Settings screen, go to Bluetooth & Devices > Printers & Scanners and click on your Printer.
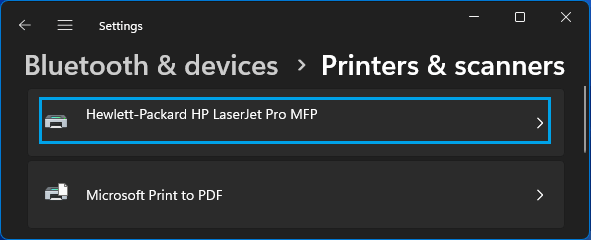
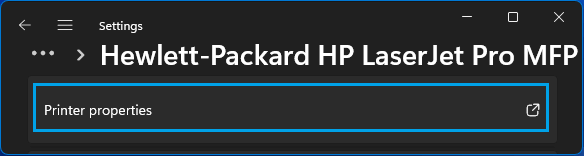
3. On the next screen, click on Printer Properties tab.
4. On Printer Properties screen, switch to Advanced tab and select Keep Printed Documents option.
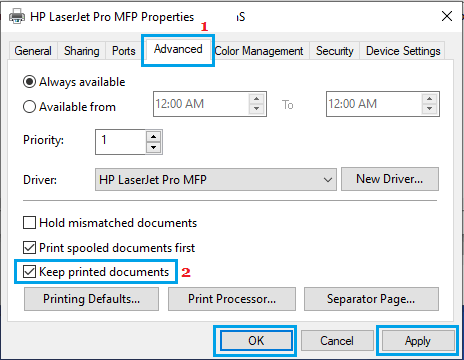
5. Click on Apply and OK to save this print setting on your computer.
Note: If there are multiple printers, this option needs to enabled separately for each available printer on your computer.
Step 2. View Print History on Windows Computer
You can see the list of current, queued and previously printed documents on your computer by using the following steps.
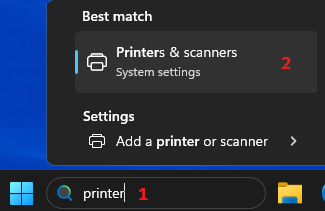
1. Type Printers in the search bar and click on Printers & Scanners in the search results.
2. On the next screen, locate your Printer and click on it > On the next screen, click on Open Print Queue option.
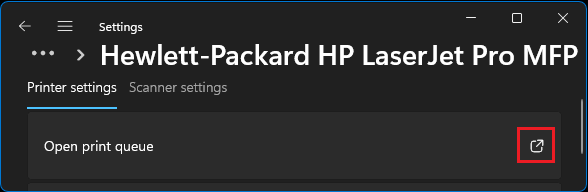
2. On Print Queue screen, you will be able to see the complete list of current, queued and previously printed documents on this particular printer.
The Print History as available on the Print Queue screen is limited. If you are interested in maintaining a long term Print History, you need to enable the Operational Print Log on your computer.
3. View Long Term Print History in Event Viewer
As mentioned above, you can see long term print history by enabling the event logging option on your computer.
1. Right-click on the Start Button and click on Run.
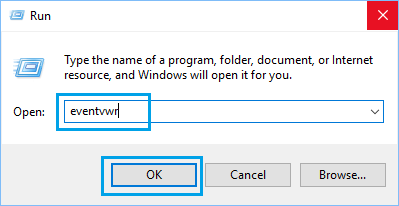
2. In Run Command window, type eventvwr and click on OK.
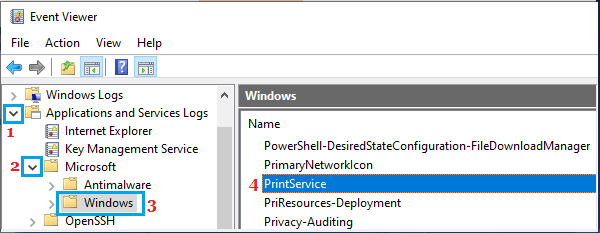
3. On the Event Viewer screen, expand Applications and Service Logs Entry in the left-pane > navigate to Microsoft > Windows and double-click on PrintService entry in the right-pane.
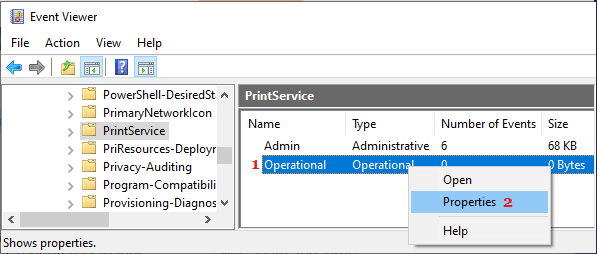
4. On the next screen, right-click on Operational and select Properties in the right-click menu.
5. On Log Properties screen, select Enable Logging option and also select whether or not you want the logs to be Overwritten or Archived when the log file is full.
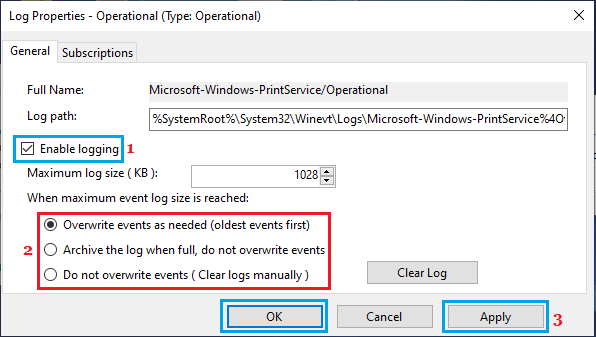
6. Make sure that you click on Apply and OK to save this change on your computer.
Note: The default log size (1024KB) is very small and gets quickly used. You can increase the Log File size to suit your printing requirements.
Once the Operation Print Log is enabled, you will be able to View Long Term Print History by going to Operational Print Service entry in the Event Viewer.