If iPhone is bothering you with “Your SIM Sent a text Message” notification, you can find below the steps to fix this problem on your iPhone.
Your SIM Sent a Text Message Notification on iPhone
It can be annoying and even worrying to see “Your SIM sent a text message” Notification popping up on iPhone.
Luckily, in this case your SIM Card has not actually sent a Text Message to any of your Contacts, it is just trying to get in touch with your Mobile Service Provider.
In general, SIM Sent a Text Message notification starts appearing due to the SIM Card on your iPhone trying to deal with a technical issue by trying to get an update from the Service Provider.
1. Check Updates From Service Provider
The first step is to see if there is an update available on your device from the Service Provider or Apple to fix a technical glitch.
Go to Settings > General > Software Update.
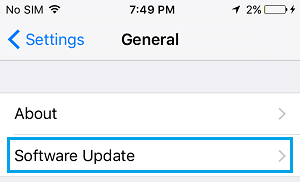
On the next screen, wait for iPhone to search for available updates and tap on the Update option (if an update is available).
2. Restart iPhone
Sometimes, the SIM Card can get stuck in a loop, trying to text your Wireless Service Provider. In most cases, this can be fixed by switching OFF iPhone and switching it back ON again.
Go to Settings > General > scroll down and tap on Shut Down. On the next screen, use the Slider to Power OFF iPhone.
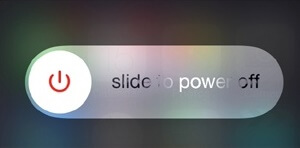
Wait for 30 seconds and press the Power button to Restart iPhone.
3. Remove SIM Card and Put it Back Again
Eject the SIM card tray on your iPhone using a SIM Card ejector tool or a paper clip.
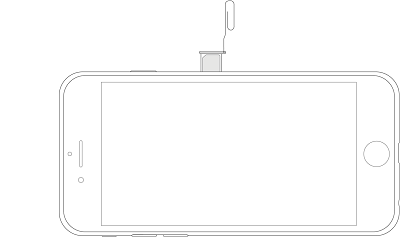
Pull the Sim Tray out, wait for 30 seconds and put it back again.
Ejecting and reinserting the SIM Card tray on iPhone gives it a fresh start, allowing it to reconnect to the network of your wireless service provider.
4. Reset Network Settings
If you are still facing the problem, you can try to Reset Network Settings on your iPhone to factory default values.
After the Reset process is completed, you will be required to rejoin WiFi Network by entering WiFi Password. Hence, make sure that you note down your WiFi Network Password.
Go to Settings > General > Transfer or Reset iPhone > Reset > On the pop-up, select Reset Network Settings option.
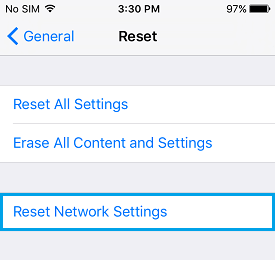
If prompted, enter your Lock Screen Password > On the confirmation pop-up, tap on Reset Network Settings to confirm.
After iPhone restarts, go to Settings > WiFi > select your WiFi Network > enter the Password to join your WiFi Network.
5. Contact Wireless Service Provider
If your iPhone is still bothering you with “Your SIM sent a text Message” pop-ups, it is time to contact your Service Provider to report the problem and see if they can help in fixing the problem.