Similar to iPhone, the Messages App on your Mac can also be setup to send & receive free iMessages to Apple device users and paid SMS Text Messages to Android and other non-apple device users.
The main advantage of using the Messages app on Mac is that it makes it easy to attach files and photos located on Mac to your iMessages and SMS Text Messages.
Also, the large screen of MacBook and its physical keyboard should allow you to be faster and more accurate while sending Messages, compared to sending Messages using the limited screen and virtual keyboard of an iPhone.
Hence, if you are not using it, consider using the Messages App on your Mac to communicate with your friends, relatives and business contacts.
Setup and Use Messages App on Mac
All that is required to receive and send free iMessages to any Apple device user on your MacBook is to link your Apple ID to the Messages App.
In addition to this, you can also setup the Messages App on your Mac to send/receive paid SMS Text messages by using the phone number of your iPhone.
1. Steps to Setup iMessage Service on Mac
Follow the steps below to setup iMessage service on your Mac, in case you had missed setting up iMessage during the setup process of your Mac or want to confirm whether or not iMessage has been properly setup on your Mac.
1. Open the Messages app on your Mac.
2. If prompted, sign-in to the Messages App using your Apple ID Email Address and Password.
Note: You may be asked to enter your verification code, in case you have enabled two-step authentication for your Apple ID
3. Next, click on Messages tab in the top-Menu bar and select Preferences in the drop-down menu.

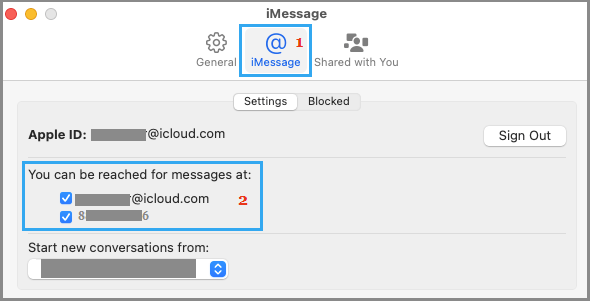
4. On the next screen, switch to iMessage tab and make sure that your Email Address is listed under “You can be reached for Messages at” is the same as your Apple ID Email Address.
After this, you are all setup to receive and send free iMessages to any Apple device user from your Mac.
2. How to Send iMessages From Mac
Sending an iMessage from your Mac is as easy as sending it from an iPhone.
1. Open Messages App on your Mac
2. Click on the New Message icon to start a New iMessage on your Mac.

3. On the New Message screen, you can type the recipient’s Name or phone number in the “To” field or click on the +Plus icon and choose recipients from your Contacts List.
4. Next, type your Message and press the Return key on the keyboard of your Mac to send this Message.
You can include Emojis in your Message by clicking on the Emoji button. You can add photos and files to your iMessage by using copy/paste functions and also by dragging photos and files in to the iMessage window.
3. Setup SMS Text Messaging on Mac
As you must be aware, the Messages App on iPhone and Mac makes use of Apple servers to send free iMessages to Apple devices users.
If your recipient is not using an Apple device, the Messages App switches to the paid cellular network of your service provider to the Message in SMS Text Message format.
Although, your MacBook does not have a cellular service or its own phone number, it can still be setup to send & receive SMS Text Messages using steps as provided in this guide: How to Send & Receive SMS Text Messages on Mac.