In most cases, the reason for “Access Denied” message while trying to edit the Hosts File on a Windows computer is due to the User not being logged-in to the Admin Account.
The Hosts File is protected by Admin Password, which protects it from being used by malware programs to redirect users to unsafe websites or block access to certain websites.
Access Denied When Editing Hosts File in Windows 10/11
The simplest way to bypass the “Access Denied” message while editing the “Hosts” File on a Windows computer is to edit the Host File by logging into an Admin Account or a User Account with Admin privilages.
If this does not help, the problem could be due to the Hosts File being saved in “Read Only” mode, which also can be fixed by going to the File Properties screen.
1. Edit Hosts File Using Admin Account
As mentioned above, the easiest way to bypass the error message is by using an Admin Account to open and edit the Hosts File.
1. Login to Admin Account or User Account with Admin Privileges.
2. Open File Explorer > navigate to C:\Windows\system32\drivers\etc and open the Hosts File by double-clicking on it.
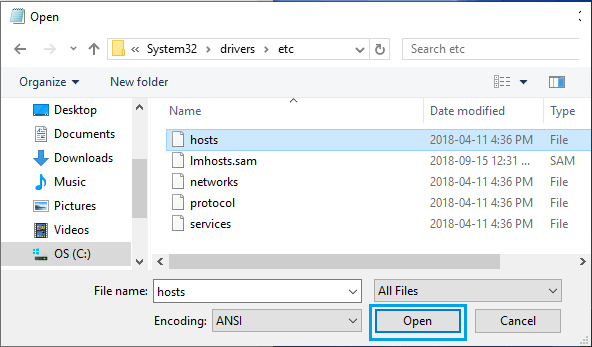
3. Edit the Hosts File as required and make sure you save the File.
Note: You can also Edit Hosts File from a non-admin account, without encountering any error messages by using steps as provided in this guide: How to Edit Hosts File in Windows 11/10.
2. Edit Hosts File on Desktop
Another way is to move the Hosts File to Desktop, make the required changes and move the Edited File back to its original location.
1. Open the File Explorer on your computer.
2. From the File Explorer screen, navigate to C:\Windows\System32\drivers\etc\ > Select the Hosts File and drag it to the Desktop.
3. When the “Access Denied” pop-up appears, click on Continue.
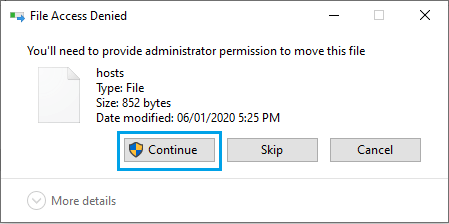
4. On the next screen, enter your Admin Password to authorize changes to the Hosts File and press the Enter key.
5. Open the Hosts File on your desktop using Notepad > make changes as required and drag the Hosts File back to its original location (C:\Windows\System32\drivers\etc\).
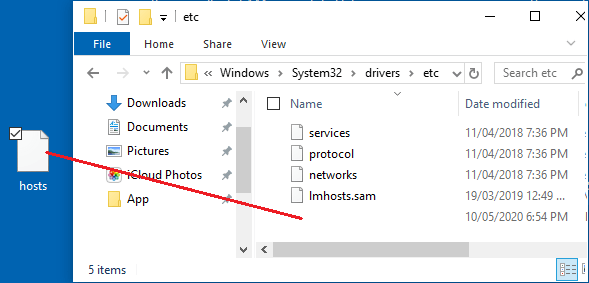
6. Click on Continue on “Destination Folder Access Denied” pop-up,
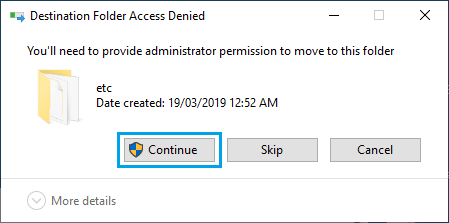
7. On the next screen, enter your Admin Password and move the File back to its original destination.
3. Uncheck Read Only Box
If above methods did not help, the problem could be due to the Hosts File being in Read Only mode.
1. Open File Explorer > navigate to C:\Windows\System32\drivers\etc\.
2. On the next screen, right-click on the Hosts File and click on Properties.
3. On Host Properties screen, uncheck the Read-only Box in the “Attributes” section.
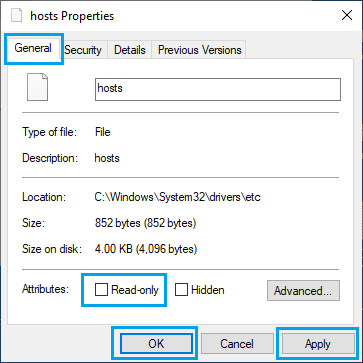
4. Click on Apply & OK to save the changes.
If you are still unable to the Edit Hosts file, scan the computer for malware and see if this helps in fixing the problem.