If the screen of your iPhone is not automatically switching OFF, even after several minutes of inactivity, the problem is usually due to the Auto-Lock feature not working on iPhone.
In general, iPhone should automatically switch OFF its display, when it is unlocked and remains unused or inactive for a period of 1 minute, which is a reasonable setting for most users.
As you must be aware, the Auto-Lock feature on iPhone is designed to save battery life and prevent the possibility of someone else being able to gain access to your unlocked device.
Auto-Lock Not Working on iPhone
If the Auto-Lock feature is not working on iPhone, it leads to loss of battery life and increases the possibility of your device being accessed by others.
Hence, it is really important that you try to fix this issue by using the following steps.
1. Make Sure Auto-Lock is Enabled
The first step is to rule out the possibility of the Auto-Lock feature being accidentally disabled on your device.
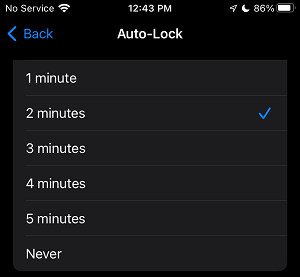
1. Go to Settings > Display & Brightness > Auto-Lock.
2. On the next screen, select 1, 2 minutes or any other duration that is suitable for your requirements.

After this, you will find the screen of your iPhone switching OFF after 2 minutes of inactivity. If you want to save more battery life, you can set the Auto-Lock period to the default 1 minute period.
2. Disable Low Power Mode
If the Auto-Lock option is greyed and you are unable to change the Auto-Lock period, the problem is usually due to iPhone being in Low Power Mode.
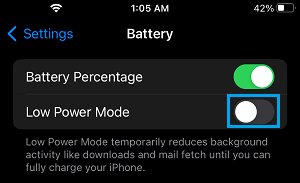
1. Open Settings > scroll down and tap on Battery.
2. On the next screen, disable Low Power Mode by moving the toggle to OFF Position.

After disabling Low Power Mode, you will be able to change the Auto-Lock Setting on your iPhone.
3. Restart iPhone
The problem could be due to a stuck App or process interfering with proper functioning of the Auto-Lock function on your iPhone.
This can be easily ruled out by shutting down iPhone (Settings > General > Shut Down), waiting for 30 seconds and restarting it back again.
4. Disable Assistive Touch
If you are using Assistive Touch, disable this feature and see if this helps in fixing the Auto-Lock problem on your iPhone.
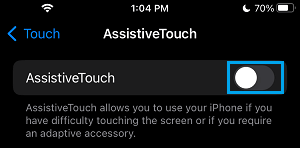
1. Go to Settings > Accessibility > Touch > AssistiveTouch.
2. On the next screen, move the toggle next to AssistiveTouch to OFF position.

5. Install Updates
Make sure that your iPhone is up-to-date with the latest version of iOS.
1. Go to Settings > General > tap on Software Update.
2. Wait for iPhone to check for updates > tap on Download and Install (If an update becomes available).
6. Reset All Settings
If above methods did not help, it is time to Reset all the Settings on your iPhone to its original Factory Default Settings.
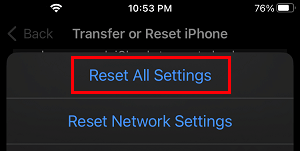
1. Go Settings > General > Transfer or Reset iPhone > Reset.
2. On the pop-up, select Reset All Settings option.

3. Follow the steps to complete the Reset process.
Note: The above step will not erase any data from iPhone, but it will erase your Wi-Fi Network password. Hence, you will be required to enter Wi-Fi network, when you try to rejoin Wi-Fi.