Some users have reported the problem of being unable to uninstall Google Chrome from their Windows computer, using both Settings and Control Panel.
In general, this problem occurs with an error message reading “Can’t Uninstall Google Chrome” and is usually accompanied by an explanation, providing a reason for this error.
Unable to Uninstall Google Chrome
If you are unable to Uninstall Google Chrome, the problem could be due to a plugin or background running app or process preventing the browser from being deleted.
Hence, follow the steps below to close background running apps, remove plugins and then try to uninstall Google Chrome from your computer.
Step 1. Prevent Chrome from Running in Background
Follow the steps below to prevent Google Chrome from running in background on your computer.
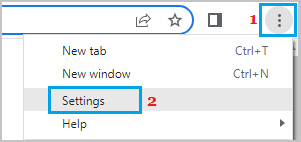
1. Open Google Chrome > click on 3-dots Icon and select Settings in the drop-down menu.
2. On the Settings screen, select System in the left-pane. In the right-pane, disable Continue running background apps when Google Chrome is closed option.
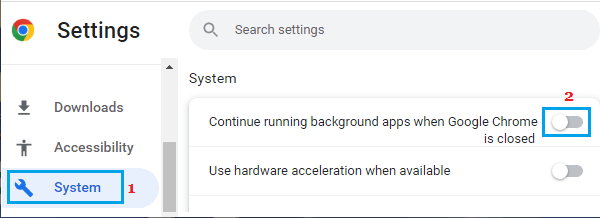
3. After this, make sure that your restart the browser in order to implement this change on your computer.
Step 2. Disable All Extensions Before Uninstalling
Sometimes, the problem is due to certain Chrome extensions preventing the browser from being uninstalled.
1. Open the Google Chrome browser on your computer.
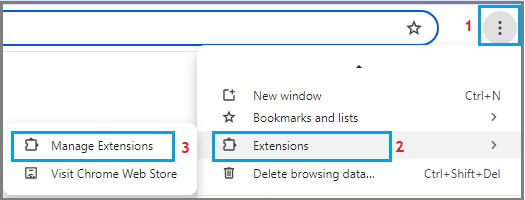
2. Click on 3-dots menu icon > Hoover mouse over Extension > click on Manage Extensions.
3. On the next screen, disable all extensions and remove unwanted extensions by clicking on the Remove option.
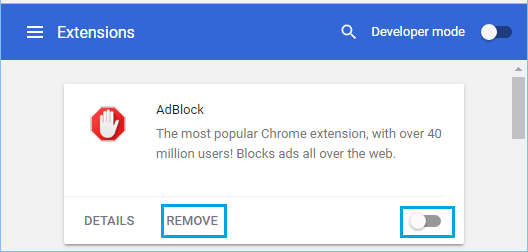
4. After this, make sure you restart the browser to implement this change on your computer.
Step 3. Uninstall Google Chrome
After disabling browser extensions and preventing the browser from running in background, you should be able to Uninstall Google Chrome from your computer.
1. Right-click on the Start button and click on Run.
2. In the Run Command window, type appwiz.cpl and click on OK.

3. On Programs and Features screen, select Google Chrome and select the Uninstall option.
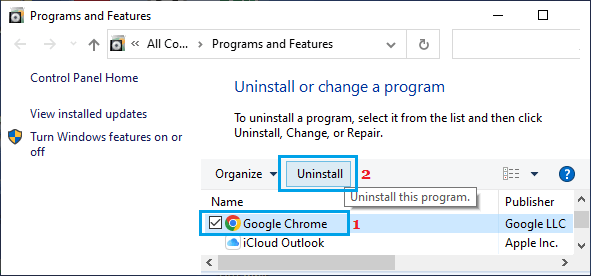
4. Wait for Google Chrome to be completely uninstalled from your computer.
Try Third Party Uninstaller
If above methods did not help, you may want to try free versions of uninstallers like Revo Uninstaller or iOBit Uninstaller to fix this problem.
After the download is complete, double-click on the downloaded revosetup.exe file and follow the prompts to install Revo Uninstaller on your computer.
Launch Revo Uninstaller on your computer > scroll down the list of Applications > right-click on Google Chrome and select the Uninstall option.
Revo Uninstaller will first create a Restore Point on your computer. Once, this is finished, you will be prompted to Uninstall Google Chrome.