• Skip to main content
  • Skip to primary sidebar

Techbout

Technology Simplified.

  • Windows
  • Mac
  • iOS
  • Android
  • Office
Home » How to » How to Change Default Printer in Windows 10

How to Change Default Printer in Windows 10

By: Waseem Patwegar

It is really easy to Change Default Printer in Windows 10 and you will find below 3 different methods to set a Default Printer on your computer.

Change Default Printer in Windows 10

Change Default Printer in Windows 10

On a Windows 10 computer, you can either set your own default printer or allow Windows to manage the default printer on your computer.

When you manually set a default printer on your computer, all the print jobs will always be sent automatically to your selected printer.

This setup is useful if your computer is based at a particular location (Home or Office) and also if you have multiple printers, but prefer sending print jobs to a specific printer.

The only disadvantage of setting a default printer is that you will have to change default printer, whenever you happen to take your Home computer to office or bring your office computer to Home.

1. Change Default Printer Using Notepad

An easy way to change the default printer in Windows 10 is by using the Notepad App.

Open Notepad App or right-click on the Desktop and select New > Text Document option.
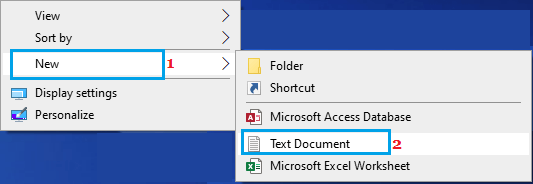
Open New Text Document

In New Text Document, click on the File tab and select Print option in the drop-down menu.
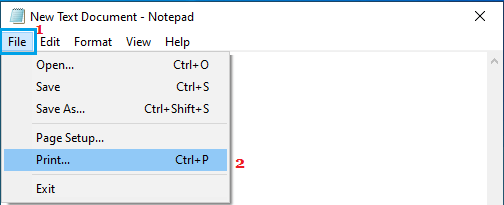
Print File Option in Notepad

On the next screen, right-click on your desired Printer and select Set as Default Printer option.
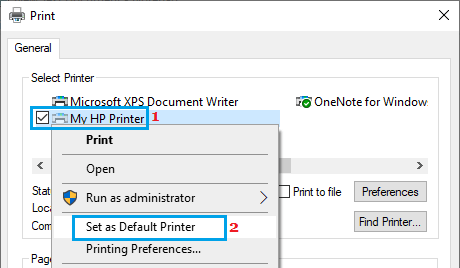
Set Default Printer Using Notepad

2. Change Default Printer Using Settings

The preferred way to Set or Change Default Printer in Windows 10 is by using the Settings App on your computer.

Go to Settings > Devices > select Printers & Scanners in the left-pane. In the right-pane, scroll down and uncheck Let Windows manage my default printer option.

Uncheck Let Windows Manage My Default Printer 

Scroll up on the same screen > select the Printer that you want to set as default and click on Manage.

Manage Printer Option in Windows

On the next screen, click on Set as Default button.

Set Default Printer in Windows

The selected printer will now become the default Printer on your computer. After this, you will find all your print jobs going to your selected default printer.

3. Change Default Printer Using Control Panel

Open Control Panel > make sure you are in Category view and click on View Devices & Printers.
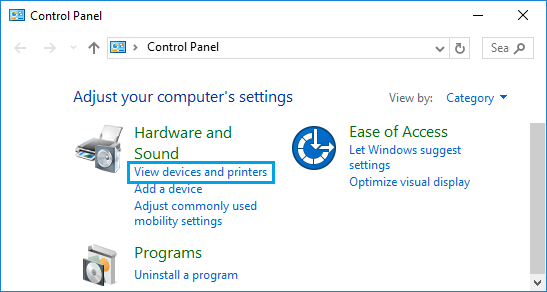
View Devices & Printers Option in Windows Control Panel

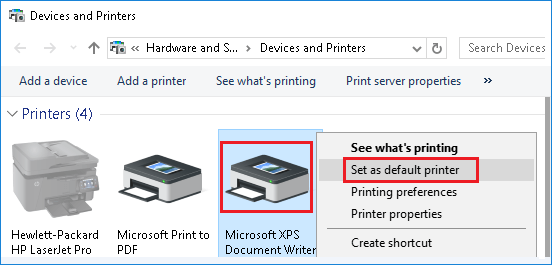
On the next screen, right-click on your desired Printer and select Set as Default Printer option in the contextual menu.

Set as Default Printer Using Control Panel

After this, Windows 10 will always send print commands to your selected default Printer.

Related
  • Default Printer Keeps Changing in Windows 10
  • How to Change Taskbar Color in Windows 10

You May Also Like
    • Deauthorize a Computer on iTunes
      How to Remove or Deauthorize Computer On iTunes
      • Authorize a Computer on iTunes
        How to Authorize Computer On iTunes
        • Fix Google Chrome Has Stopped Working Error
          Google Chrome Has Stopped Working: How to Fix?

Primary Sidebar

Twitter
Facebook


Popular Now

  • How to Reduce Cellular Data Usage on iPhone
  • How to Backup Registry in Windows 11/10
  • How to Check Computer Specs in Windows 10
  • How to Remove Bloatware From Windows 10 PC
  • How to Create Local Account in Windows 11


Gadget Guide

  • Mac vs PC Comparison: Should You Buy Mac or PC
  • Chromebook vs Windows Laptop
  • Kindle E-Reader Comparison | Which Kindle to Buy
  • iPad vs iPad Pro Comparison
  • Advantages of Chromebooks

About | Privacy Policy | Disclosure | Terms | Contact
© Copyright 2022 @Techbout.com · All Rights Reserved