The default setting in Windows is to make the computer to automatically go into sleep mode after 10 Minutes of inactivity while using battery and 15 minutes of inactivity when pugged-in to a power source.
However, this default sleep mode setting may not be suitable for all users and all types of situations. Hence, Windows provides the option to increase or decrease the Sleep Mode time to suit your own individual and changing requirements.
Change Sleep Mode Time in Windows 11/10
If you are looking for a way to increase the time after which your computer goes to sleep, you need to be aware that delaying the computer from going to sleep can have a negative impact on its Battery Life.
Hence, it is better to stay close to the recommended sleep mode settings, when the computer is running on battery power and change the sleep mode time, only when the computer is plugged-in to a power source.
When the computer is plugged-in, you can increase the time after which it goes to sleep and even prevent the computer from going in to sleep mode and it will have no impact on the battery life of your device.
1. Change Sleep Mode Time Using Settings
If you are like most users, you are likely to prefer using the Settings menu to change the sleep mode time of your computer.
1. Go to Settings > System > Power & Battery.

2. On the next screen, expand Screen, sleep & hibernate time-outs tab and click on the Down Arrow next to Make my device sleep after entry, located under “plugged in” section.
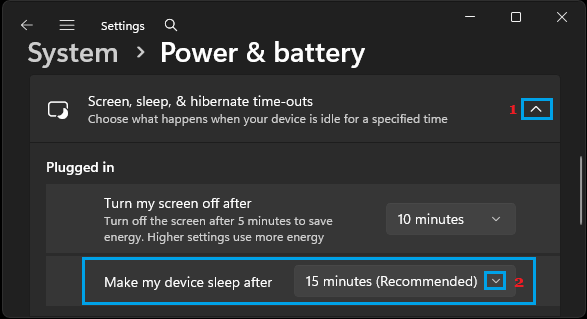
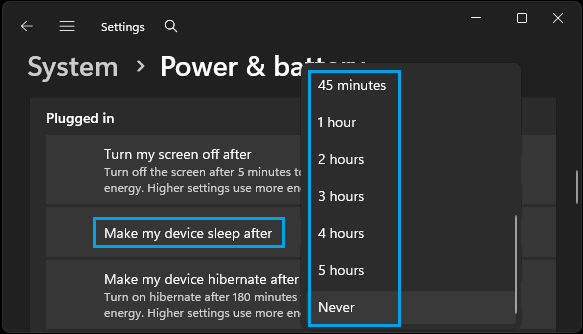
When you click on the Down Arrow, you will be able to select any duration from 1 minute to 5 hours and even prevent the computer from going in to sleep mode by selecting the None option.
3. On the same screen, you can scroll down to “On Battery” section and change the time after which the computer goes to sleep when it is using Battery.

In order to conserve Battery life, it is recommended that you set the Sleep Mode Time for ‘On Battery’ to as low value as possible.
If a longer period is required (to download files), you can set Make my device sleep after to Never and change it back to the recommended plugged-in period of 10 minutes, after the download is completed.
2. Change Sleep Mode Time Using Power Settings
Another way to change the Sleep Mode Time on a Windows computer is by using Advanced Power Settings.
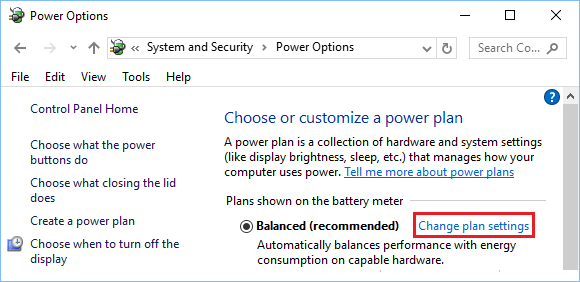
1. Press Win + R keys > Type powercfg.cpl and click on OK.

2. On Power Options screen, click on Change Plan Settings link, located next to the current Power plan setting on your computer.
3. On the next screen, you will find the option to change Sleep Mode time for the computer when it is on Battery and Plugged-in next to Put the computer to sleep entry.
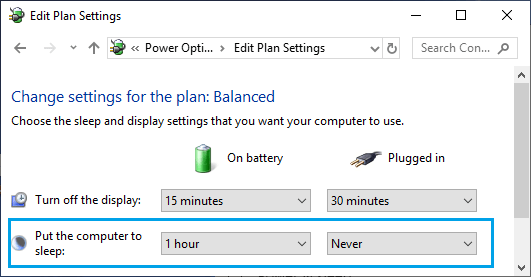
As mentioned above, you can select any duration from 1 minute to 5 hours and even disable Sleep Mode, when the computer is plugged In to a Power Source.
When the computer is using Battery Power, it is better to stay close to the recommended settings and select a longer duration for a temporary period, whenever it is required to complete a download.