As you must have noticed, there is no option to create Admin Accounts in the Home Edition of Windows. Hence, the only way to add a Local Admin Account on a Windows computer is by changing an existing Local Account to Admin.
Once a Local User Account is switched to Admin, it can be used to Install Apps/programs, Delete Apps/Programs, Create New User Accounts, Change or Delete User Accounts and perform other tasks that require Admin rights.
In comparison, Standard User Accounts have limited privileges and access to the computer, which prevents them from installing programs and making changes to global settings on a computer.
Change Local Account to Admin in Windows 11/10
You can find below the steps to change any Local User Account on your computer to Admin Account by using Settings and also be using Control panel.
1. Change Local User Account to Admin Using Settings
Perhaps the easiest way to change an existing Local User Account to Admin is by using the settings menu as available on your computer.
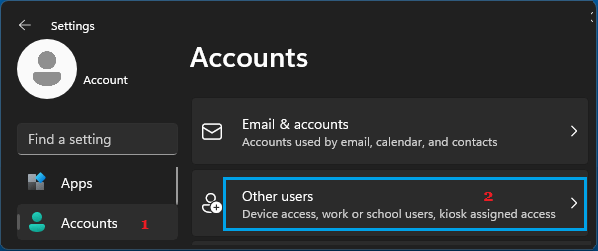
1. Open Settings > select Accounts in the left-pane and click on Other Users in the right pane.
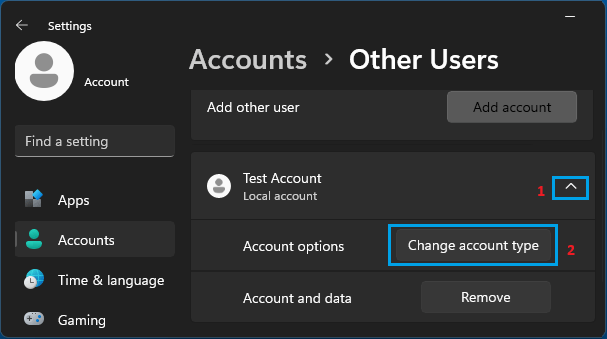
2. On Other Users screen, select the Account that you want to convert to Admin and click on Change account type button.
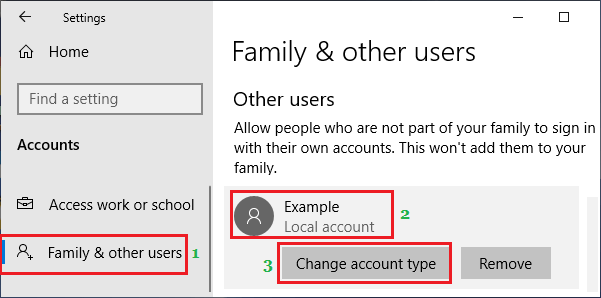
Windows 10: Go Settings > Accounts > Family & Other Users > User Account and click on Change Account Type button.
3. On the next screen, use the Down-Arrow to select the Account type to Administrator.
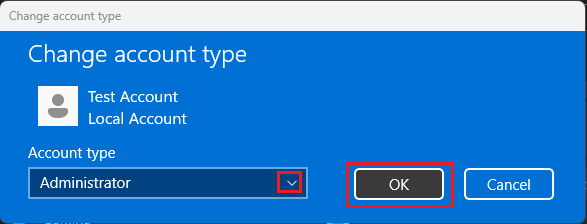
4. Click on OK to save this change in Account type on your computer.
2. Change Local User Account to Admin Using Control Panel
Another easy way to change the User account type on a Windows computer from Local user account to Admin is by using the Control Panel.
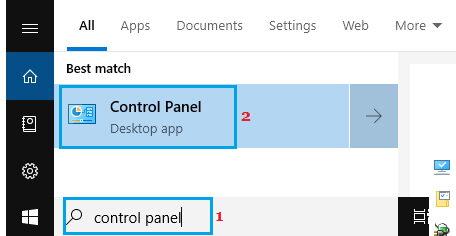
1. Open the Control Panel on your computer.
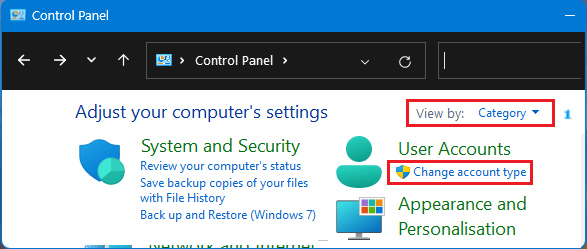
2. On the Control Panel Screen, make sure you are in “Category” view and click on Change Account Type link under “User Accounts” section.
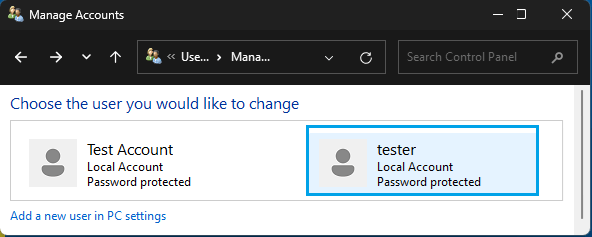
3. On the next screen, click on select the User Account that you would like to change.
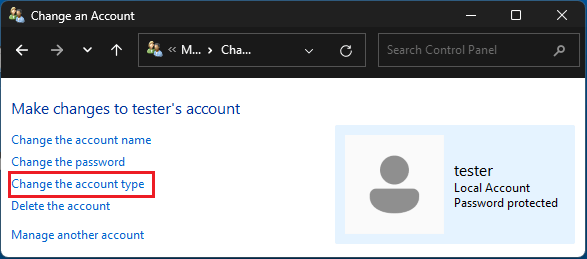
4. On the next screen, click on Change Account Type option in the sidebar menu.
5. On Change Account Type screen, check the little box next to Administrator.
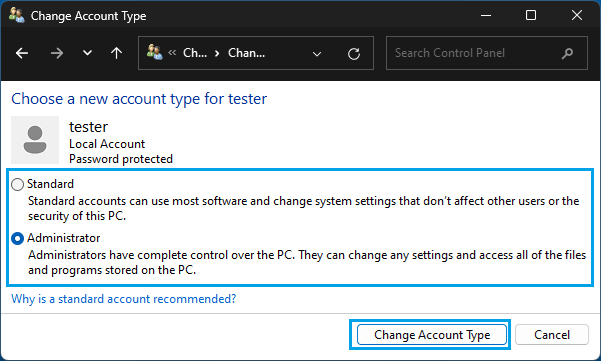
6. Click on Change Account Type button to complete the process of changing the Local User Account Type on your computer to Admin.