You may find the need to delete a User Account from your computer, if it has become corrupted or if you are dealing with unwanted or unused user accounts being present on your computer.
Before going ahead with the steps to delete any User Account on your computer, you need to be aware that deleting a User Account on a Windows computer results in deletion of all the Files that are associated or linked with that particular User Account.
Hence, make sure that you take a good look at all the Files that are associated with the User Account that you want to delete and copy them to another User Account or to a USB Drive (If they are important).
Delete User Accounts In Windows 11/10
The act of adding and deleting User Accounts on a Windows computer can only be performed by an Admin. Hence, make sure that you are logged-in to an Admin Account or logged-in to a Local User Account with Admin privileges.
Once you are logged-in to an Admin Account, you can practically delete any User Account on your computer by using Settings, Command Prompt and Control Panel.
Note: The last method provides the option to save Files to desktop, before deleting the User Account.
1. Delete User Account Using Settings
The easiest way to delete any Local User Account on a Windows computer is by using the Settings App.
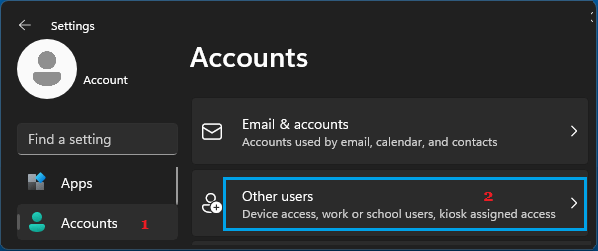
1. Open Settings > click on Accounts in the left-pane. In the right-pane, scroll down and click on Other Users.
2. On the next screen, select the Account that you want to delete and click on the Remove button.

Windows 10: Go to Settings > Accounts > Family and other users > select the User account that you want to delete and click on Remove.
3. On the confirmation pop-up, click on Delete Account and data button to confirm.
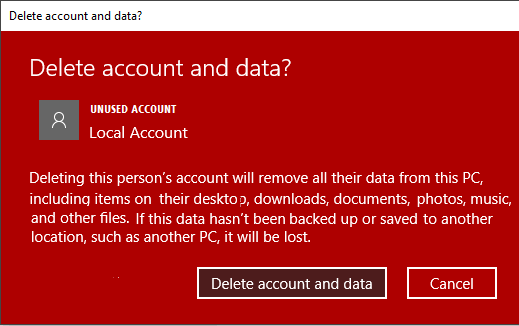
As mentioned above, the User Account will be permanently deleted from the computer, along with all the Files linked to that particular User Account.
2. Delete User Account Using Command Prompt
A quick way to delete User Accounts on a Windows computer is by using the Command Prompt with Admin privileges.
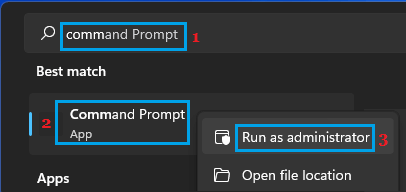
1. Type Command Prompt in the search bar > Right-click on Command Prompt App in the search results and click on Run as Administrator option.
2. On the Command prompt screen, type net user (User Name) /delete and press the Enter key on the keyboard of your computer.
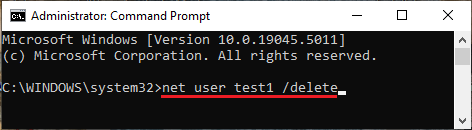
Note: Replace the User Name by the actual name of the User Account that you want to delete.
3. Delete User Account Using Control Panel
When you delete a User Account from the Control Panel, it provides you with the option to save User Account Files to Desktop.
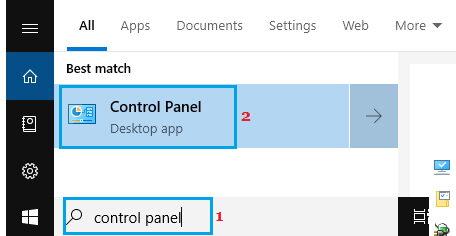
1. Type Control Panel in the search bar and click on Control Panel Desktop App in the search results.
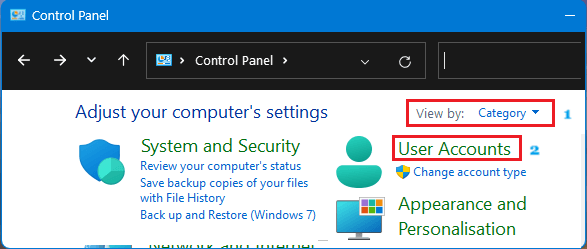
2. On the Control Panel screen, switch to Category view and click on User Accounts.
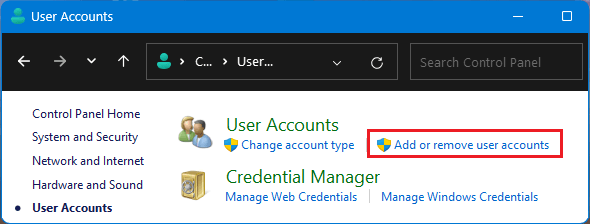
3. On the User Accounts screen, click on Add Remove User Accounts link.
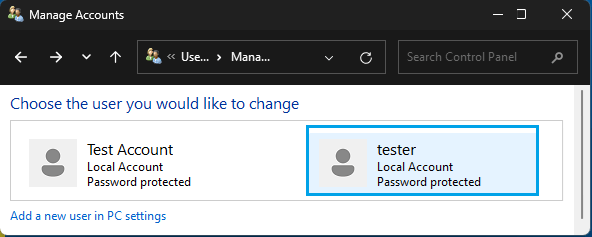
4. On the next screen, select the User Account that you want to delete >.
5. On Change Account screen, click on Delete the Account link.

6. On Delete Account page, click on Keep Files button.
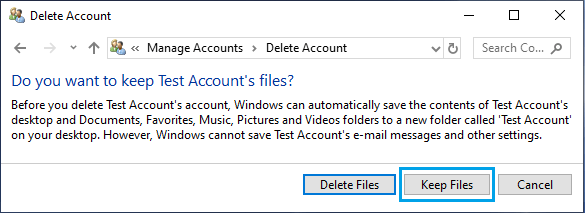
When you select “Keep Files” option, Windows automatically creates a New Folder with the User’s Name on the Desktop and moves all the Files associated with the deleted User Account to this New Folder.