If required, you can disable Automatic Updates on your Windows 11 computer, in order to prevent the possibility of your device becoming incompatible with an update.
In-fact, Microsoft itself provides the option to delay or pause its monthly Quality updates up-to a period of 35 days and provides the option to disable auto-updates in the professional edition of Windows 11.
In general, the most common reason for disabling Auto-updates on a Windows computer is to prevent the possibility of an ongoing work/project being impacted by an early and untested Windows update.
Stop Automatic Updates in Windows 11
If you are concerned about an update causing problems on your device or want to install updates according your own schedule, you can use any of the following methods to stop or disable Automatic Updates on your computer.
1. Pause Updates in Windows 11
As mentioned above, Windows 11 provides the option to Delay or Pause Updates on your computer up to a maximum period of 35 days.
1. Open the Settings Menu on your computer.
2. On the Settings screen, select Windows Update in the left-pane. In the right-pane, click on the down arrow next to Pause Updates and select your desired Pause Period.
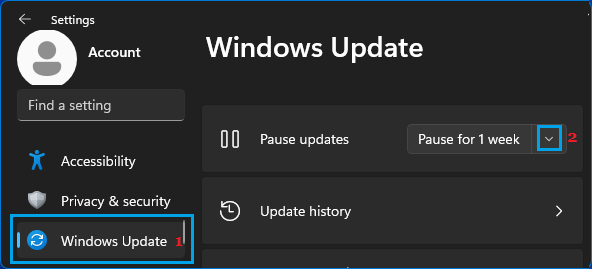
Depending on your requirements, you can set the computer to delay or puase updates for 1 week, 2 weeks, 3 weeks and up-to a maximum period of 5 weeks.
2. Set Windows Updates Over Metered Connection
An easy way to Stop Windows 11 from automatically downloading updates in background is to set the computer to download updates over Metered connection.
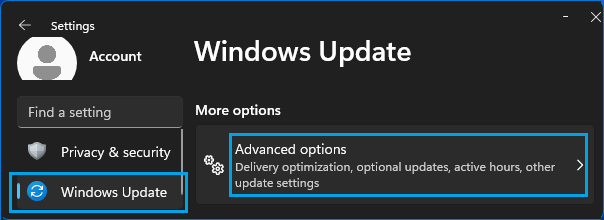
1. Open Settings > select Windows Update in the left-pane. In the right-pane, click on Advanced Options.
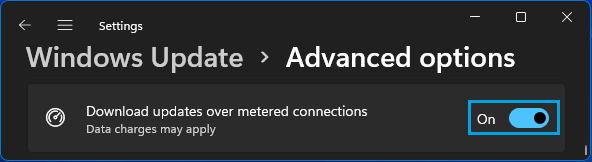
2. On the next screen, move the Slider next to Download Updates Over Metered Connection to ON position.
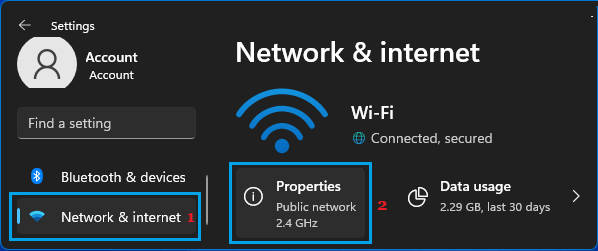
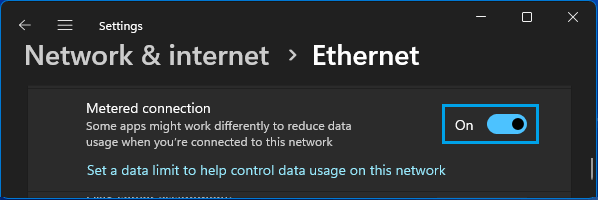
3. After this, go to Settings > Network & Internet and open Properties of the Active Network (Wi-Fi or Ethernet) on your computer.
4. On the next screen, move the toggle next to Metered connection to ON position.
Since, you are not setting any limit on this metered connection, your normal browsing activity should not be impacted. However, Apps that need to refresh their data in the background, won’t be able to do so.
3. Disable Automatic Updates Using Administrative Tools
You can also disable Auto Updates in Windows 11 by disabling Windows Update Service.
1. Right-click on the Start button and click on Run.
2. In Run Command window, type services.msc and click on OK.

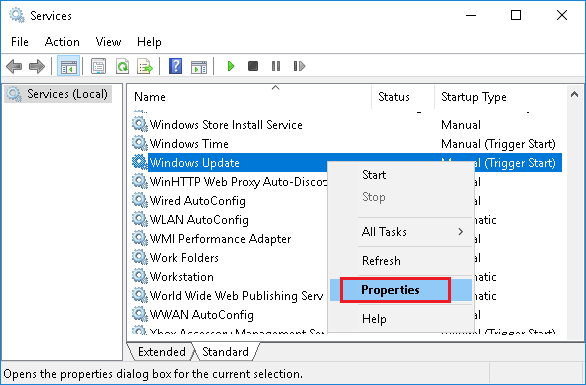
3. On the Services screen, right-click on Windows Update and select Properties in the menu that appears.
4. On Windows Update Properties screen, click on Startup type down-arrow and select Disabled option.
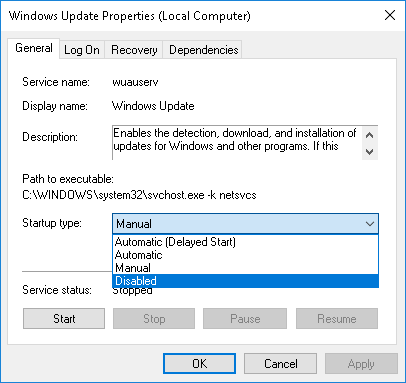
5. Click on Apply and OK to save this change on your computer.
The disadvantage of this method is that it can prevent your computer from being up to date with the latest updates.
Hence, make sure that you periodically check for Updates by going to Settings > Update & Security > Check for Updates.
4. Disable Automatic Updates Using Group Policy Editor
If you are using the Professional Edition of Windows 11, you can disable Auto-updates by using Group Policy Editor.
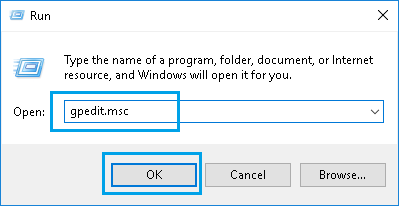
1. Right-click on the Start button and click on Run.
2. In the Run Command window, type gpedit.msc and click on OK.
3. Navigate to Computer Configuration > Administrative Templates > Windows Components > Windows Update > Manage end user experience and double click on Configure Automatic Updates entry.
4. On Configure Automatic Updates screen, select the Disabled option.
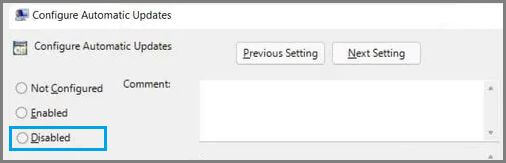
4. Click on Apply & OK to save this setting on your computer.
5. Disable Automatic Updates Using Registry
Before going ahead with this method, it is recommended that you backup Registry files on your computer.
1. Open Run Command > Type regedit and click on OK.
2. On the Registry screen, navigate to HKEY_LOCAL_MACHINE\SOFTWARE\Policies\Microsoft\Windows\WindowsUpdate\AU.
3. Right-click on the blank space in the right-pane and click New > DWORD (32-bit) Value and Name the New DWORD as NoAutoUpdate.
4. Double-click on the newly created key and sets its value to 1 and click on OK.
After this, Windows will stop automatically downloading updates on your computer. However, this does not prevent you from checking for updates and installing them on your computer.