When Google Chrome browser is having problems accessing a website, it is known to come out with error codes, including the notorious “DNS_PROBE_FINISHED_NXDOMAIN” Error.
In a typical case, this particular error is accompanied by “This Website Cannot Be Reached” message, which indicates that the Chrome browser could not reach the requested website due to Domain Name System (DNS) lookup error or failure.
Reason For DNS PROBE FINISHED NXDOMAIN Error
There could be various reasons for “DNS Probe Finished NXDOMAIN error on a Windows computer, ranging from mistyped URL, DNS Servers of your service provider being busy to the browser cache being corrupted and other reasons.
You can find below the troubleshooting steps to fix DNS Probe Finished NXDOMAIN error on a Windows computer.
1. Check Domain
The problem may simply be due to the web browser being asked to look-up a website or webpage that does not exist on the internet.
This usually happens when you misspell the website name or paste incorrect or truncated webpage address in the browser window.
Hence, make sure that you are typing the correct URL Address. If you are pasting URL Address, make sure that you are not pasting a truncated or modified URL address.
2. Clear Chrome Browser Cache
Next, clear the browser cache on your computer to rule out the possibility of this problem being caused due to a cached error page or corrupted browser cache.
For the actual steps to Clear the Browser Cache in Google Chrome, you can refer to this guide: How to Clear Cache & Cookies in Google Chrome.
3. Disable Proxy Servers
Make sure that your computer is set to automatically detect settings and is not using a proxy server to connect to internet.
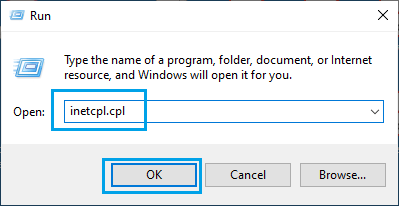
1. Right-click on the Start button and click on Run.
2. In the Run Command window, type inetcpl.cpl and click on OK.
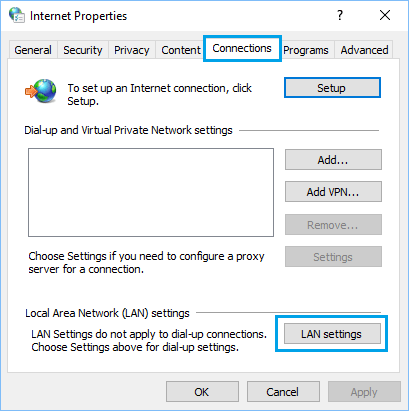
3. On internet Properties screen, switch to Connections tab and click on LAN Settings button.
4. On the next screen, uncheck Use a Proxy server for your LAN option and make sure Automatically detect settings option is selected.
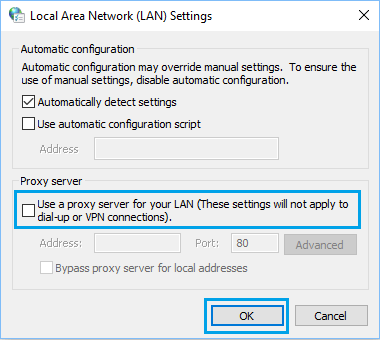
5. Click on OK to save this setting on your computer.
4. Flush DNS Cache
You can Flush the DNS Cache on your computer by using Command prompt.
1. Type CMD in the Search bar > right-click on Command Prompt in the search results and select Run as Administrator option.

2. On Command prompt screen, type ipconfig /flushdns and press the enter key.
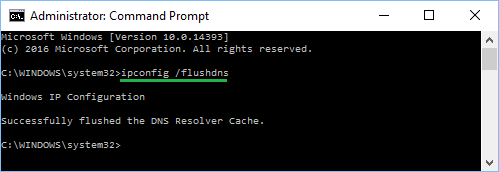
Once the Command is executed, try to open the webpage that you were trying to access.
5. Renew IP Address
Sometimes, the problem is due to the IP address being temporarily blocked.
1. Open Command Prompt As Admin.
2. On Command Prompt screen, type ipconfig /release and press the enter key.

After this command is executed, type ipconfig /renew and press the enter key.
3. Close the Command prompt screen and you should now be able to access the internet.
6. Reset Network Adapter (Winsock Reset)
If the above steps did not help, you may need to Reset the Network Adapter on your computer using the following steps.
1. Open Command Prompt As Admin.
2. On the Command Prompt window, type netsh winsock reset and press the Enter key.

3. Close or Exit the Command prompt screen.
Make sure you Restart the computer, before trying to access the internet.
7. Change DNS Server
As mentioned above, the problem could be due to the DNS servers of your Internet service provider being busy or going through problems.
If you are frequently experiencing connectivity issues, you can consider the option of switching to free public DNS service providers like Google DNS, OpenDNS and others.
You can find the steps to change the DNS server on your computer in this guide: How to Change DNS Server in Windows 11.