As you must have noticed, the Safari browser on iPhone provides a list of “Frequently Visited websites” in addition to websites listed under “Favorites” section on Safari Home Page.
While this feature provides quick access to your most frequently visited websites, it can also reveal your browsing habits to anyone that is able to take a look at your device.
If you are concerned about your privacy; you can delete any Frequently visited website from Safari Home page and also prevent Frequently visited websites from appearing on Safari Home Page.
Note: Unlike Safari Bookmarks, frequently visited websites are device-specific (limited to iPhone) and not carried over to the Safari browser on your iPad or Mac.
1. Delete Frequently Visited Sites on iPhone Safari Browse
You can follow the steps below to delete Icons of frequently visited websites from the Safari browser on your iPhone.
1. Open the Safari browser on your iPhone.
2. Tap and hold on Icon of the frequently visited website that you want to delete and select the Delete option in the menu that appears.
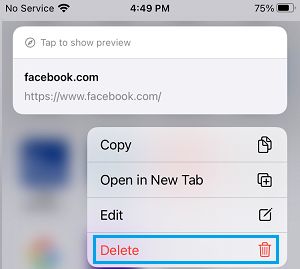
3. The selected website Icon will be removed from the Frequently Visited section.
2. Prevent Frequently Visited Sites from Showing on iPhone
As mentioned above, you can also prevent Frequently Visited Websites from appearing on iPhone.
1. Open the Safari browser on your iPhone.
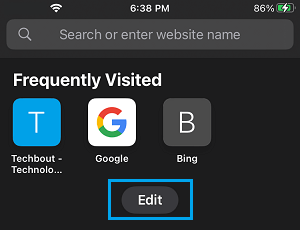
2. On the Safari Home or Start page, tap on the Edit page.
3. On the next screen, move the toggle next to Frequently Visited to OFF position.
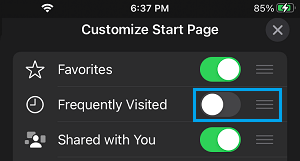
After this, you will no longer find Frequently Visited websites being listed by the Safari browser on your iPhone.
Note: Even if you delete or prevent frequently visited websites from appearing on iPhone, the websites that you visit will be listed in your Safari browsing history.
If required, you can delete this information by clearing Safari history and website data.