While it is easy to follow directions provided by the Maps App on iPhone, adding Compass to Apple Maps can be helpful in training your own sense of direction and natural ability to navigate.
When Compass view is added to Apple Maps, it keeps showing the direction (North, South, East, West) in which your iPhone is pointing by rotating the Map with you, providing you with real-time orientation.
This can be helpful while driving through unfamiliar areas with limited street signs or landmarks and also while you are hiking, camping and travelling cross-country by car.
Add Compass to Apple Maps on iPhone
While the Maps App on iPhone comes with built-in ability to show Compass, this setting is not enabled by default.
Hence, the first step that is required to add compass to the Maps App on iPhone is to manually enable the option to show Compass in Apple Maps.
Once this option is enabled, you will be able to activate the compass in Apple Maps at any time by double-tapping on the Location Arrow and disable compass by using single-tap.
1. Enable Compass in Apple Maps On iPhone
Follow the steps below to Enable the Compass in Apple Maps on iPhone or iPad.
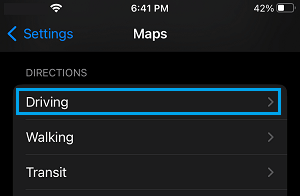
1. Go to Settings > Apps > tap on Maps.
2. On the Maps screen, scroll down to “Directions” section and tap on Driving.
3. On the next screen, move the slider next to Compass to ON position.
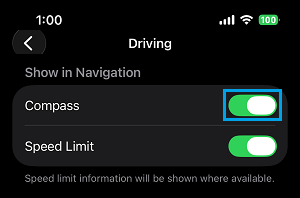
While this step enables the Compass for the Maps App, you still need to follow the next step to Add the Compass to the Maps App.
2. Show Compass in Apple Maps
Once Compass is enabled for Apple Maps, you can show the Compass in Maps by double-tapping on the Direction Icon in Apple Maps.
1. Open the Maps App on your iPhone.
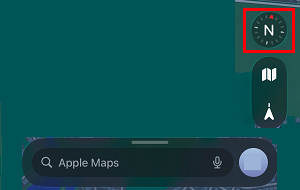
2. Double-tap on Location Arrow icon to activate the Compass in Apple Maps.
![]()
3. Once you tap twice on the Location Arrow, you should see the Compass Icon appearing in Apple Maps.
If required, you can dismiss or remove the Compass from Apple Maps by a single tap on the Location Arrow.
3. Set Compass to Show True North
The Compass App on iPhone can be configured to show both True North and Magnetic North.
True North: Points directions along Earth’s surface towards the Geographic North Pole. Hence, it is also known as “Geodetic North”.
Magnetic North: Points directions towards the Magnetic North Pole, which can be defined as a point in the Northern Hemisphere at which Earth’s Magnetic Field points vertically downwards.
In general, it is recommended to set the Compass App on iPhone to use True North and not Magnetic North.
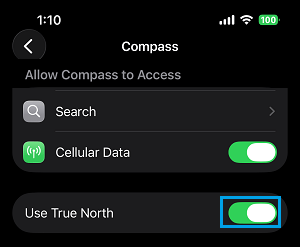
1. Go to Settings > Apps > Compass.
2. On the next screen, move the toggle next to Use True North to ON position.
Although, it is recommended to use True North Setting on iPhone, the GPS on iPhone will be accurate, even if you decide to use Magnetic North.