While most problems & optimizations on a Windows computer can be done using Settings, Control Panel and other tools available on the computer, you will find the need to enter BIOS/UEFI settings in order to Update the Firmware (UEFI), enable security features (TPM 2.0), Change Boot Order or to troubleshoot hardware failures.
Hence, it is important that you understand the steps to enter BIOS; while you are logged-in to the computer, stuck on the login screen and also when the computer is refusing to start up.
Enter UEFI (BIOS) Settings in Windows 11/10
On most Windows computers, you should be able to enter BIOS or UEFI Settings by pressing a designated key on the keyboard, while the computer is still in the process of booting up. The designated key that needs to be pressed during the startup process could be F1, F2, F10, ESC, DEL or any other key as designated by the manufacturer of the computer.
If you miss the opportunity to press the designated key at the right time, you will find the computer quickly heading to the login screen, where you can use the Shift Key Restart method to enter BIOS from the login screen or login to the computer and enter BIOS using the Start menu, Settings menu or Command Prompt.
If your computer is not starting up, you can make use of a Bootable USB drive to enter BIOS, using the last method as provided in this guide.
1. Enter BIOS by Pressing Designated Key
As mentioned above, most computers provide the option to enter BIOS by pressing a designated key, which should be mentioned in the User Manual.
1. Start the Computer by pressing the Power button.
2. As the computer starts, watch the scrolling messages appearing on the screen of your computer. The designated key to enter BIOS will be mentioned in one of the scrolling messages.
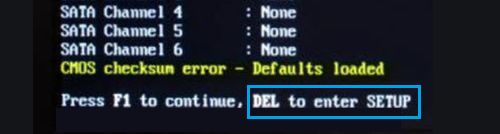
Note: As the computer restarts, you will only have a few seconds to read the scrolling messages. You can restart the computer again, in case you miss the opportunity to read the messages properly.
3. After finding the designated key, shut down the computer.
4. Wait for 30 seconds > press the power button to restart the computer and immediately press the designated key, until you see the BIOS/UEFI settings screen.
Note: Do not hold down the key for long and do not press the key too many times, as this can end up locking the system.
2. Enter BIOS from Login Screen
If you are not yet logged-in to the computer, you can enter BIOS by clicking on the Power Icon located at bottom-right corner of the login screen.
1. Start the computer by pressing the Power Button.
2. At the Login screen, click on the Power icon (bottom-right corner) > Press and hold the Shift Key on the keyboard of your computer and click on the Restart option.

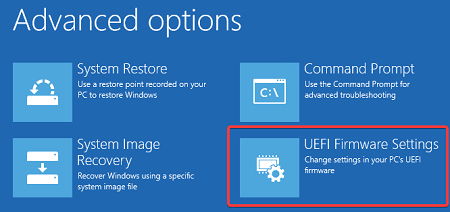
3. From the next screen, navigate to Troubleshoot > Advanced options > UEFI Firmware Settings.
4. On the next screen, click on Restart to enter UEFI Firmware settings on your computer.
Note: If the Power Icon is not visible, click anywhere on the login screen and you will be able to see the Power Icon at bottom-right corner of the screen.
3. Enter BIOS Using Start Menu
If you are logged-in to the computer, you can enter BIOS by going to Advanced Startup Options screen.
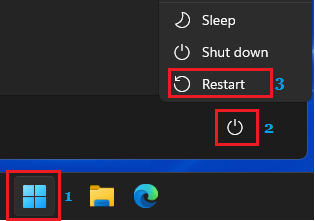
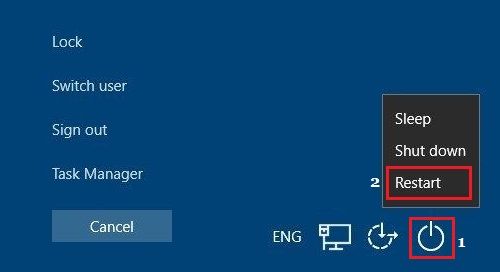
1. Click on Start (1) button > Power Icon (2) > press and hold the Shift key on the keyboard of your computer and click on Restart (3) option.
2. From the next screen, navigate to Troubleshoot > Advanced options > UEFI Firmware Settings.
3. On the next screen, click on Restart to enter UEFI Firmware settings on your computer.
4. Enter BIOS Using Settings
You can enter BIOS by using the Settings menu on your Windows 11/10 computer.
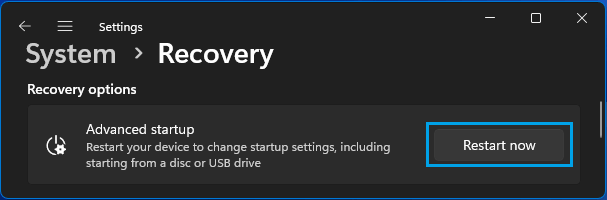
1. Go to Settings > select System in the left-pane. In the right-pane, scroll down and click on the Recovery tab.

2. On the next screen, scroll down and click on Restart now button located in “Advanced Startup” section.
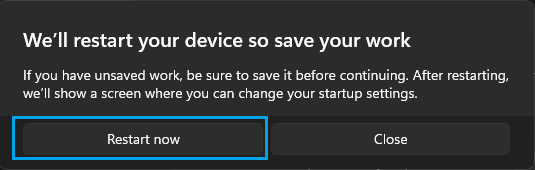
3. On the confirmation pop-up, click on Restart now button.
4. When the computer restarts, navigate to Troubleshoot > Advanced options > UEFI Firmware Settings option.
5. On the next screen, click on Restart to enter UEFI Firmware settings on your computer.
5. Enter BIOS/UEFI Using Keyboard Shortcut
If you are unable to open the Start Menu, you can access BIOS or UEFI Settings on your computer by using Ctrl + Alt + Delete keyboard shortcut.
1. Press Ctrl + Alt + Delete keys on the keyboard of your computer.
2. On the next screen, click on the Power Icon > press and hold the Shift key on the keyboard of your computer and click on the Restart (2) option.
3. Next, click on Troubleshoot > Advanced options > UEFI Firmware Settings.
4. On the next screen, click on Restart to enter UEFI Firmware settings on your computer.
6. Enter BIOS Using Command Prompt
An easy way to enter BIOS is by using the Command Prompt.
1. Type CMD the Search bar > right-click on Command Prompt in the Search results and select Run as Administrator option.

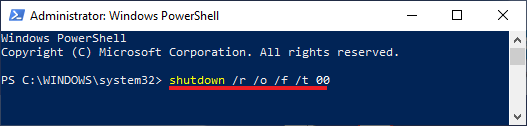
2. On the Command Prompt screen, type shutdown /r /o /f /t 00 and press the Enter key on the keyboard of your computer.
3. After your computer restarts, navigate to Troubleshoot > Advanced options > UEFI Firmware Settings option.
4. On the next screen, click on Restart to enter UEFI Firmware settings on your computer.
7. Enter BIOS Using Automatic Repair
If your computer is not booting up and you do not have a Bootable USB Drive, you can should be able to enter BIOS by forcing the computer to go into recovery mode.
1. Start the computer by pressing its Power button.
2. If the computer is unable to load the operating system, it will start Self Diagnostic Power-On Self-Test (POST).
3. After Power-On Self-Test (POST) is completed, press the Power button to shut down the computer.
4. Repeat steps 1 to 3 two more times.
5. During the third restart, your computer should go into “Windows Recovery Environment” and it will automatically start performing a number of diagnostic tests to fix booting problems.

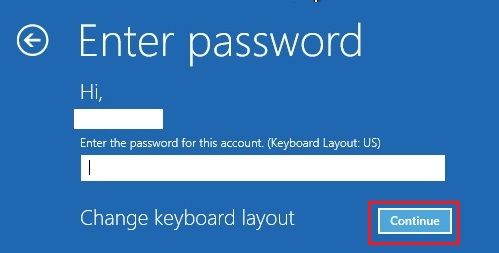
6. When prompted, choose your User Account, enter the Password for your User Account and click on Continue.
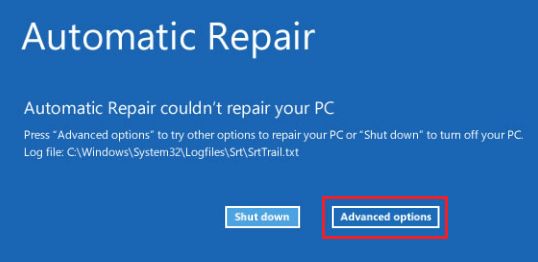
7. After all diagnostic tests are completed, click on Advanced options.
8. On the Advanced options screen, click on UEFI Firmware Settings option.
9. On the next screen, click on Restart to enter UEFI Firmware settings on your computer.
8. Enter BIOS Using Bootable USB Drive
If your computer is not booting up, you can make use of a Bootable USB Drive to enter BIOS.
1. Insert Bootable USB Drive into USB port of your computer and Press the Power button to start the computer.
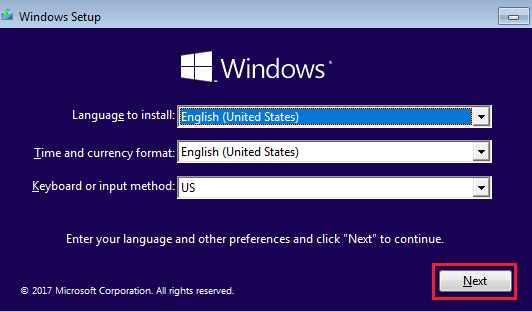
2. Once the computer starts, click the Next button.
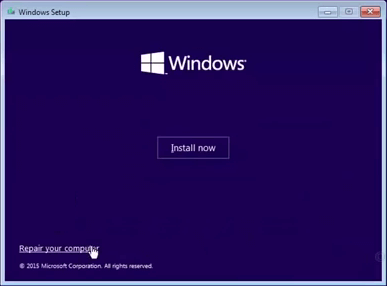
3. On the next screen, click on Repair your computer option, located at the bottom-left corner of your screen.
4. From the next screen, navigate to Troubleshoot > Advanced options > UEFI Firmware Settings option.
5. On the next screen, click on Restart to enter UEFI Firmware settings on your computer.