The problem of Headphones not working in Windows 10 usually occurs after installing updates. You can find below the steps to fix this problem.
Headphones Not Working in Windows 10
If Headphones are not working on your computer, take a look at the bottom-right corner of your screen and see if the Speaker shaped Sound Icon is visible in the taskbar.
![]()
If the Sound Icon is missing, you can follow the steps provided in this guide: How to Restore Missing Volume Icon in Windows 10 Taskbar.
If Sound Icon is visible, click on the Sound Icon and try to increase the volume. If this does not help, move to troubleshooting steps as provided below.
1. Restart the Computer
If you are using wired Headphones, unplug them from the computer.
1. Shut down the computer.
2. Plug the Headphones back into the computer and Restart the computer.
2. Use the Sound Troubleshooter
To start with, try the built-in Audio Troubleshooter as available in Windows 10 to find and fix the problem of Headphones not working on your computer.
1. Open Settings > click on Update & Security Icon.
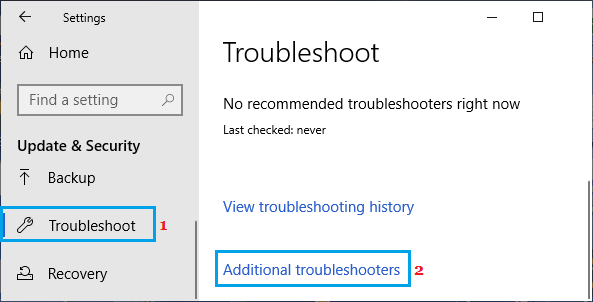
2. On the next screen, select Troubleshoot in the left pane. In the right-pane, scroll down and click on Additional Troubleshooters.
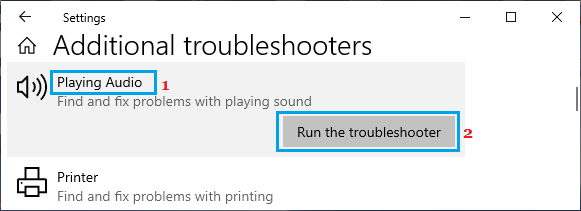
3. On the next screen, click on Playing Audio and then click on Run the Troubleshooter option.
4. Follow the on-screen instructions as the Sound Troubleshooter tries to find and fix problems on your computer.
3. Update Audio/Sound Drivers
1. Right-click on the Start button and click on Device Manager.
2. On Device Manager screen, expand Sound, Video and Game Controllers entry > right-click on the Audio Device and click on Update driver option.
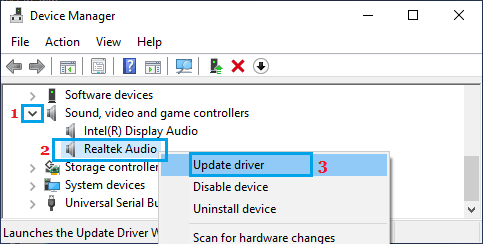
3. On the next screen, click on Search Automatically For Driver Software option and follow the instructions to install driver software.
4. Restart Windows Audio Service
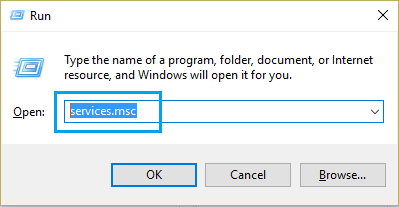
1. Right-click on Start button and click on Run.
2. Type services.msc in the Run Command window and click on OK.
3. On the Services screen, right-click on Windows Audio entry and select the Restart option.
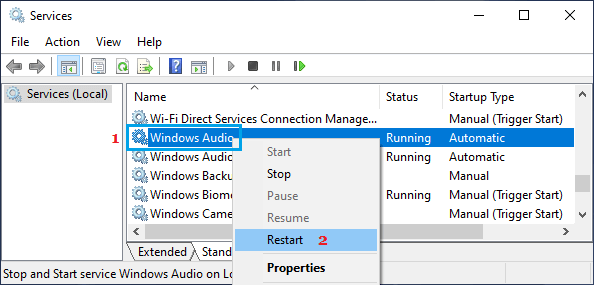
4. Restart the computer and see if Headphones are now working on your computer.
5. Reinstall Audio Drivers
1. Right-click on the Start button and select Device Manager.
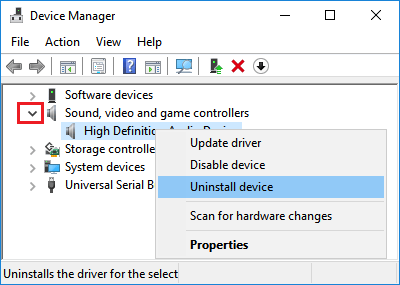
2. On Device Manager screen, expand Sound, Video and Game Controllers entry > right-click on the Audio device and click on Uninstall device option.
3. Next, click on Action tab in top-menu bar and select Scan for hardware changes option in the drop-down menu.
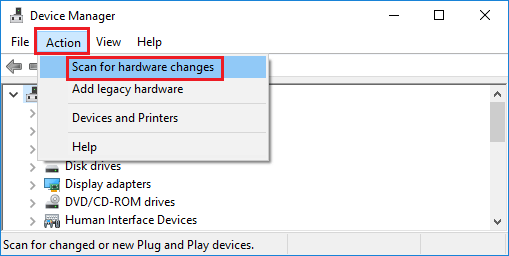
Restart the computer and it should automatically install the right drivers.