In general, “USB Device not recognized” error is usually noticed on a Windows computer while connecting new USB devices. However, it can also appear, when USB devices like Mouse or Keyboard are already plugged into the computer.
There could be various reasons for this issue, ranging from software glitches and outdated drivers to the issue of power supply to USB ports being cut-off by the computer to conserve power.
USB Device Not Recognized in Windows 10/11
If your Windows 11/10 computer is coming up with “USB Device Not Recognized” error, when you plug in a USB Storage Device, USB Mouse or Keyboard, you should be able to fix the problem using the following troubleshooting steps.
1. Disconnect USB Devices and Restart
Disconnect all USB connected devices from the computer (excluding mouse & keyboard) and restart your device.
After the computer restarts, plug back the USB Device into the same USB port which was not recognizing it. If this does not work, try connecting the device to other USB ports on your computer.
2. Unplug Computer from Power Source
The reason for USB Device not recognized error on your computer could be due to minor software glitches.
1. Power OFF the computer.
2. Wait for 60 seconds and Restart the computer.
After the computer restarts, you might be surprised to see the USB Device being recognized by the computer.
3. Update Device Drivers
Your Windows computer should automatically update the firmware for all device drivers. However, this may not always happen, resulting in device drivers becoming outdated.
1. Right-Click on Start button and select Device Manager in the WinX menu.
2. On Device Manager Screen, expand Universal Serial Bus Controllers entry, right-click on the Unknown device and click on Properties.

3. On the next screen, switch to Driver tab and click on Update Driver button.

4. On the next screen, select Search Automatically for updated driver software option and wait for Window to Search and Install the required driver.
4. Check for Updates
See if an Update is available for your computer. If an update is available, Windows will also install the latest available drivers for your computer.
1. Go to Settings > Updates & Security.
2. On the next screen, select Windows Update in the left-pane and click on Check for Updates button in the right-pane.

3. Allow Windows to check for available updates and install them on your computer.
5. Disable USB Selective Suspend Setting
By default, Windows computer is set to conserve power by suspending power supply to external USB devices, whenever they are inactive.
However, this power saving setting can sometimes cause problems like Error Code 43 and USB Device Not Recognized Error on a Windows computer.
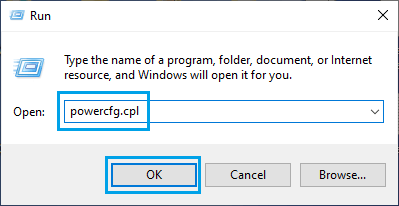
1. Right-click on the Start button and click on Run.
2. In the Run Command window, type powercfg.cpl and click on OK.
3. On Power Options screen, click on Change Plan Settings link located next to the current Power Plan.

4. On the next screen, select Change Advanced Power Settings link.

5. On Power Options screen, click on USB Settings > USB selective suspend setting and select the disabled option for “Plugged In” and also for “On Battery” (If you are using a Laptop).

6. Click on OK to save these Advanced Power Setting on your computer.
6. Change Power Management Setting for USB Root Hub
1. Right-click on the Start button and select Device Manager in WinX menu.
2. On device Manager Screen, expand Universal Serial Bus Controllers entry, right-click on USB Root Hub and click on Properties.

3. On USB Root HUB Properties screen, switch to Power Management tab and uncheck Allow the computer to turn off this device to save power option and click on OK.

4. If there are multiple USB Root Hubs, you need to repeat the above steps for them as well.
7. Uninstall Faulty Device Drivers
1. Right-click on Start button and click on Device Manager in WinX menu.
2. Right-click on USB Controllers with an exclamation mark and select the Uninstall option in the contextual menu.

Repeat the above step for other USB Controllers with exclamation marks and Restart the computer. Once the computer restarts, Windows should automatically load the right drivers as required for your computer.