While Apple’s free iMessage service has a reputation of being reliable, it is not uncommon to find users complaining about iMessage not working on iPhone.
If you are new to iPhone or switched to a new device, the problem of iMessage not working is most likely due to Apple’s iMessage service not being properly setup on your device.
If iMessage was previously working properly on your iPhone, but has now suddenly stopped working, the problem could be due to your device not being connected to Internet (Wi-Fi or Mobile data) and other reasons.
iMessage Not Working on iPhone
While iPhone can send SMS Text Messages using the network of your mobile service provider, it can send iMessages only if it is connected to the Internet.
Hence, before going ahead with the troubleshooting steps make sure that your iPhone can connect to internet using Wi-Fi, if you are using mobile data, make sure that the network strength is good enough.
1. Enable/Disable iMessage
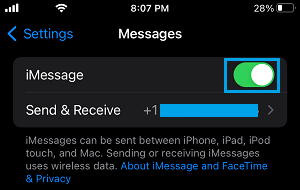
Start by enabling/disabling the iMessage service on your iPhone to rule out the possibility of the problem being caused due to a glitch in the Messages App or Apple’s iMessage service.
1. Go to Settings > Messages > disable iMessage on your iPhone.
2. Wait for 30 seconds and enable iMessage on your iPhone.
Note: If your iPhone fails to activate iMessage and comes up with an error message, you can refer to this guide: Fix: iMessage Waiting for Activation Error on iPhone.
2. Check iMessage Server Status
As mentioned above, the problem could be due to Apple’s iMessage service being temporarily unavailable.
You can confirm this be going to Apple’s System Status page and taking a look at iMessage entry.

If there is a problem, you will see an error message next to iMessage entry and the dot next to iMessage will be Red.
3. Check iMessage Settings
Apple’s iMessage service makes use of your Apple ID to send iMessages. Hence, make sure that both your phone number and Apple ID are associted with iMessage.
1. Go to Settings > Messages > tap on Send & Receive .
2. On the next screen, make sure that both your Phone Number and Apple ID are listed.
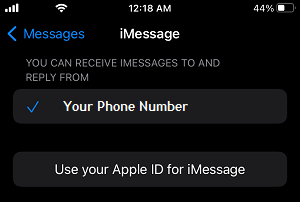
If your Apple ID is not listed, tap on Use your Apple ID for iMessage option and sign-in to your Apple ID.
4. Disable Wi-Fi Calling
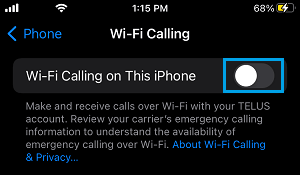
The Wi-Fi Calling feature on iPhone can sometimes lead to connectivity issues and prevent iMessages being sent from your device.
1. Go to Settings > Cellular > Wi-Fi Calling.
2. On the next screen, disable Wi-Fi Calling by moving the toggle to OFF position
After disabling Wi-Fi calling, see if you are able to send an iMessage from your iPhone.
5. Sign Out of Apple ID and Sign Back In
In certain cases, the problem is due to your Apple ID not being recognized by iCloud.
1. Open Settings and tap on your Apple ID Name.
2. On the next screen, scroll all the way down and tap on the Sign-out option.
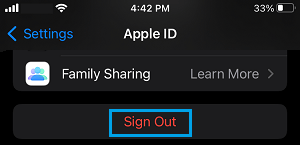
3. Wait for 30 seconds > Sign-in back into Apple ID by tapping on Sign in to your iPhone option.
6. Delete Old Messages
Users have reported fixing the problem of iMessage not working on their iPhone by deleting the Last iMessage received prior to start of the problem.
Others have reported fixing the problem by deleting the entire iMessage thread and starting a New iMessage thread.
Hence, delete an unwanted or old Message from your iPhone and see if this helps in fixing the issue.
7. Reset Network Settings
If above steps did not help, you can try to Reset Network Settings on your iPhone and see if this helps in fixing the problem.
1. Go to Settings > General > Transfer or Reset iPhone > Reset.
2. On the pop-up, select Reset Network Settings option.
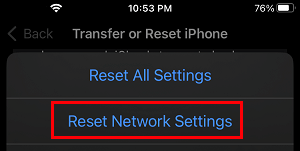
3. On the confirmation pop-up, select Reset Network Settings to confirm.
After iPhone restarts, join your Wi-Fi Network and see if iMessages are now working properly on your iPhone.