If your iPhone is coming up with “Waiting for Activation” or “An error occurred during activation” message, it is likely that you are trying to activate and use Apple’s free iMessage service.
While this error message usually appears while trying to activate iMessage and FaceTime, it is also known to appear after switching to New Phone Number, New Service Provider and also when iPhone is located outside the range of the mobile service providers network.
iMessage Waiting for Activation Error
In general, the most common reason for iMessage activation errors on iPhone is due to poor network connectivity, incorrect iMessage settings and temporary problems with Apple’s iMessage service.
In rare cases, the problem could also be due to Apple ID not being recognized by iCloud or Apple ID being blocked by Apple due to security reasons.
Luckily in most cases, this particular error message and iMessage related problems in general can be fixed by using the following steps.
1. Add Credit to Your Phone Plan
If you are trying to activate iMessage for the first time or trying to use iMessage after switching to a new phone number, make sure that there is sufficient balance available in your account to receive paid SMS text messages.
If you are on limited plan, make sure that you are still within the limits of your mobile plan and your account still has the balance to send and receive SMS Messages.
2. Enable/Disable Airplane Mode
You can quickly reset Wi-Fi and Cellular networks on iPhone by enabling Airplane mode and disabling it after 30 seconds.
1. Open Settings > enable Airplane Mode by moving the toggle to ON position.
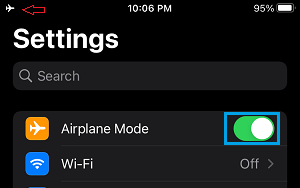
2. Wait for 30 seconds > Disable Airplane Mode by moving the toggle to OFF position.
3. After this, go to Settings > Messages and see if your iPhone is still coming up with ‘Waiting for Activation’ error message.
3. Check iMessage Server Status
The problem could be due to Apple’s iMessage service being down or going through problems. To confirm, visit Apple’s System Status page and take a look at iMessage entry.

If there is a problem, you will see an error message next to iMessage entry and the dot next to iMessage will be Red.
4. Check iMessage Settings
As mentioned above, the problem could be due to incorrect iMessage settings.
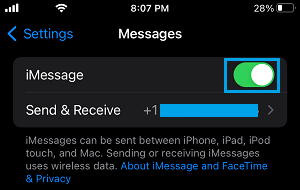
1. Go to Settings > Apps > Messages.
2. On the Messages screen, make sure iMessage is enabled and tap on Send & Receive .
3. On the next screen, make sure your phone number Phone Number is listed with a check mark.
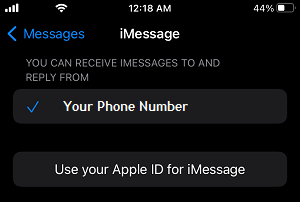
If there is no check mark, tap on your Phone Number to activate iMessage for your Phone Number.
5. Use Apple ID for iMessage
While iPhone can send and receive SMS text messages using your phone number, it makes use of Apple ID to send iMessages to Apple devices.
1. Go to Settings > Apps > Messages > Send & Receive.
2. On the next screen, tap on Use Your Apple ID for iMessage.
3. Follow the instructions to add your Apple ID to iMessage.
6. Install Updates
The problem could be due to an iOS update waiting to be installed on your iPhone.
1. Go to Settings > General > Software Update.
2. Allow iPhone to search for updates > tap on Download to Install updates (if available).
7. Sign Out of Apple ID and Sign Back In
The problem could be due to your Apple ID not being recognized by iCloud.
1. Open Settings > tap on your Apple ID Name.
2. On Apple-ID screen, scroll all the way down and select the Sign-out option.
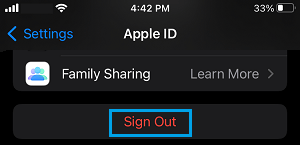
3. On the pop-up, enter your Apple ID Password and follow the instructions to sign-out.
Wait for 30 seconds and sign-in back into Apple ID by tapping on Sign in to your iPhone option.
8. Check Date and Time
Having incorrect Time & Date Settings can have an impact on iMessage and other Apple Services.
1. Go to Settings > General > Date & Time.
2. On the next screen, disable Set Automatically option and make sure iPhone is displaying the correct Date, Time and Time Zone City.
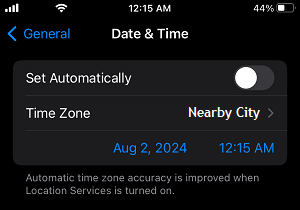
If required, correct the Date, Time or Time Zone as required by tapping on Date, Time and Time Zone entries.
Note: The recommended option is to Enable Set Automatically option and allow iPhone to get the correct Date and Time.
9. Wait for 24 Hours
According to Apple it can take up to 24 hours to activate iMessage and FaceTime. If the issue continues beyond 24 hours, Apple recommends the following steps.
- Make sure the latest version of iOS is installed on your iPhone (See above).
- Contact your carrier (if you are not receiving SMS messages).
- Contact Apple Support.