The iCloud Backup feature on iPhone provides users the option to automatically backup the data on their devices to Apple’s iCloud Servers.
Once iCloud Backups are setup, your iPhone should be regularly backing up its data to iCloud, whenever it is plugged in for charging and connected to a Wi-Fi Network.
In addition to automated iCloud Backups, you can initiate a manual backup of your device to iCloud at any time on your iPhone.
What to Do If iPhone Can’t Backup to iCloud?
If your iPhone is not backing up its data to iCloud, the problem could be due to Network connectivity issues, Apple ID not being recognized by iCloud or simply due to lack of storage space in your iCloud Account.
In most cases, the problem of iPhone not backing up its data to iCloud can be fixed by using the following troubleshooting steps.
1. Check iCloud Backup Settings
If automated iCloud backups are not working, the first step is to make sure that your iPhone is set to automatically backup its data to iCloud.
1. Open Settings and tap on your Apple ID Name.
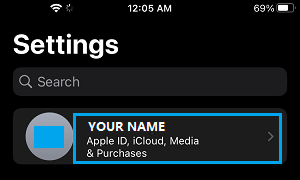
2. From the Apple ID screen > go to iCloud > iCloud Backup > make sure the toggle next to Backup This iPhone is set to ON position.
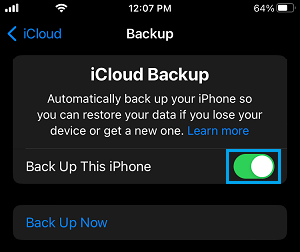
Note: If the Battery life on your device is about 60%, you can manually backup iPhone to iCloud by tapping on Backup Now button.
2. Disable Low Power Mode
iPhone won’t be backing up to iCloud, if your device is in Low Power Mode. The solution in this case is to connect your device for charging.
If you have manually enabled Low Power Mode, disable low Power Mode by going to Settings > Battery and moving the Low Power Mode slider to OFF position.
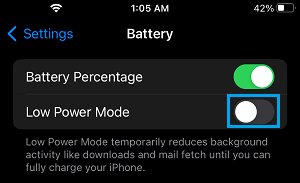
Now, you can expect iPhone to backup its data to iCloud, provided it is connected to a good Wi-Fi Network.
3. Check iCloud Storage Space
The most common reason for iPhone not backing up to iCloud is due to lack of iCloud Storage Space.
1. Go to Settings > Apple ID > tap on iCloud.
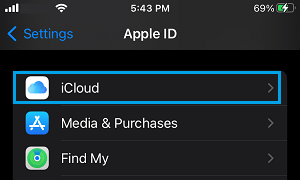
2. On the next screen, you will be able to see the amount of storage space remaining in your iCloud Account.
If you do not have enough iCloud Storage (less than 2 GB), you need to make efforts to free up iCloud storage space.
The other option is to buy additional iCloud Storage Space by tapping on Manage Storage > Change Storage Plan and selecting a Storage Plan that suits your requirements.
4. Sign-Out and Sign-In to Apple ID
Sometimes, the problem is due to your Apple ID not being recognized by iCloud and other iCloud glitches.
1. Go to Settings > tap on your Apple ID.
2. On the next screen, scroll down and tap on Sign Out.
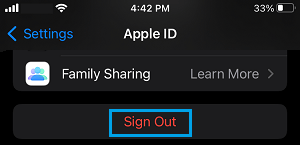
3. When prompted, enter your Apple ID password and tap on Turn OFF.
4. On the next pop-up, you can tap on the Sign Out option.
Note: You won’t be losing data, if you Sign Out without keeping a copy of data on iPhone. All the data will be downloaded back to iPhone, once you sign-in back into your Apple ID.
5. After 60 seconds, Sign-in back into your device by going to Settings and tapping on Sign in to your iPhone option.
After signing-in, see if you can make a Manually Backup iPhone to iCloud Backup by using steps provided below in the next steps.
5. Manually Backup iPhone to iCloud
Make sure your iPhone is connected Wi-Fi, it is sufficiently charged (above 50%) and follow the steps below to initiate a manual backup of iPhone.
1. Go to Settings > Apple ID > iCloud > scroll down and tap on iCloud Backup.
2. On the next screen, move the toggle next to Backup This Phone to ON position and tap on Back Up Now

3. Patiently wait for the Backup process to be completed.