Compared to iPhone, the problem of Apple’s messaging service going through problems and iMessage not working is more common on a MacBook.
There could be various reasons for this issue, ranging from incorrect iMessage settings on Mac to Apple ID not being recognized by iCloud and other reasons.
iMessage Not Working on Mac
If you are unable to send iMessages from your MacBook, you can find below the steps to fix the problem of iMessage not working on Mac.
1. Check if the Recipient is Using Apple Device
The Messaging App on your iPhone makes use of Apple’s cloud servers to send iMessages to Apple device users and the mobile network of your service provider to send SMS Text messages to Android phone users.
Hence, you won’t be able to send an iMessage from Mac, if your recipient is not using an Apple device and your device is not connected to mobile network.
2. Force Quit Messages App
You might be able to fix the problem by force quitting the Messages App.
1. Open Messages App > click on Messages tab in top-menu bar and select Quit Messages option in the drop-down menu.

2. After 30 seconds, relaunch the Messages App and see if the problem is now fixed.
3. Check Your Apple ID
Make sure that you are signed-in to iMessage Apple ID that is linked to your iMessage Account on iPhone.
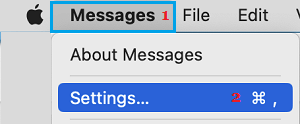
1. Open Messages App > click on Messages tab in top-menu bar and select Settings in the drop-down menu.

2. On the next screen, switch to iMessage tab and make sure that you are signed-in to iMessage with the correct Apple ID.

If you are not using the right Apple ID, Sign out of iMessage and Sign-in back using the Apple ID that is linked to your iMessage Account.
4. Check If iMessage Service is Down
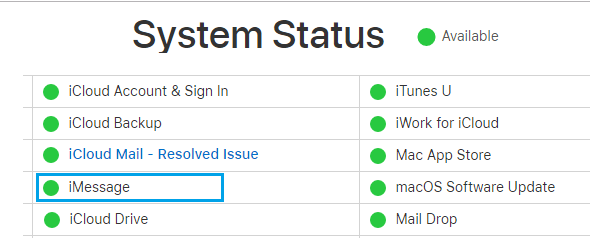
Apple servers can become temporarily unavailable and cause iMessage problems. To confirm, visit Apple’s System Status page and take a look at iMessage entry.

If there is a problem, you will see an error message next to iMessage entry and the dot next to iMessage will be Red.
5. Install Updates
Make sure that your Mac is up-to-date with the latest macOS and App Updates.
1. Click on Apple Logo in top-menu bar and select About This Mac option.

2. On the next screen, click on Software Update and follow the instructions to install Updates (if available).
6. Check Time & Date Setting
The problem might be due to incorrect Time & Date settings on your Mac.
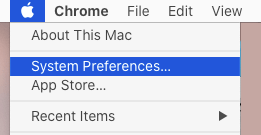
1. Click on Apple icon in top-menu bar and select System Preferences in the drop-down menu.

2. On System Preferences screen, switch to Date & Time tab and make that the option to Set Date and Time Automatically is selected.

3. Also, make sure that your Mac is showing the correct Time & Date.
After this, restart the Messages App and see if you are able to send iMessages from your device.
7. Sign Out of iMessage on Mac
Sometimes, the problem is due to your Apple ID not being reconized by Apple’s iCloud service.
1. Open Messages App > click on Messages tab in top-menu bar and select Preferences in the drop-down menu.

2. On the next screen, switch to iMessage tab and click on the Sign out button.

After you are signed out, wait for 30 seconds > Sign back into iMessage and see if it is now working properly on your device.
8. Enable iCloud Messages on Mac
While you can get iMessages on Mac without enabling iCloud Messages, enabling “Messages in iCloud” option ensures that all your received, sent and deleted messages are automatically updated across all your devices.
1. Open Messages App > click on Messages tab in top-menu bar and select Preferences in the drop-down menu.

2. On the next screen, switch to iMessage tab and select Enable Messages in iCloud option.

3. After this, relaunch the Messages App and you should find missing iMessages appearing on your Mac.
9. Unlock Keychain Access
Users have reported fixing the problem by unlocking and locking Keychain Access.
1. Open the Finder on your Mac.
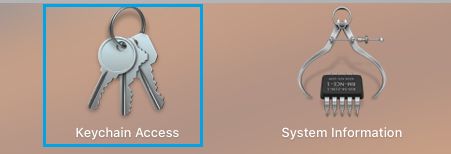
2. From the Finder screen, go to Applications > Utilities and double-click on Keychain Access.

3. Next, click on the File tab in the top-menu bar and select Unlock Keychain Access > Enter Admin Password and click on OK.
After unlocking Keychain Access, open Messages App and try to send the iMessage again.