If you are trying to send a message from your iPhone and it is coming up with “Message Blocking is active” error, you can find below the steps to fix this problem.
Message Blocking is Active Error on iPhone
While the Messages App works flawlessly most of the times, it can sometimes prevent you from sending a message and come up with “Unable to send a message – message blocking is active” error message.
Going by wordings of the error message (Message blocking is active), the problem appears to be related to the phone number of your Contact being blocked on your device.
If this is not the case, the problem could be due to iPhone losing contact with the Carriers network, incorrect settings in the Messages App and other reasons.
1. Make Sure the Phone Number is Correct
As mentioned above, the problem could be due to phone number of the person that you are trying to send the text or iMessage to being incorrect.
This can happen, while trying to send a message to someone who is not listed on your Contacts list and also if an incorrect phone number has been entered in the address book.
Hence, check the phone number of the person that you are trying to send the message to and make sure it is correct.
2. Check Network Strength
Take a look at top-left corner of the screen and make sure that your iPhone is indicating a good network strength.
![]()
Move to the next troubleshooting steps, if the reception is good enough and you are still not able to send messages from your iPhone.
3. Turn OFF iMessage and Turn It Back ON
If the problem is occurring while trying to send an iMessage to Apple device users, switch OFF iMessage and switching it back ON again.
1. Go to Settings > Messages > move the toggle next to iMessage to OFF position.
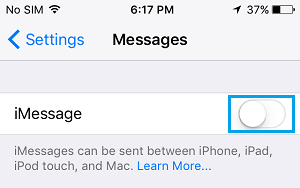
2. Wait for 30 seconds and move the toggle next to iMessage to ON position.
4. Check Your Call Block List
As mentioned above, the problem could be due to the Contact’s phone number being accidentally blocked on your device.
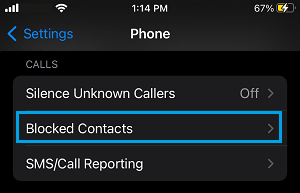
1. Go to Settings > Phone > scroll down and tap on Blocked Contacts. On the Blocked Screen, you will be able to see the list of all blocked numbers.
2. If the Contact appears in the block list, tap on the Edit option located at top-right corner.
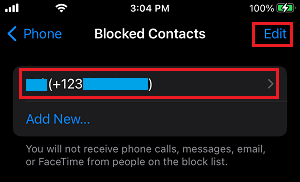
3. Next, tap on the minus sign (–) Icon, located next to the Contact and tap on Unblock button.
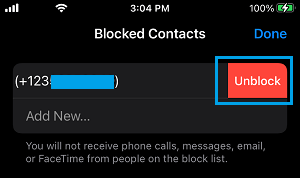
After the Phone Number is removed from the Block List, you should be able to send Message to this Contact.
5. Remove & Reinsert SIM Card Tray
Eject the SIM Card try on your iPhone > Wait for 30 seconds and Insert the SIM tray back into your iPhone.
Ejecting and reinserting the SIM Card from iPhone gives it a fresh start, allowing it to reconnect to the network of your wireless service provider.
After this, try to send the Message again and see if you are still getting the same error.
6. Check Send & Receive Settings
1. Go to Settings > Messages > Send & Receive.
2. On the next screen, make sure both your Apple ID and Phone Number are listed with check marks.
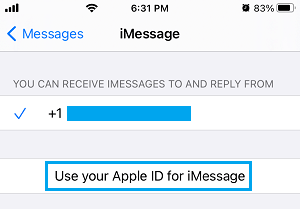
3. If there is no check mark, tap on your Phone Number to activate iMessage for your Phone Number.
7. Sign Out of iMessage and Sign Back In
1. Go to Settings > Messages > Send & Receive.
2. On the next screen, scroll down and tap on your Apple ID.
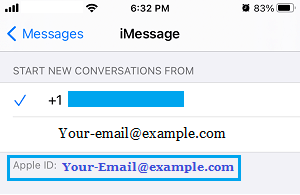
3. On the pop-up, select the Sign Out option.
4. After 30 seconds, sign back into iMessage using your Apple ID.
8. Install Updates
Make sure that your iPhone is up-to-date with the latest version of iOS and carrier updates.
1. Go to Settings > General > Software Update.
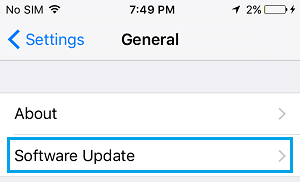
2. On the next screen, tap on Download to Install updates on your iPhone (if available).
9. Reset Network Settings
Note down the Password for your WiFi Network and follow the steps to Reset Network Settings on your iPhone to Factory Default Settings.
1. Go to Settings > General > Transfer or Reset iPhone > Reset.
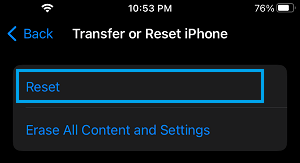
2. On the pop-up, select Reset Network Settings option.
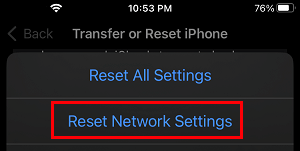
3. On the next pop-up, tap on Reset Network Settings to confirm.
After the Reset process is completed, your iPhone will restart, after which you should be able to send the Message from your iPhone.