Windows operating system makes it really easy to see which Apps have access to the Webcam on your computer and also provides the option prevent specific Apps from accessing the Webcam.
However, you need to be aware that traditional desktop programs can access the webcam in multiple ways and do not necessarily appear in the list of Apps having access to webcam.
Also, Remote Access Tools (RATs) used by hackers and other types of malware can avoid detection by using webcam at a lower level and in different ways.
Prevent Apps from Accessing Webcam in Windows 10
You can find below the steps to prevent All Apps and also selected individual apps from accessing the webcam on your computer.
1. Prevent All Apps from Accessing Webcam in Windows 10
If the computer is being used by a child, you may want to prevent all Apps from accessing the webcam.
1. Go to Settings > Privacy.
2. Select Camera in the left pane. In the right-pane, toggle OFF the option for Allow apps to access your camera.
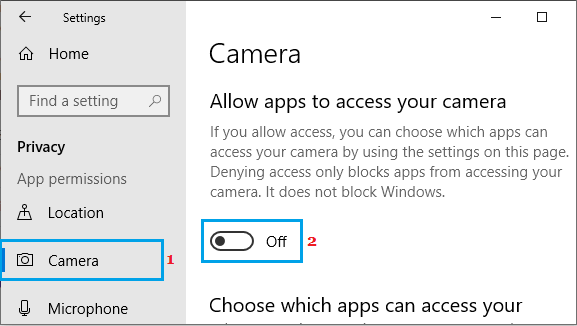
This will prevent all the Apps from accessing the webcam on your computer.
2. Prevent Specific Apps from Accessing Webcam in Windows 10
Follow the steps below to prevent selected or specific Apps from accessing webcam in Windows 10.
1. Go to Settings > Privacy.
2. Select Camera in the left pane. In the right-pane, scroll down to “Choose which Apps can access your camera” section.
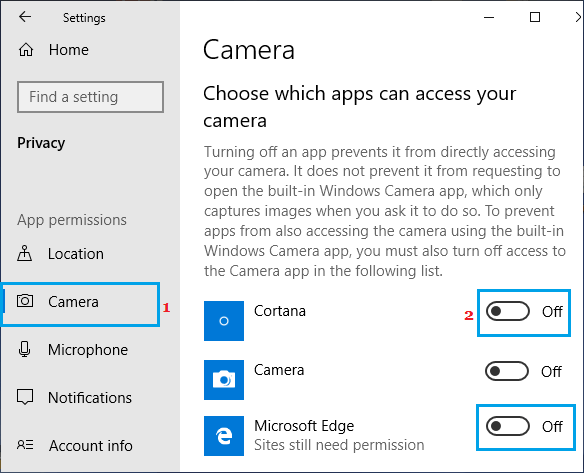
3. Under this section, you can prevent any App from accessing the webcam on your computer by moving the toggle next to the App to OFF position.
3. Prevent Desktop Programs from Accessing Webcam in Windows 10
The only way to prevent unknown Desktop Programs and Remote Access Tools (RATs) from accessing the webcam is to disable the webcam on your computer.
1. Right-click on the Start button and click on Device Manager.
2. On Device Manager screen, expand the entry for Cameras (or Imaging Devices) > right-click on Integrated Webcam and click on Disable option.

3. On the confirmation pop-up, click on Yes to confirm and restart your computer to implement this change.
If required, you can enable the integrated Webcam on your Computer at any time by using right-clicking on the Webcam and this time selecting the Enable option.
4. Hardware Solution to Disable Webcam in Windows 10
If you want to play it safe, you can simply cover the webcam with a sticker or use Webcam Covers as available on Amazon.
In case of a Desktop computer, you can simply unplug the attached webcam to totally prevent the possibility of the webcam being used by Remote Access tools (RATs).