As you must be aware, you can convert any Excel File or Spreadsheet to PDF Format by using both “Save As PDF” and “Print to PDF” options as available in Microsoft Excel.
Once, the Excel File is converted to PDF Format, it can be opened and viewed on any web browser and on any device (computer & phone), without the need to install Microsoft Excel.
In general, the reason for converting Excel Files to PDF Format in an office or business related setting is to submit the file electronically to clients.
Difference Between Save As PDF And Print to PDF in Excel
While both “Print to PDF” and “Save As PDF” can be used to convert Microsoft Excel File to PDF format, the end product produced by these two methods are different.
When you use “Print to PDF” function, the resulting PDF document will be stripped of all its Metadata (Links, Bookmarks etc.) and it will only contain information as available on an actual paper printed document.
When you use “Save As PDF” function, the resulting PDF File will contain Metadata, Links, Bookmarks and almost the same information as available in the original document.
1. How to Print to PDF in Microsoft Excel
You can follow the steps below to Print any Microsoft Excel file to PDF format on a Windows computer.
1. Open the Excel File that you want to Print to PDF.
2. Once the File is open, click on the File tab located in top-menu bar and this will bring up the File Menu.

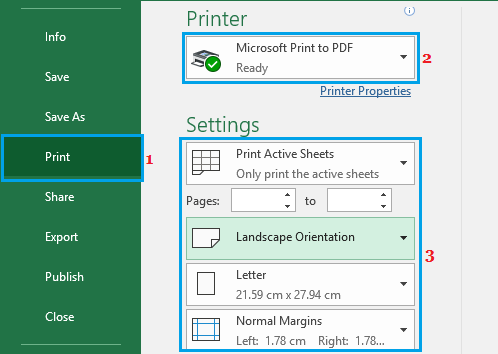
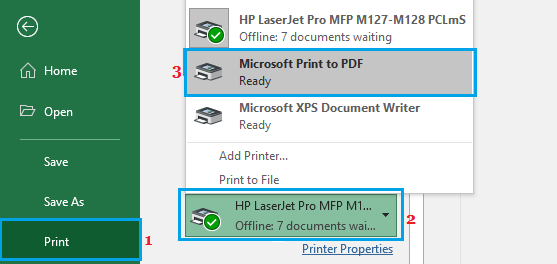
3. In the File Menu, click on Print in the left pane and make sure Microsoft Print to PDF is available in the right-pane. If available, use the Settings section to select page size, orientation and margins as required.
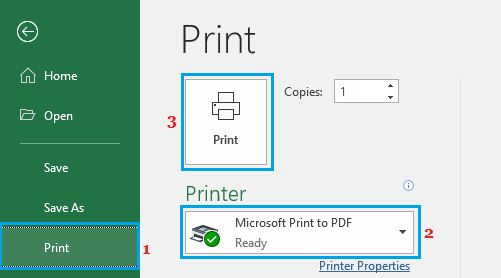
4. Once you are happy with the print settings, scroll up and click on the Print box.
5. On the next screen, type a Name for the PDF File, select its save Location and click on the Save button.
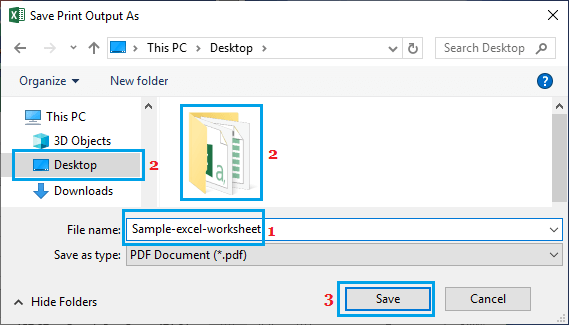
Note: Make sure “Save as type” is set to .pdf before clicking on the Save button.
Once the PDF Print File is saved, you will be able to send the File for printing or share it electronically with anyone.
Since, the PDF File has been generated by using “Print to PDF” option, it will not contain Links and other types of Metadata associated with the original Excel File.
2. How to Save As PDF in Microsoft Excel
If you do want to convert the Excel File to PDF Format along with all its associated Links & other types of Metadata, you can use “Save As PDF” option.
1. Open the Excel File that you want to convert to PDF along with all its Metadata.
2. Once the File is open, click on the File tab located in the top menu bar to open the File Menu.
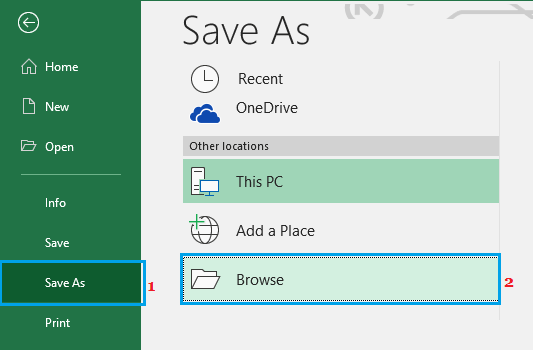
3. From the File Menu that appears, select Save As option in the left pane and click on the Browse button in the right-pane.
4. On “Save As screen”, type a Name for the PDF File, select the Location where you want to save the File and click on the Save button.

This will save the Microsoft Excel File as a PDF File to the selected location on your computer.
Note: While submitting the File to clients, you need to be aware that the PDF file has been prodced using “Save As PDF” option and it will contain all the Metadata associated with the original file.
What to Do if Microsoft Print to PDF is Not Available
If you had previously printed to an actual printer, you may find “Microsoft PDF Printer” missing or not being available for selection, when to try to use “Print to PDF” option in Microsoft Excel.
In such cases, you need to make “Microsoft PDF Printer” available and ready, before being able to Print to PDF.
If “Microsoft Print to PDF” is not available, click on the current available printer and then select Microsoft Print to PDF in the menu that appears.
After this, you should be able to use the “Print to PDF” option in any Microsoft Excel File that you try to print from your computer.