In general, most users do not find the need to change the resolution of the screen on their computers as most Laptop computers already come with display resolution set to the manufacturer’s recommended display setting.
Hence, most users find the need to change the display resolution of their computers in the following cases.
- Change in Resolution: If the display resolution has been accidentally changed or appears to have changed after a driver or Windows update.
- Display Issues: If the display has become blurry, appears stretched and the text appears too large or small.
- External Monitor: To set the external monitor to its best available display resolution.
- Gaming Performance: Switching to a lower resolution in order to improve the performance of a gaming computer.
In addition to above, another common reason for users looking for a way to change Display Resolution is to check and see if their device can support higher resolution formats (1920, 2560 & others).
Related: How to Change Screen Brightness in Windows 11/10.
Change Display Resolution in Windows 11
The term “Display Resolution” represents the number of pixels displayed Horizontally and Vertically on the screen of the computer and you can find it expressed as 1920 x 1080 (Full HD), 3840 x 2160 (4K UHD) and so on.
As you can see from above figures, higher resolution means more pixels are packed into the same screen size; which leads to sharper images, more visual details and better rendering of the text.
While higher resolution produces better image quality and clarity, it requires more processing power and has an impact on the battery life of a laptop computer. Hence, it is always a good idea set the display resolution on your device to whatever is recommended by the manufacturer of the computer.
1. Change Display Resolution Using Right-click
The easiest way to change the display resolution on a Windows computer is by right-clicking on the desktop.
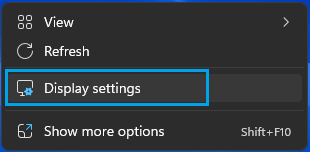
1. Right-click in an empty space on the desktop and click on Display Settings.
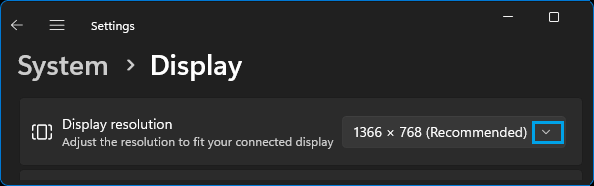
2. On the display screen, click on the down-arrow in Display Resolution section and select your desired resolution value.
3. When prompted, make sure that you click on Keep changes to save this change on the computer.
2. Change Display Resolution Using Settings
Another easy way to change the display resolution on a Windows computer is by using the Settings app.
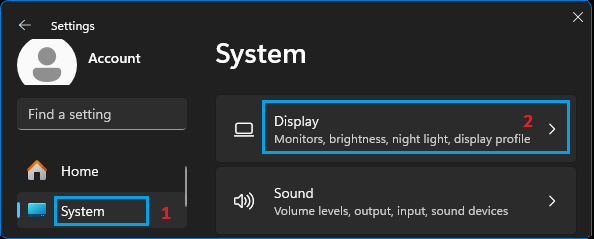
1. Go to Settings > select the System tab in the left-pane and click on Display tab in the right-pane.
2. On the display screen, click on the down-arrow in Display Resolution section and select your desired resolution value.
3. On the confirmation pop-up, make sure that you click on Keep changes to save this change on the computer.
Note: If you do not click on “Keep changes”, the computer will revert back to its previous display values.
3. Change Display Resolution Using Graphics Control Panel
You can change the display resolution on a Windows computer by using Intel, AMD or NVIDIA control panel.
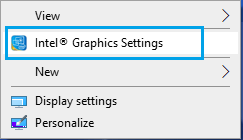
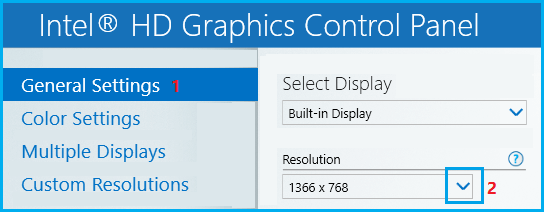
1. Right-click in any Empty space on the desktop and click on the available Graphics Settings (Intel, AMD, NVIDIA, etc.).
2. On the Graphic settings screen, click on General Settings tab and select your desired Resolution.
As you can see in above image, selecting ‘Rotate to Normal’ option switches the screen to its regular or default setting.