While the problem of start menu not working on a Windows computer is usually reported after installing a Windows update, it can also occur after installing a new app or program on the computer and other reasons.
In certain cases, the problem could simply be due to a stuck app, program or process interferring with proper functioning of the Start menu on your computer.
Start Menu is Not Working in Windows
If the Start menu is stuck or not working, simply restart the computer to rule out the possibility of this problem being caused due a stuck app or process.
After the computer restarts, you may find the start menu working on your computer. If this did not help, you can move to the next steps as provided below to fix this issue.
1. Restart Windows Explorer
The start menu on a Windows computer is powered by Windows Explorer. Hence, restarting Windows explorer can help in fixing the problem.
1. Right-click anywhere on the Taskbar and select Task Manager in the menu that appears.

Note: If this is not working, press Windows + R keys to open Run Command, type taskmgr and click on OK.
2. On Task Manager screen, right-click on Windows Explorer entry and click on Restart.
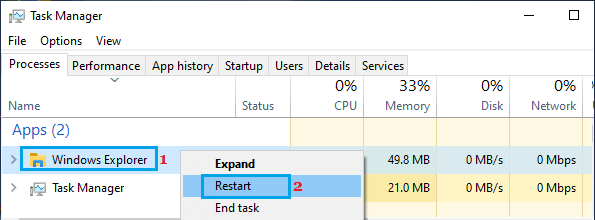
After Windows Explorer restarts (few seconds), check if the Start button is now working on your computer.
2. Restart Windows Explorer Using Run Command
If the above method did not help, try starting Explorer.exe file by using Run Command.
1. Press Windows + R keys to open Run command.
2. Type explorer.exe in the Run Command window and click on OK.
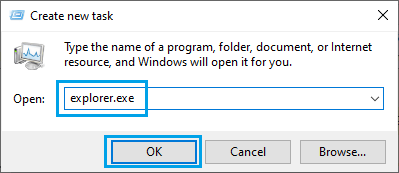
After running this command, click on the Start button and see if it is working.
3. Disconnect Windows Account
Some users have reported fixing this problem by disconnecting their User Account from the computer.
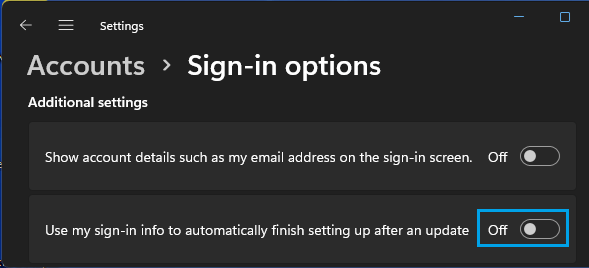
1. Go to Settings > Accounts > scroll down in the right-pane and uncheck Use my sign-in info to automatically finish setting up after an update option.
2. Restart the computer and see if the Start Menu is now working on your computer.
Windows 10: Go to Settings > Accounts > Sign-in Options > Switch OFF Use my sign in info to automatically finish setting up my device option in the right-pane.
4. Reinstall Settings App
The problem could be due to a Microsoft Store App not being properly registered or the Settings App itself become faulty.
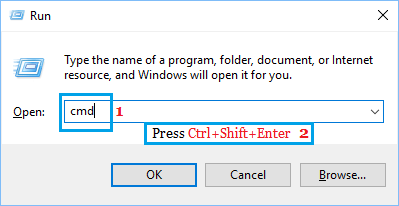
1. Press Windows + R keys to open Run command.
2. Type CMD in the Run Command window and press Ctrl+Shift+Enter keys to open Command Prompt As Admin.
3. On the Command prompt screen, type the following command and press the Enter key.
Get-AppXPackage | Foreach {Add-AppxPackage -DisableDevelopmentMode -Register “$($_.InstallLocation)AppXManifest.xml”}
This command will Reinstall all Native Windows Apps on your device, including the Settings App.
5. Run System File Checker
The problem might be due to system files being damaged or corrupted on yout computer.
1. Type CMD in the Search bar > right-click on Command Prompt in the search results and select Run as Administrator option.

2. In the Command Prompt Window, type sfc /scannow and press the Enter key on the keyboard of your computer.
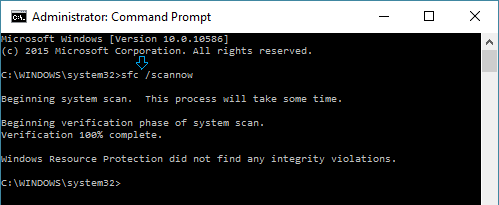
3. Wait for the Scan to be completed, restart the computer and see if the problem has now been fixed.
6. Repair Windows Image
After running System File Checker, follow the steps below to run DISM command.
1. Open Command Prompt As Admin.
2. On Command Prompt screen, type Dism /Online /Cleanup-Image /RestoreHealth and press the Enter Key
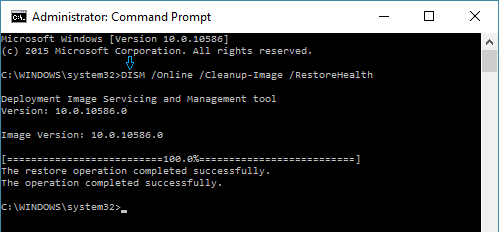
3. Once the process is completed, restart your computer and see if the Start Menu is now working on your computer.
7. Enter Safe Mode
By now, if you are thinking that the problem might be due to a newly installed app or program, start the computer in Safe Mode and see if the problem gets fixed.
If the Start menu works in Safe Mode, it confirms that the problem is due to a recently installed App or Program on your computer.
In such a case, you can uninstall that particular App and this should help in fixing the problem.
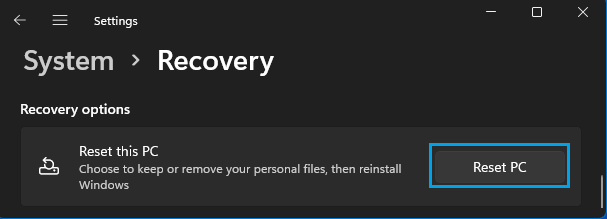
8. Reset Your Computer
If you were unable to fix the problem using above methods, you can Reset the computer to its Factory Default settings.
1. Go to Settings > System > select Recovery in the right-pane.

2. On the Recovery screen, scroll down in the right-pane to “Recovery Options” and click on Reset PC button.
3. When prompted, enter your Admin Password. On the next screen, select Keep My Files option.
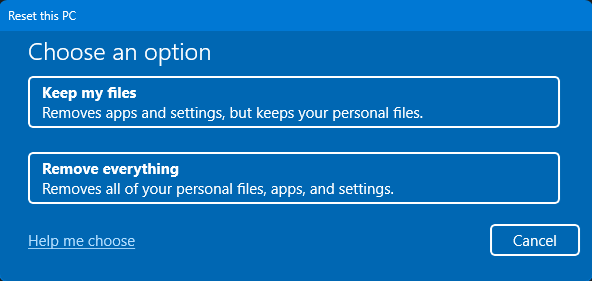
4. Follow the onscreen instructions and allow Windows to remove all apps, settings and reinstall the latest version of Windows OS on your computer.