If Send to Mail Recipient option is not working in Excel or Word programs, you won’t be able to Email Word Documents or Excel Spreadsheets directly from within Microsoft Word and Excel programs.
Luckily, this issue can be easily fixed by setting up your favorite Email client (say Outlook) as the default Email client on your computer.
Send to Mail Recipient Not Working in Excel or Word
As mentioned above, the issue of “Send to Mail Recipient” option not working in Microsoft Excel or Microsoft Word can be fixed by setting up the right Email Client (the one that you want to use) as the default Email Client on your computer.
You can find below the steps to Set Default Email Client on your Windows 11/10 computer using Settings and Control Panel.
1. Set Default Email Client Using Settings
If “Send to Mail Recipient” feature is not working, you will have to choose a default Email client on your computer by following the steps below.
1. Go to Settings > Apps > select Default Apps in the left-pane. In the right-pane, make sure the right Email client is listed under “Email” section.
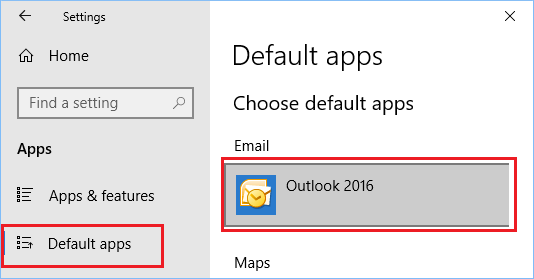
2. If the Email client under “Default Apps” is is not the right one, click on the listed Email Client and select your preferred email client in the menu that appears.
2. Set Default Email Client Using Control Panel
If you are prefer using Control Panel, you can also set the default Email client on your computer by using Control Panel.
1. Type “Control Panel” in the Search bar and click on Control Panel Desktop app.
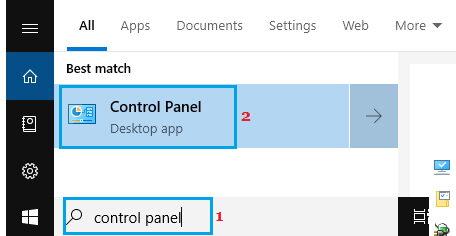
2. From the Control Panel screen, go to Default Programs > Set your default programs.
3. On the next screen, make sure that the right “Email Client” is listed under “Email” section in Choose Default Apps screen.
If the Email client as listed on Default Apps screen is not the right one, click on the listed Email Client and you will be provided with the option to choose a different Email Client.