You won’t be able to access the internet, if the Google Chrome browser installed on your computer is coming up with “Server DNS address could not be found” error message.
The reason for this problem on a Windows computer could be due to the DNS Client Service being switched OFF, DNS servers being busy, DNS Cache being corrupted and other reasons.
Server DNS Address Could Not Be Found Error
In most cases, the problem of Google Chrome browser coming up with “DNS Address could not be found” error message on a Windows computer can be fixed using the following steps.
1. Clear Host Resolver Cache
Start by clearing the Host Cache on your computer.
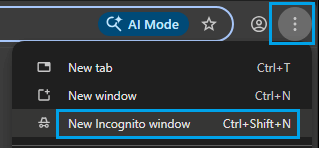
1. Open Google Chrome > click on 3-dots icon and select New Incognito Window option.
2. Type chrome://net-internals/#dns in the address bar and press the Enter Key.
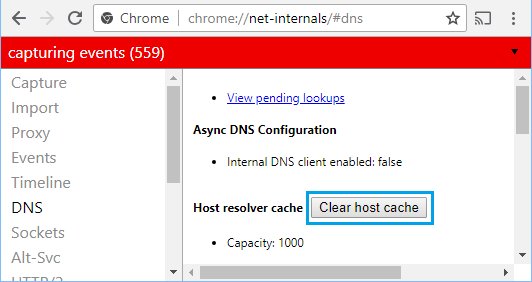
3. Click on Clear host cache button, located next to ‘Host Resolver Cache’ field.
2. Restart DNS Client Service
Follow the steps below to Restart the DNS Client service on your computer.
1. Right-click on the Start button and click on Run.
2. In the Run Command window, type services.msc and click on OK.

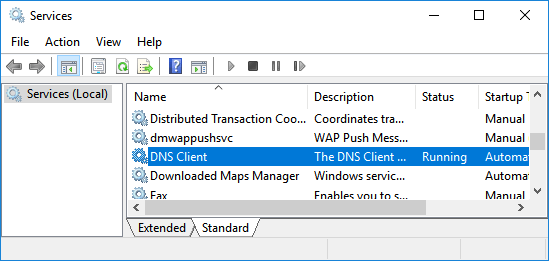
3. On the Services screen, right-click on DNS Client and click on Restart.
After Restarting DNS Client, open the Chrome browser on your computer and see if you are able to access the Internet.
3. Flush DNS Cache
The next step would be to flush the DNS Cache and register DNS address.
1. Type Command Prompt in the search bar > right-click on Command Prompt App and select Run as Admin option.

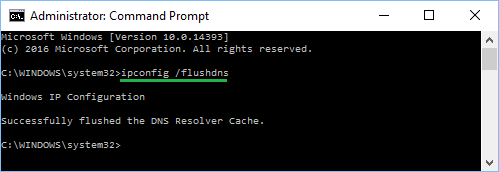
2. On Command Prompt screen, type ipconfig /flushdns and hit the Enter key.
3. After this type ipconfig /registerdns and press the Enter key.
4. Power Flush Modem/Router
Power Flushing the Modem/Router can help in fixing network connectivity issues.
1. Switch OFF the Modem/Router.
2. After 60 seconds > Switch ON the Modem/Router.
After all the lights on the Router/Modem unit are switched ON, try to connect your computer to the internet.
5. Edit Hosts File
In rare cases, the problem could be due the Hosts File being modified by malware. You can check and confirm this by logging in to your Admin Account and taking a look at the Host File.
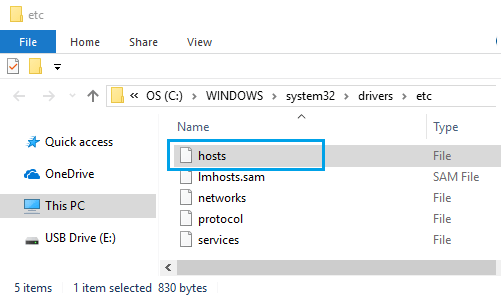
1. Open the File Explorer on your computer.
2. From the File Explorer screen, go to C:\windows\system32\drivers\etc and open the Hosts File.
3. Once you are in the Hosts File, delete all the lines that are not staring with # and Save the file.
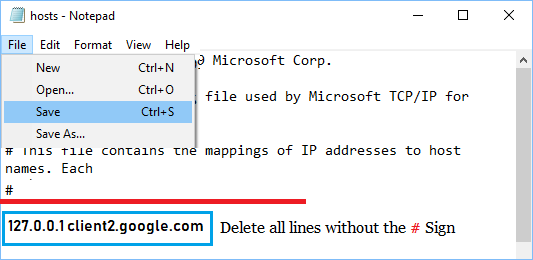
In above example, the new line containing 127.0.0.1 clients2.google.com can be removed.
After this, scan the computer for malware using Windows Defender Offline Scan and also by using the Antivirus software installed on the computer.
6. Change DNS Servers
If your computer is frequently coming up with Server DNS could not be found error, the problem is most likely due to the DNS Servers of your service provider being congested or busy.
In such cases, it can be beneficial to Switch the DNS Servers on your computer to other free public DNS Service Providers like Google, OpenDNS and Amazon.