If you are busy and do not want to be bothered by unimportant calls, you can set your iPhone to ring only when certain important or selected Contacts call your device. This way you can ensure that you are not missing calls from these important people or missing a call that you are expecting and waiting for.
iPhone provides multiple ways to set your device to ring only for certain selected contacts and you can use any method that you feel is easy to use or suites your own requirements.
Set iPhone to Ring For Selected Contacts Only
The easiest way to set iPhone to ring only when certain selected or important Contacts call your device is by adding these Contacts to the allowed list in ‘Do Not Disturb’ mode.
The other way of doing this is to Add these selected Contacts to Emergency Bypass List, which grants them with the permission to call your device in “Do Not Disturb” mode.
Yet another way of permitting certain selected Contacts to ring your device is by adding them to Favorites List and allowing Favorites to call your device in Do Not Disturb mode.
1. Set iPhone to Ring for Selected Contacts Using “Do Not Disturb” Mode
The straight forward way to set iPhone to ring only for certain selected or important Callers is by adding these Contacts to the allowed list in ‘Do Not Disturb’ mode.
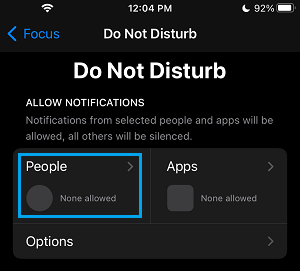
1. Go to Settings > Focus > Do Not Disturb > select the People tab, located under “Allowed Notifications” section.
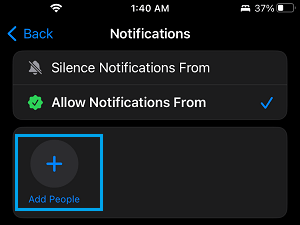
2. On the next screen, tap on +Add people option and this will take you to your Contacts List.
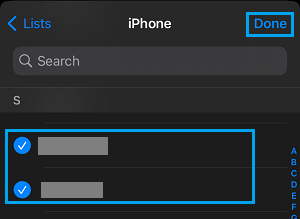
3. On the Contacts List, select the Contacts that you want to add to Allowed List and tap on Done.
4. After this, tap on Allow Calls From tab and select Allowed People Only option.
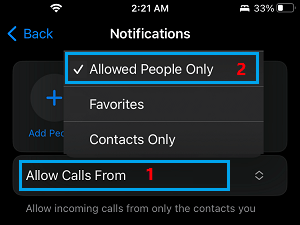
After this, only the people in Allowed list will be able to ring your device, as long your iPhone remains in DND Mode.
2. Set iPhone to Ring for Selected Contacts Using Emergency Bypass Mode
Another way to make iPhone ring only for selected Contacts is by enabling the Emergency Bypass option for these selected Contacts on your iPhone.
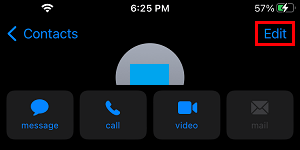
1. Open the Contacts App on your iPhone and select the Contact that you want to add to Emergency bypass mode.
2. On Contact’s Detail screen, tap on the Edit option located at top-right corner.
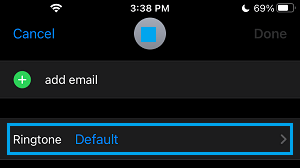
3. On the next screen, scroll down and tap on Ringtone.
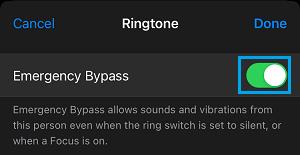
4. On the Ringtone screen, move the toggle next to Emergency Bypass to ON position and tap on Done.
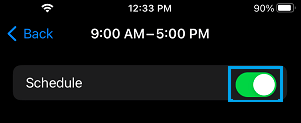
5. After this, go to Settings > Focus > Do Not Disturb > select your current DND Schedule.
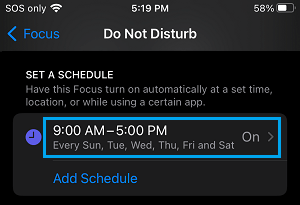
6. On the next screen, move the toggle next to Schedule to ON position.
Now, only these important Contacts that have Emergency bypass option will be able to ring your device.
3. Set iPhone to Ring for Selected Contacts Using Favorites List
Yet another way to make iPhone to ring for selected Contacts is by marking these Contacts as Favorites in the Contacts App.
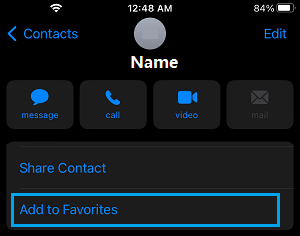
1. Open the Contacts App on your iPhone and select the Contact that you want to mark as your Favorite Contact.
2. On Contacts Info screen, select Add to Favorites option.
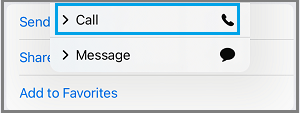
3. On the menu that appears, select the Call option.
4. On the next menu, select the Phone Number of this Contact.
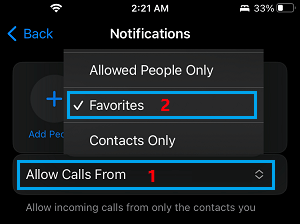
5. After this go to Settings > Focus > Do Not Disturb > select the People tab.
6. On the next screen, scroll down and tap on Allow Calls From and select the Favorites option.
After this, only these Favorite Contacts will be allowed to ring your device, whenever you decide to place your iPhone in ‘Do Not Disturb’ mode.