Windows operating system provides the option to connect and setup dual monitors on your Windows 11/10 computer, which can be really helpful.
For example, you can have your working Spreadsheet on one screen, while having a baseline or reference spreadsheet readily accessible on the second screen.
Similarly, you can bypass the screen size limitations of your Laptop by connecting it to a large screen monitor, which can significantly boost your productivity, while working on large Spreadsheets and AutoCAD drawings.
Connect Dual Monitors to Windows Computer
If you look around, you will find that Dual and even Multiple Monitors are routinely being used by Architects, Coders, Content creators, Media Editors and others.
Hence, let us go ahead and take a look at the actual steps to setup dual monitors on a Windows 11/10 computer.
1. Connect the Second Monitor to Computer
The first step is to connect the second Monitor to the HDMI port of your computer. If you have an older computer, it may have VGA or S-VIDEO port.
Look at the back of the Monitor to find the connection type and connect the Monitor to your computer by using the right type of cable (HDMI, VGA).
2. Select Display Mode
The second step is to select the appropriate Display Mode for the secondary monitor.
1. Press Win + P keys on the keyboard of your computer and you will be presented with display types as available on your computer.
2. Depending on your requirements, select the Display Type that you want to setup on the secondary monitor.
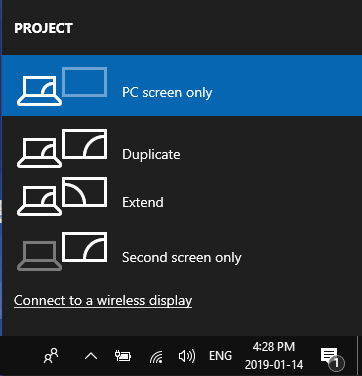
- PC Screen Only: Display on the Main screen and Blackout on the second monitor
- Duplicate: Same Display on both Monitors
- Extend: Extends the Desktop to second Monitor
- Second Screen Only: Blackout on the main, display on the second monitor
3. Change Display Settings
If required, you can change the display settings for both primary and secondary monitors on your computer.
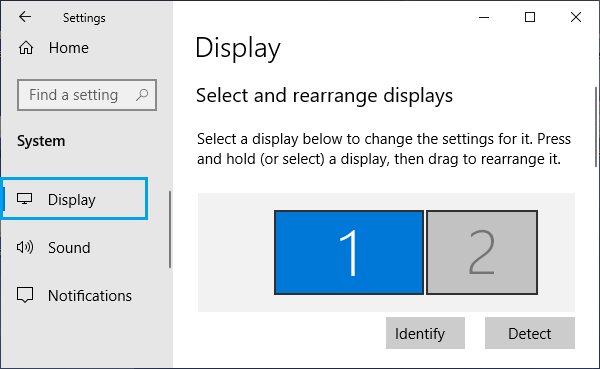
1. Go to Settings > System > Display.
2. On the Display screen, select the Monitor (Primary or Secondary) for which you want to change display settings.
3. On the Display settings screen, you can change Font Size, Resolution, Orientation and Brightness.
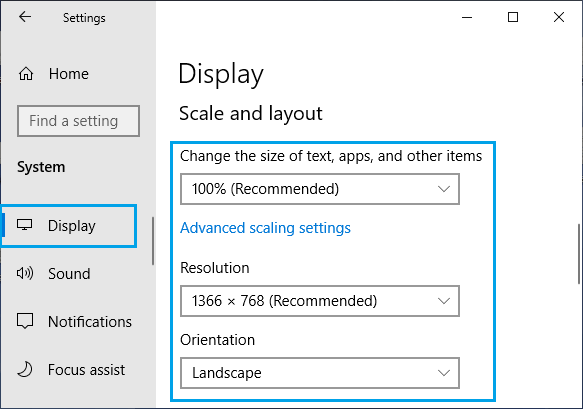
- Brightness: Use the slider to change brightness level on the secondary monitor
- Font Size: choose 100% or 125% in case you want to see larger text on the secondary monitor
- Resolution: Stick to the recommended value
- Orientation: Choose Landscape, Portrait, Landscape(Flipped), Portrait(Flipped)
Note: In case of Dual Monitors, click on 2 and in case of multiple monitors, click on Detect to find out the number allocated to different monitors.