The Screenshot feature on iPhone allows you to capture Photos, Payment Receipts, Funny Tweets and information from websites that you consider useful, interesting and worth sharing with others.
Screenshots are also useful in capturing error messages appearing on the screen of iPhone, in order to report errors and seek help in troubleshooting problems on your device.
Since, there are iPhones with and without Home buttons, the actual method or the steps to take screenshots on iPhone vary, depending on the model of iPhone.
Take Screenshots on iPhone
The steps to take Screenshots on iPhone vary, depending on the model of your iPhone. You can find below the steps to take screenshots on different models of iPhone.
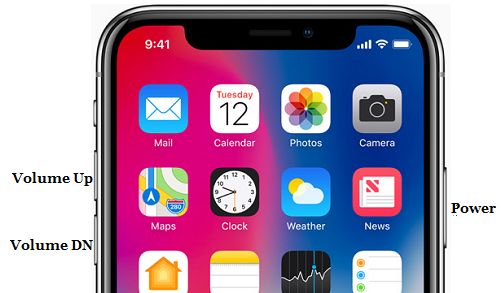
1. Take Screenshot on iPhone 14/13/12/11 and X
If you have newer model of iPhone without a Home Button, you can take screenshots by using Power (Side) and Volume Up buttons.
Press and hold the Power (Side button) and Volume Up buttons at the same time and quickly release them.
You will see the screen of iPhone flashing and you will also hear a clicking sound, indicating that the screenshot has been taken.
This will also be confirmed by screenshot thumbnail appearing at the lower-left side of the screen. The screenshot will be saved to the Screenshots Album in the Photos App
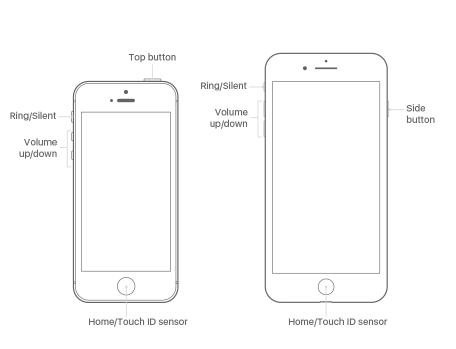
2. Take Screenshot on iPhone SE/8/7/6S
All that is required to take a screenshot on these models of iPhone is to press and hold Home and Power (Side) buttons at the same time.
If you pressed the Home & Power buttons at the same time, you will find the screen of your iPhone flashing and the screenshot will be saved to the Photos App.
Note: Power Button is located at right-hand side of iPhone and is also known as Side Button. On iPhone 5 and earlier models, Power button is located at top-right corner.
3. Take Screenshot on iPhone Without Pressing Any Button
Another way to take screenshots on any model of iPhone is by using the dedicated Screenshot option as available in the AssistiveTouch menu.
1. Go to Settings > Accessibility > Touch > AssistiveTouch .
2. Move the AssistiveTouch Slider to ON position.
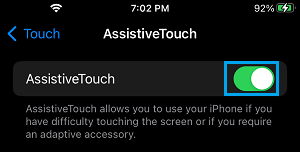
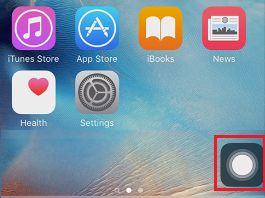
This will place an AssistiveTouch Icon on the screen of your iPhone, which provides access to Screenshot option in the AssistiveTouch Menu.
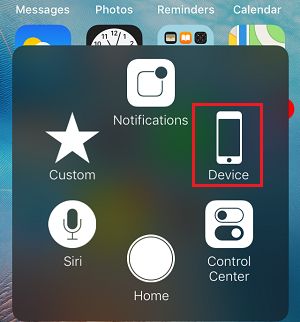
3. To take a Screenshot, tap on the AssistiveTouch Icon.
4. In Assistive Touch Menu, tap on the Device option.
5. In the Device menu, tap on the More option.
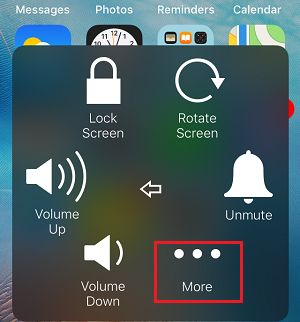
6. Next, tap on the Screenshot option to take a screenshot of the screen.

You will immediately see the screen of iPhone flashing and will also hear a “Shutter” sound, indicating that you have successfully taken a screenshot.
4. How to View Screenshots on iPhone?
By default, the Screenshots that you take on iPhone are saved to the “Screenshots” Album in the Photos App.
To view Screenshots, open the Photos App > tap on Albums tab in bottom-menu and open Screenshots album by tapping on it.

In Screenshots Folder, you will find all the screenshots that were taken on your device.
5. How to Share Screenshots on iPhone
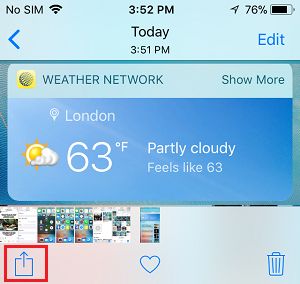
Open Photos App > tap on Albums tab in bottom-menu > open Screenshots album > select the screenshot that you want to Share and tap on the Share Icon located at bottom-left corner.
On the next pop-up that appears, select the App that you want to use for sharing the screenshot with others.
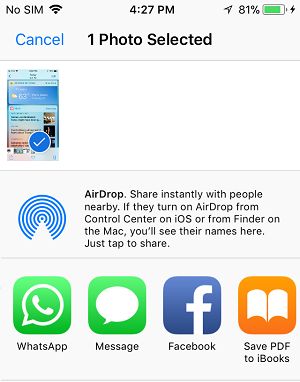
On the next screen, type the name of the Contact that you want to send the screenshot to and tap on the Send option.