There could be various reasons for Wi-Fi not working on iPhone, ranging from software glitches, stuck programs, weak signal strength and incorrect network settings to other issues.
Luckily, most Wi-Fi connectivity problems on iPhone can be easily fixed, unless the issue is due to hardware related damage.
Steps to Fix Wi-Fi Not Working Issue on iPhone
As mentioned above, the problem of Wi-Fi not working could simply be due to a minor software glitch, which can be quickly cleared up by restarting iPhone.
Before going ahead with other troubleshooting steps, it is recommended that power-off your device by going to Settings > General > Shut Down.
After 30 seconds, restart your device and you might be pleaseantly surprised to see Wi-Fi working properly on your iPhone.
1. Enable/Disable Airplane Mode
Enabling and then Disabling Airplane mode can help in fixing network connectivity problems on iPhone.
1. Open Settings > enable Airplane Mode by moving the slider to ON position.
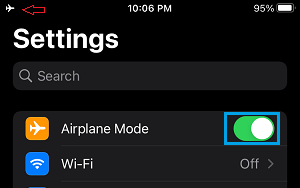
2. After 30 seconds, disable Airplane Mode and see if your iPhone is now connected to Wi-Fi.
2. Turn OFF Wi-Fi Assist
The problem could be due to the Wi-Fi Assist feature on your iPhone prefering to connect your device to Cellular network, instead of connecting it to Wi-Fi.
1. Go to Settings > Cellular.
2. On the next screen, move the toggle next to Wi-Fi Assist to OFF position.
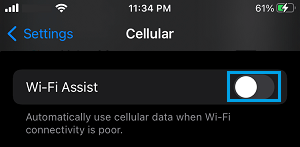
After disabling Wi-Fi assist, reconnect your device to Wi-Fi network and see if Wi-Fi is now working properly on your iPhone.
3. Power Flush Modem/Router
In many cases, the problem of Wi-Fi not working on iPhone is due to a glitche in the Modem/Router. This can be fixed by switching OFF Router and restarting it back again.
1. Unplug the Modem/Router from its power supply source.
2. Wait for 30 seconds and reconnect Modem/Router back to its Power Supply Source.
4. Forget Wi-Fi Network and Rejoin
Make sure you note down the Password for your Wi-Fi Network and follow the steps below to forget and rejoin the Wi-Fi Network.
1. Go to Settings > Wi-Fi > select your Wi-Fi network.
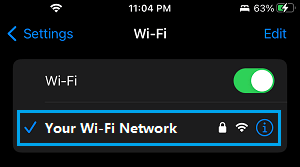
2. On the next screen, tap on Forget This Network option.
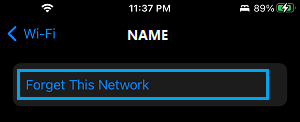
3. On the confirmation pop-up, tap on Forget to confirm.
4. Wait for 30 seconds and rejoin Wi-Fi Network by entering your Wi-Fi Network Password.
5. Reset Network Settings
Note: Before going ahead with this step, make sure that you note down the Password for your Wi-Fi Network.
1. Go to Settings > General > Transfer or Reset iPhone > Reset.
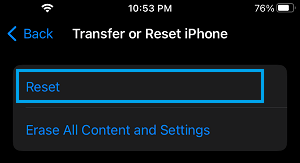
2. On the pop-up, select Reset Network Settings option.
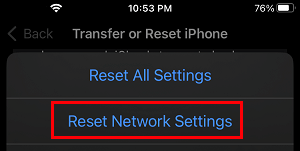
3. Enter your Lock Screen Password (if prompted) > On the confirmation pop-up, select the Reset option to confirm.
4. Patiently wait for the Reset process to be completed.
Once the Reset Process is completed, you will find iPhone restarting and prompting you to rejoin the Wi-Fi Network by entering your Wi-Fi Network Password.
6. Change DNS Servers
This solution can help, if the problem is due to the DNS Servers of your Internet Service Provider being always busy or going through problems.
For the actual steps to switch DNS servers on your device to Google, you can refer to this article: How to Use Google DNS On iPhone and iPad.