If you are unable to run SFC scan command on your computer due to Windows Resource Protection Could Not Perform Requested Operation, you can find below the steps to troubleshoot and fix this error.
Windows Resource Protection Could Not Perform Requested Operation
The SFC (System File Checker) scan is used to scan the computer for corrupted system files and it usually comes up with one of the following messages.
1. Windows Resource Protection did not find any integrity violations: This is a good news as your computer does not have any missing or corrupted system files.
2. Windows Resource Protection could not perform the requested operation: This is an error message, indicating that SFC scan could not be completed.
If you are getting the second message, try running SFC Scan in Safe Mode. If this did not help, you should be able to fix the problem by using additional troubleshooting steps as provided below.
1. Run SFC in Safe Mode
In most cases, the problem can be fixed by running SFC in Safe Mode.
1. Right click on the Start button and click on Run.
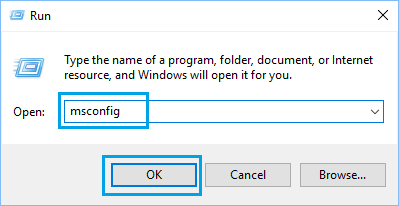
2. In the Run Command Window, type msconfig and click on OK.
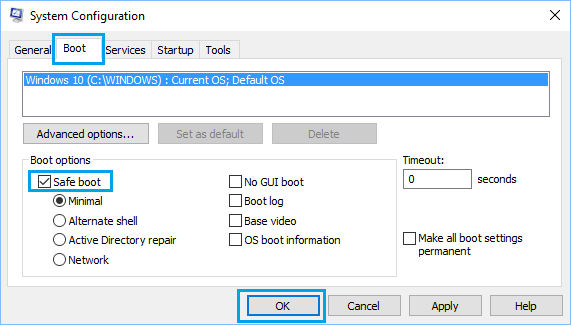
3. On the next screen, click on the Boot tab, select Safe Boot with Minimal option and click on OK.
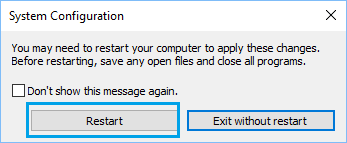
4. On the pop-up, click on Restart to start the process of Booting your Computer in Safe Mode.
5. After the computer restarts in Safe Mode, open Command Prompt as Admin and Run the SFC command.
2. Run Check Disk Command
1. Right-click on Start button and click on Command Prompt (Admin) or PowerShell Admin.
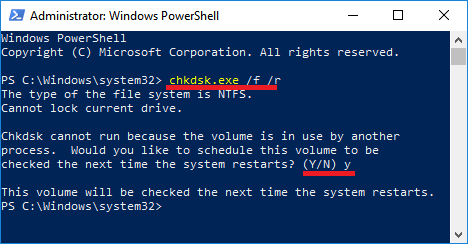
2. On PowerShell window, type chkdsk.exe /f /r and press the Enter key. Type Y, and press the Enter Key, when you are prompted to Schedule this volume to be checked on next restart.
3. Close the PowerShell Window, Restart your computer and patiently wait for Windows to scan the Hard drive for errors and repair bad sectors (if any).
Note: This process can take a very long time (5 to 12 hours or more).
3. Repair System Files Using DISM
Follow the steps below to fix errors using DISM (Deployment Image Servicing and Management) tool.
1. Right-click on the Start button and click on Command Prompt(admin).
2. On Command prompt window, type DISM /Online /Cleanup-Image /RestoreHealth and press the Enter Key.
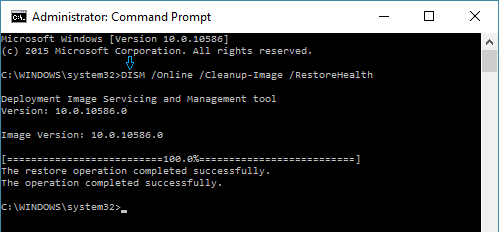
Note: There needs to be a space after DISM, Online and Cleanup-Image.
3. Wait for the DISM tool to check your computer for errors and fix them.
Note: The DISM process can take anywhere from 10 to 15 minutes or more. The progress bar may not show up for a while and you may find the progress stuck at 20 percent for a long time.
After the DISM Command is completed, restart the computer and it should now be completely free from File System Errors.
4. Modify Security Descriptors
In certain cases, the problem is due to SFC being unable to access the winsxs folder. This issue can be fixed by manually modifying the security descriptors.
1. Open Command Prompt as Admin.
2. On the Command Prompt screen, type ICACLS C:\Windows\winsxs and press the Enter Key.
3. Close the Command prompt window and Restart your computer.